
24-Hour Homemade Focaccia
This website contains affiliate links.
Some of the links below are affiliate links. This means that, at no additional cost to you, Bread By Elise may earn a commission if you click through the link and finalize a purchase. Please read our Privacy Policy for more details.
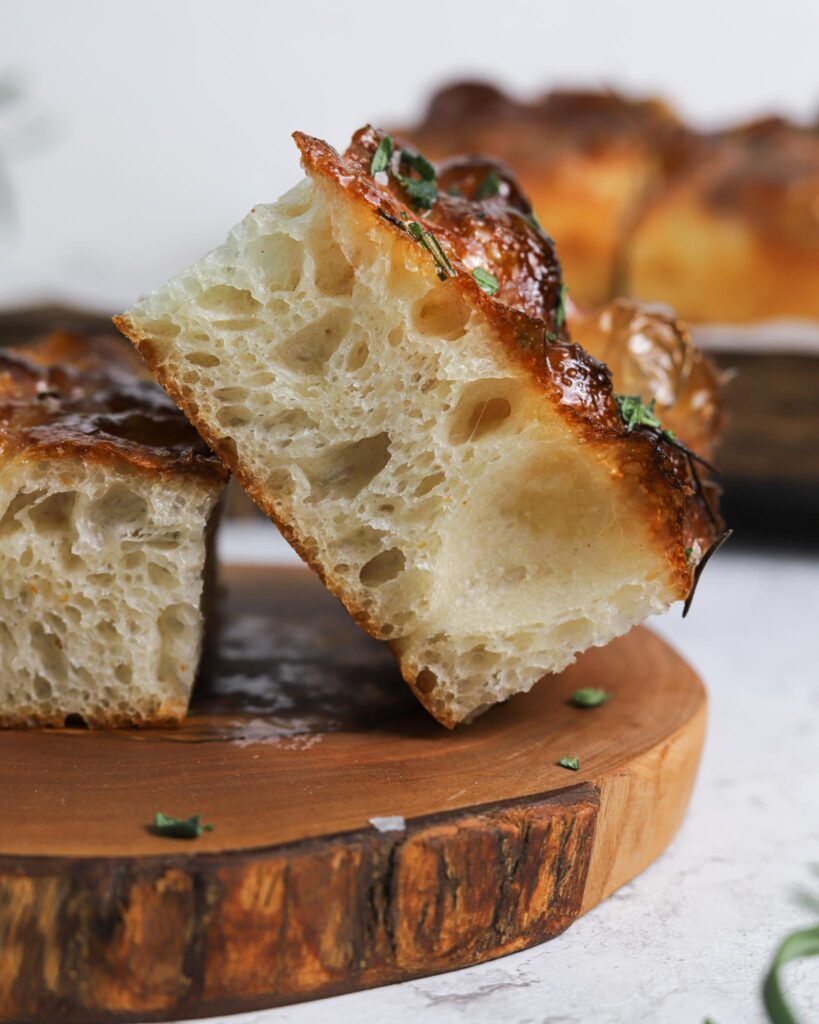
The Ultimate Homemade Focaccia topped with rosemary and flaky sea salt. Crispy on the outside, light and fluffy on the inside, a.k.a. irresistibly delicious. Serve it alongside salads, soups, or pasta – or slice it in half to make a tasty focaccia sandwich. Or just… Eat it on its own; it’s THAT good.
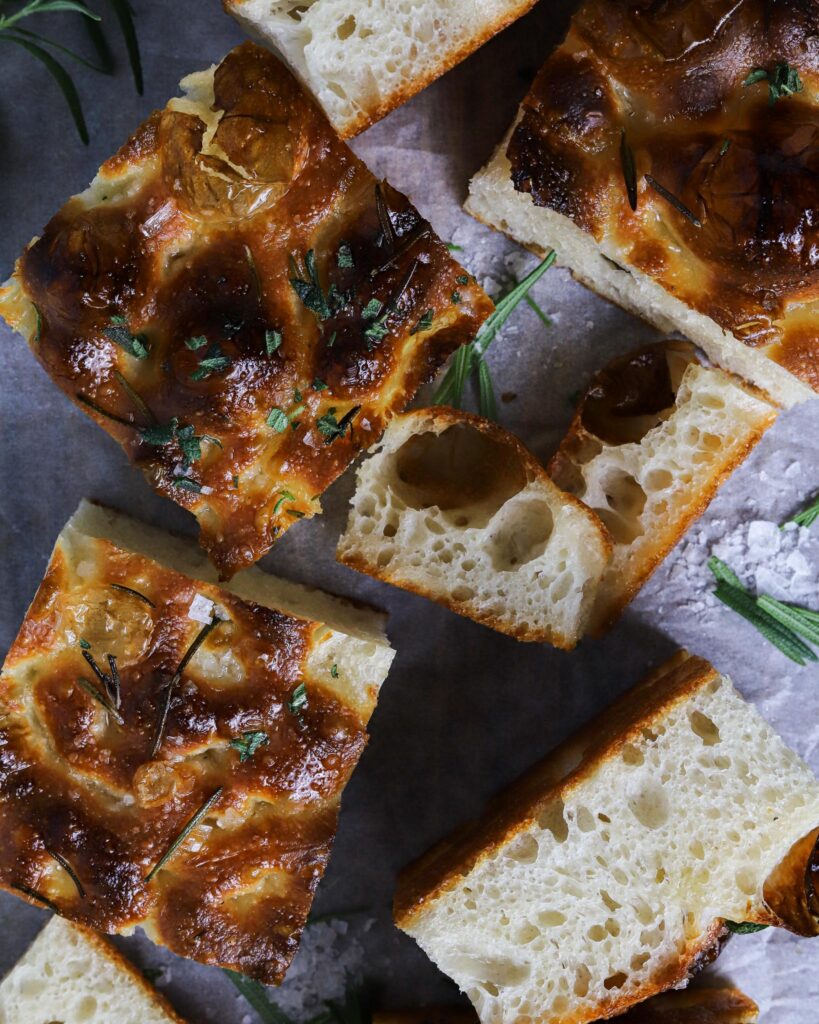
Table of contents
Focaccia made with One Gram Yeast
This focaccia includes a long fridge rest, which yields an extra flavorful, light, and crispy focaccia. In other words, there is some waiting involved in making this. But I promise you it’s worth it. All you need is flour, water, salt, olive oil, and a tiny bit of instant dry yeast – yes, just one gram.
To help plan out your bake, I have included a baker’s schedule at the end of this post. Make sure to check that out before you start baking.
Recipe run through
Day one
Start with the dough
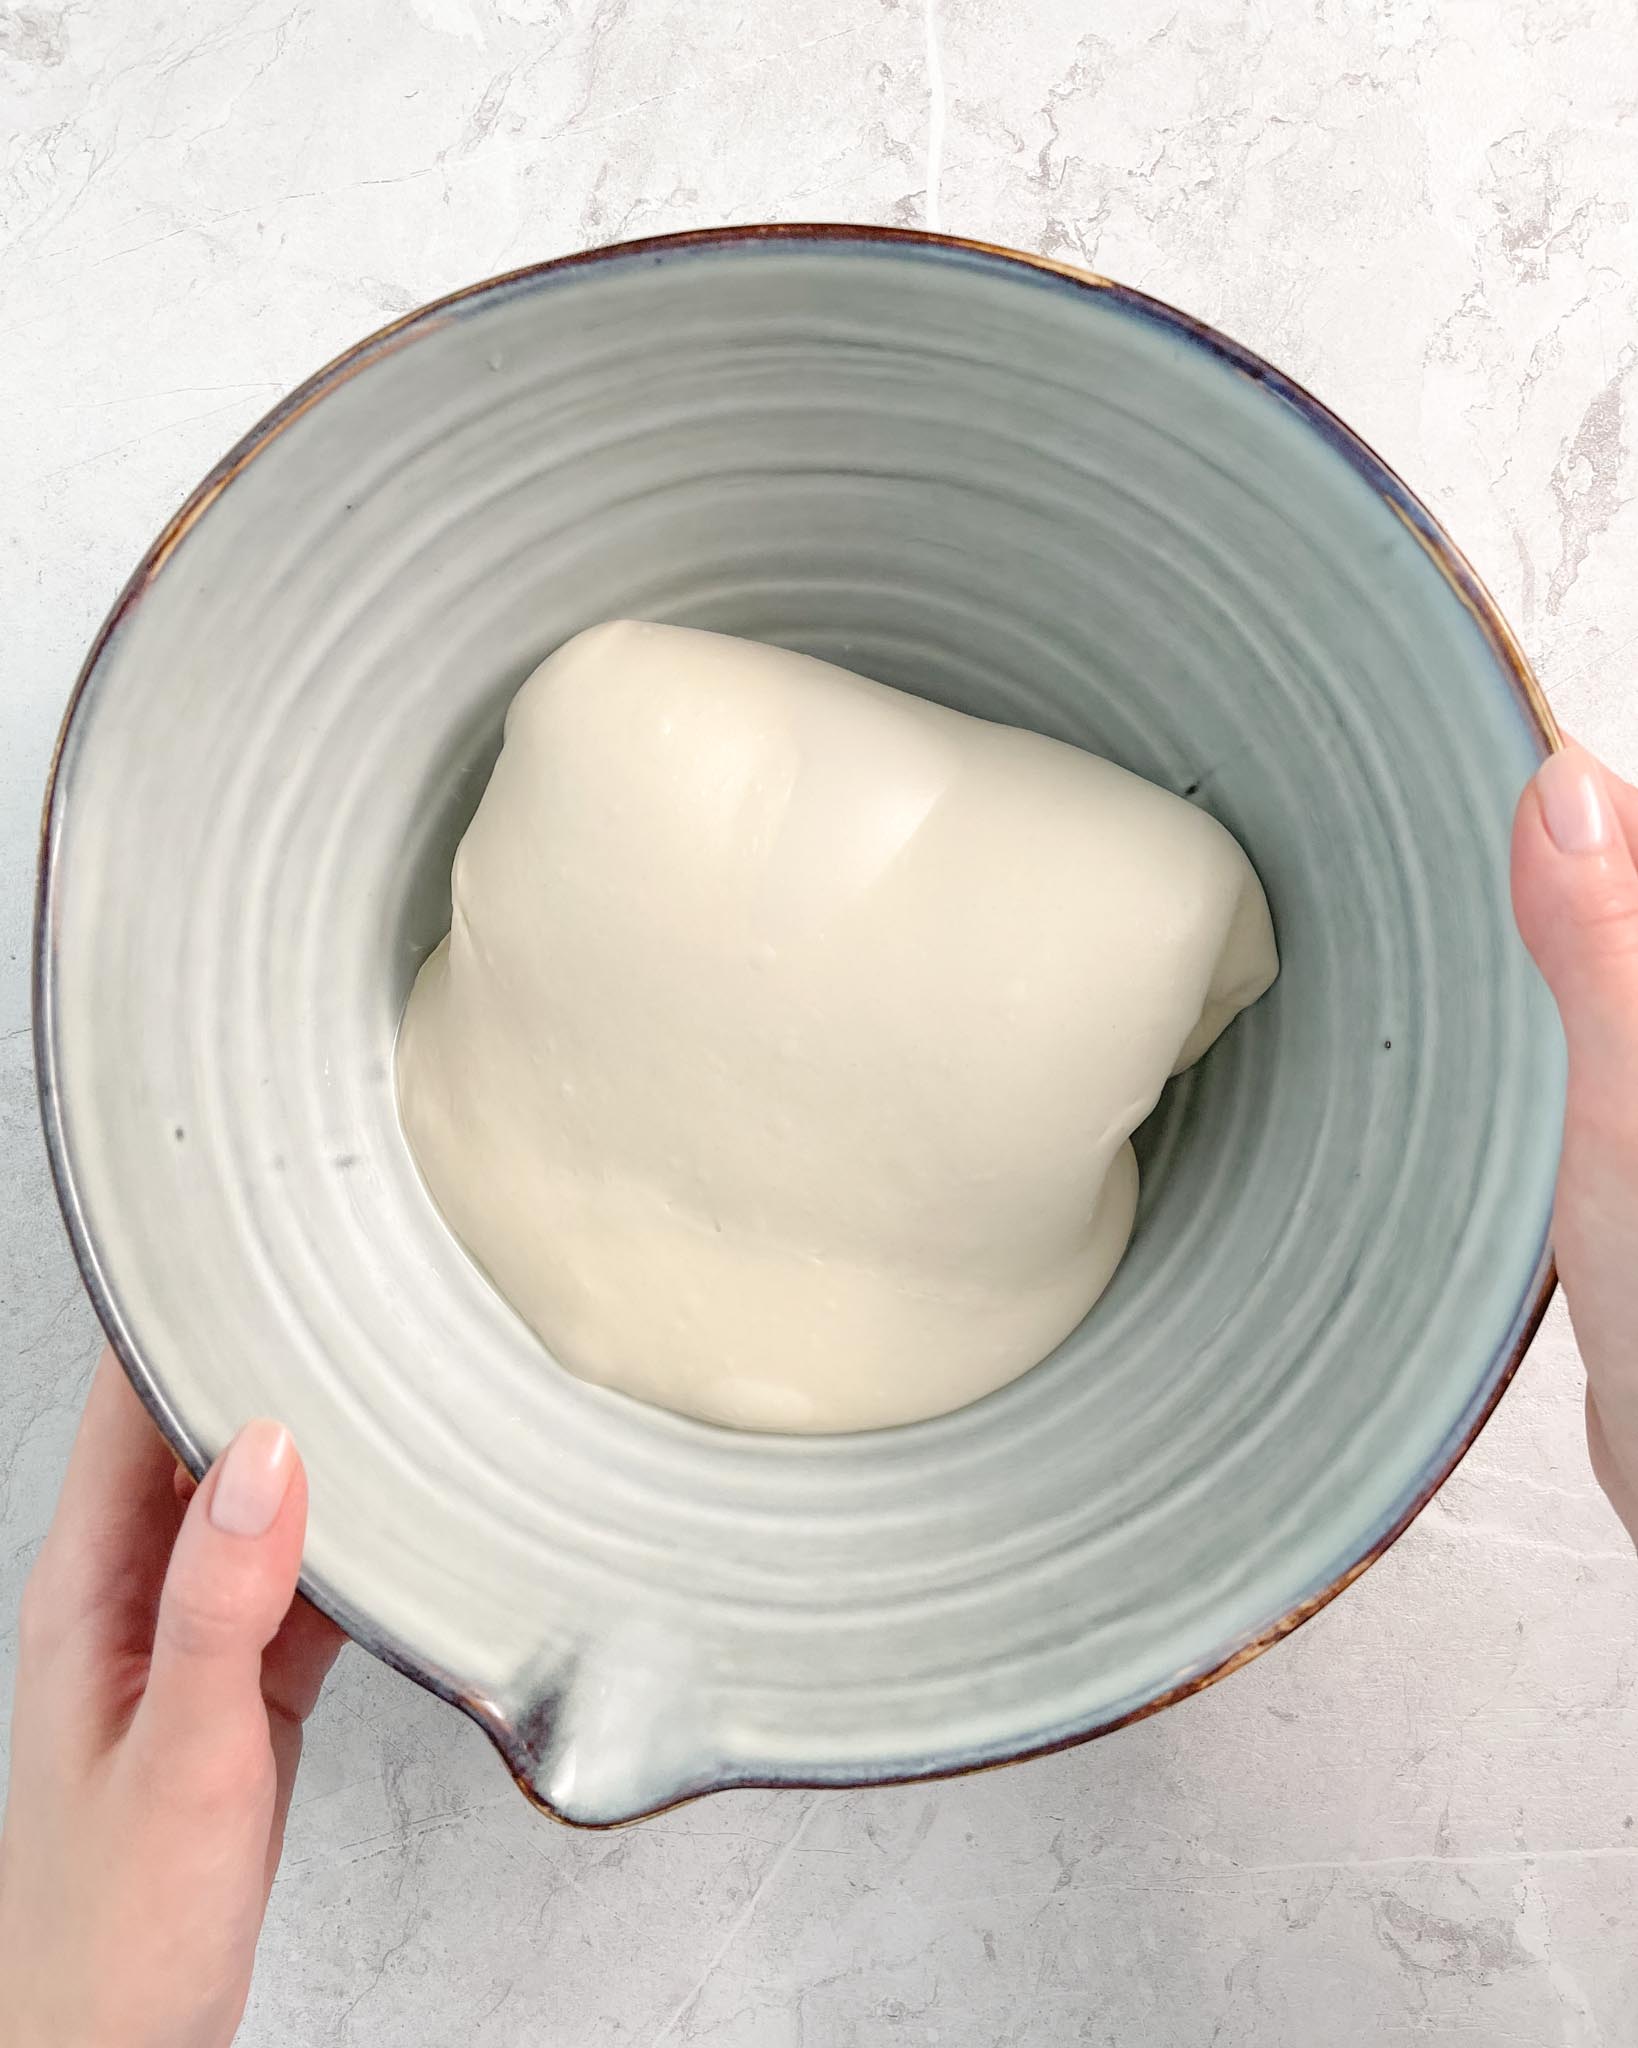
- Measure ingredients – Add flour, instant dry yeast, and water to the bowl of your stand mixer fitted with a dough hook. If you’re not used to working with high hydration dough, I recommend starting with the minimum amount of water recommended. Also, please keep in mind this dough is supposed to be wet and sticky – so don’t freak out if it seems a little uncontrollable at first.
- Mix it up – Turn the mixer on low and knead until it forms a very shaggy, sticky dough and is just combined; this step shouldn’t take longer than a minute or so. Cover the bowl and let the dough autolyse/rest for 30 minutes.
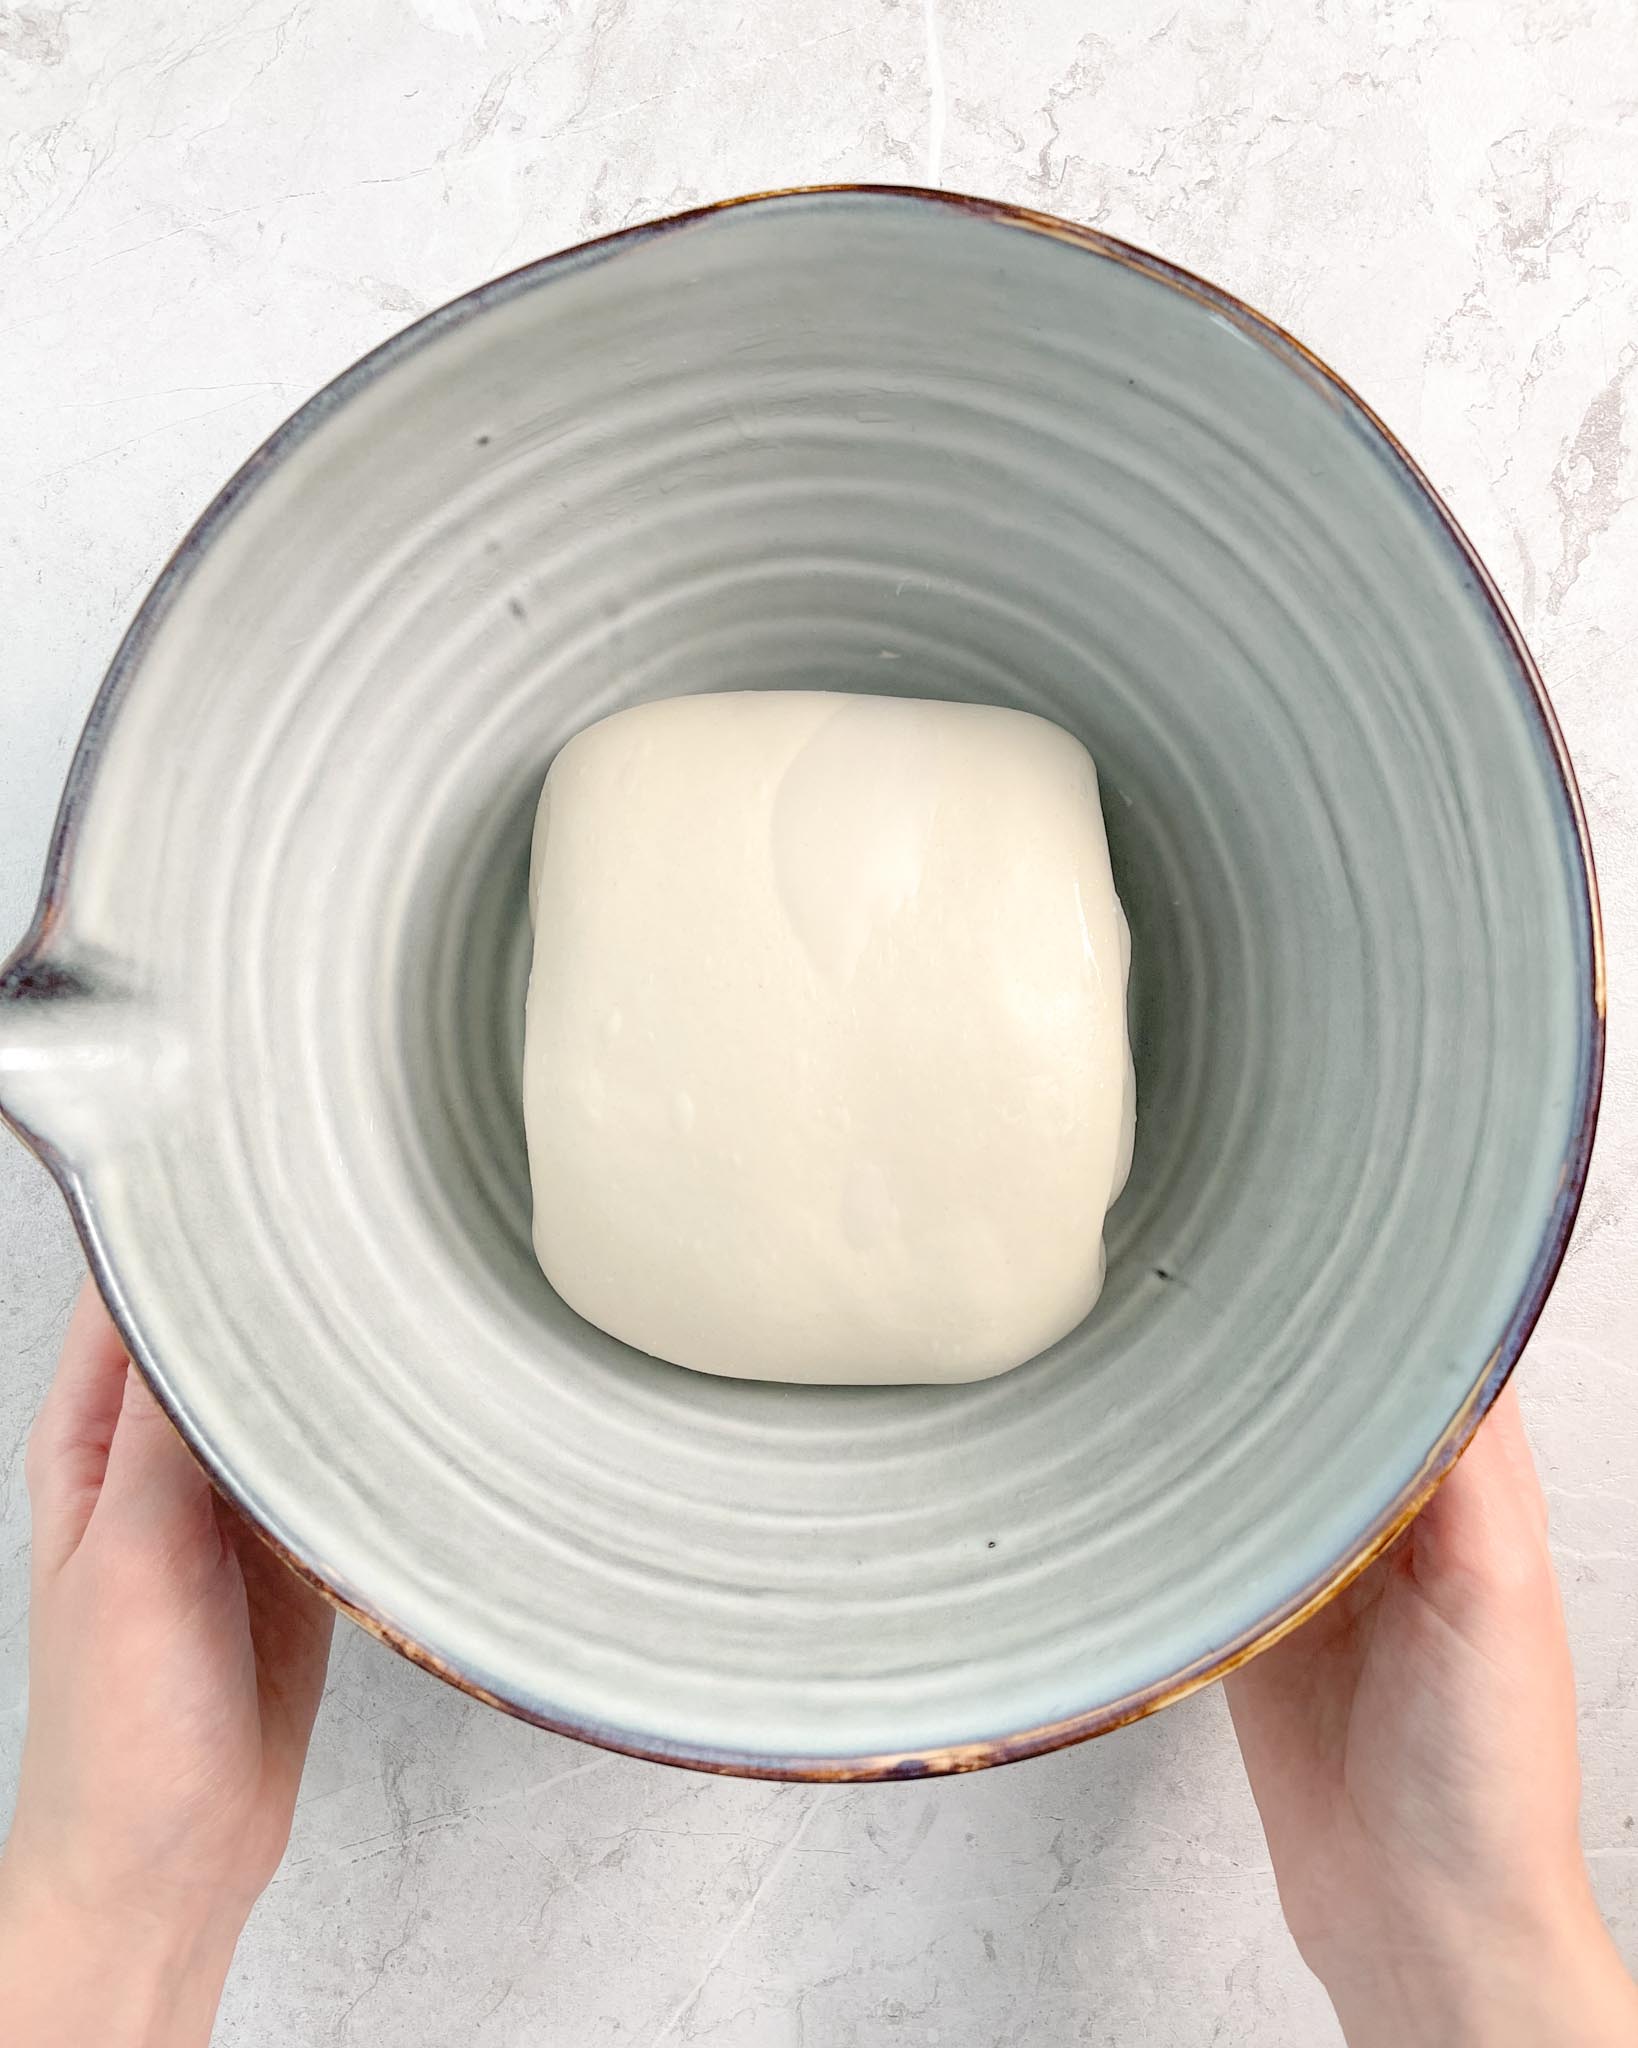
- Add salt and oil – After the 30-minute rest, add salt and olive oil to the dough. Start your mixer and, on low speed, knead for 10-15 minutes until the dough comes together and is beginning to let go of the sides of the bowl.
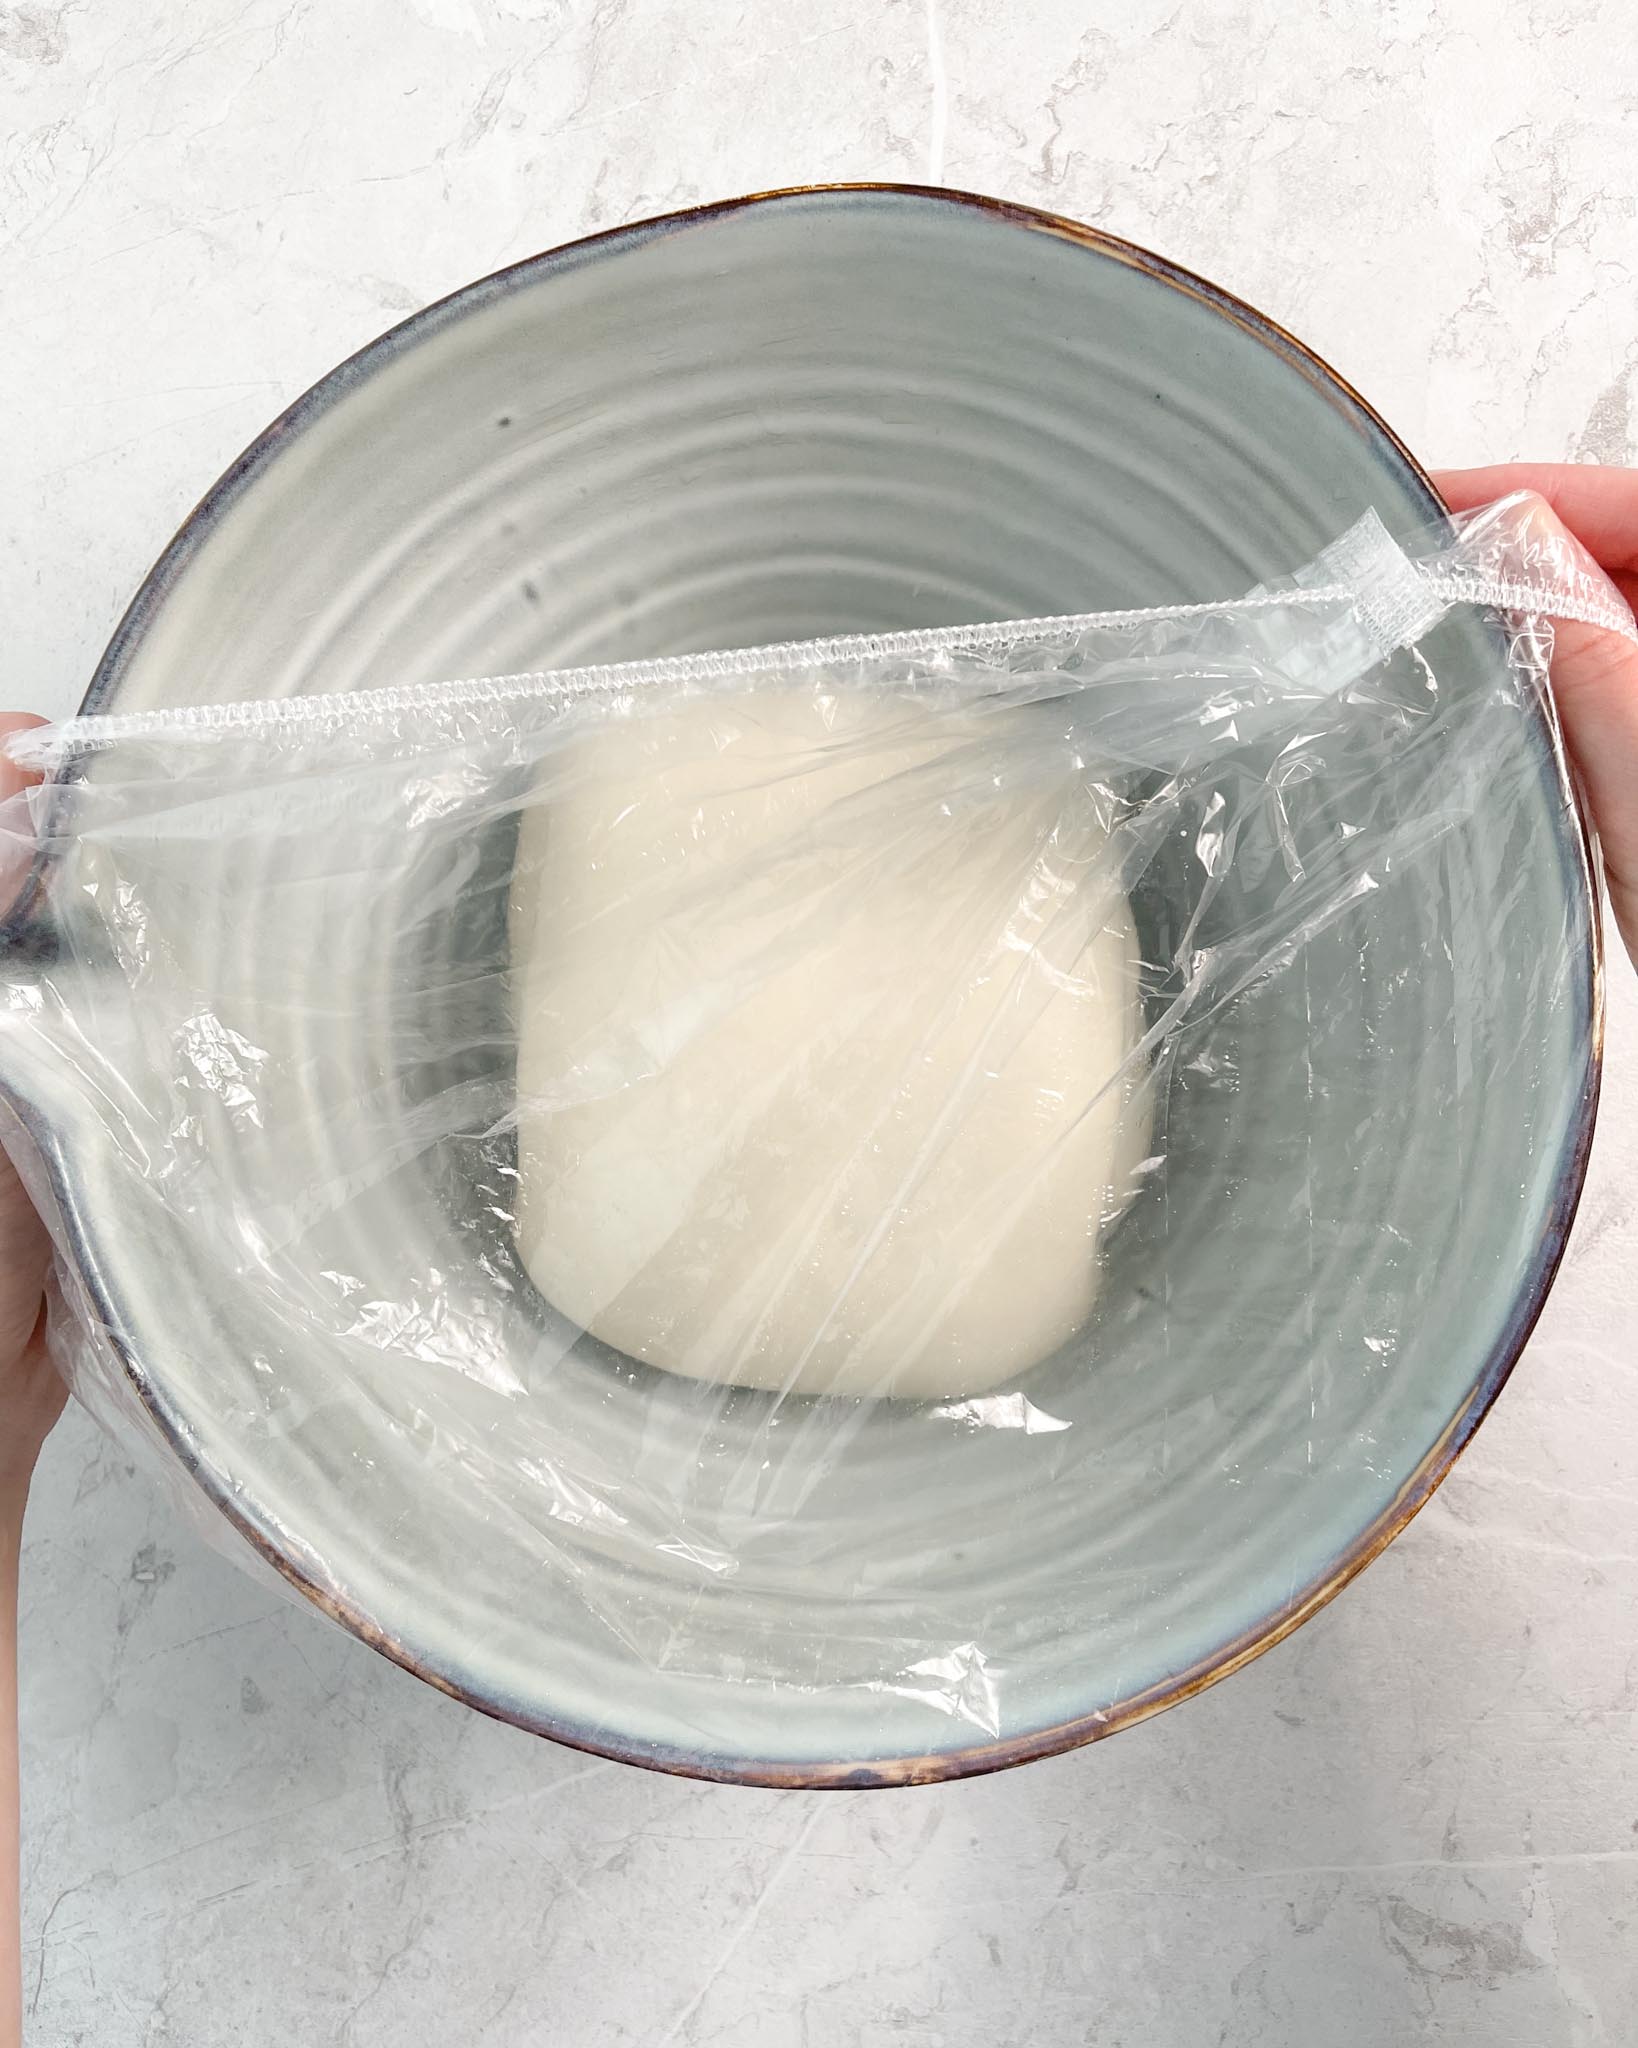
- First proof and coil folds – Grease a large baking bowl with olive oil. Transfer your kneaded dough into the greased baking bowl and place it in a warm spot (ideally at 75°F/24°C) for 45 minutes. After 45 minutes, you want to perform the first coil fold. Then, place the dough back to proof for another 45 minutes, then perform the second and final coil fold. Next, leave your dough to proof for another 1-2 hours before transferring it to the fridge for 24 hours (up to 48 hours). In total, we are doing two sets of coil folds, and the first proof lasts for 2.5-3.5 hours. I typically aim for a 60% rise before transferring my focaccia dough to the fridge.
Day two
Final proof
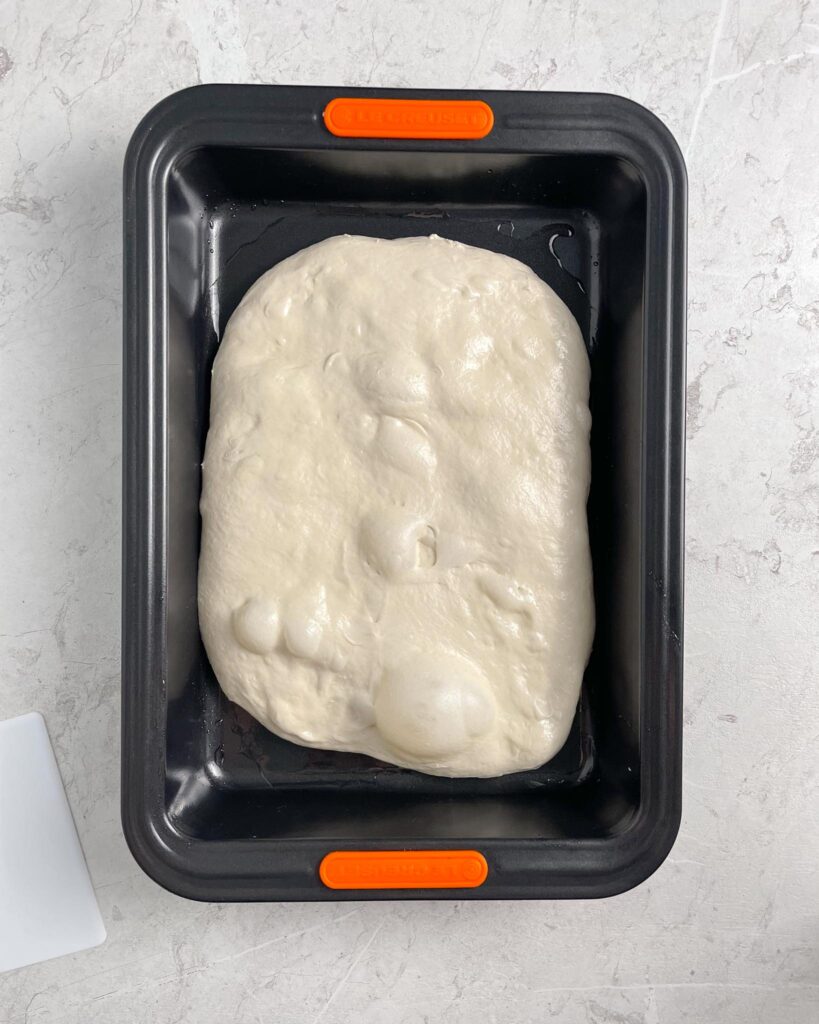
- Remove dough from the fridge – Take the dough out of the fridge and dump it in an oiled non-stick baking pan (9×13 inches/23x33cm). If your pan is not non-stick, line the pan with parchment paper, and pour oil on top of the paper so that the dough doesn’t stick to the paper while you’re stretching it out.
- Stretch the dough to even it out – Gently stretch the dough to flatten it out in the pan. It doesn’t matter if the dough isn’t covering the whole pan yet, as long as it’s somewhat even throughout.
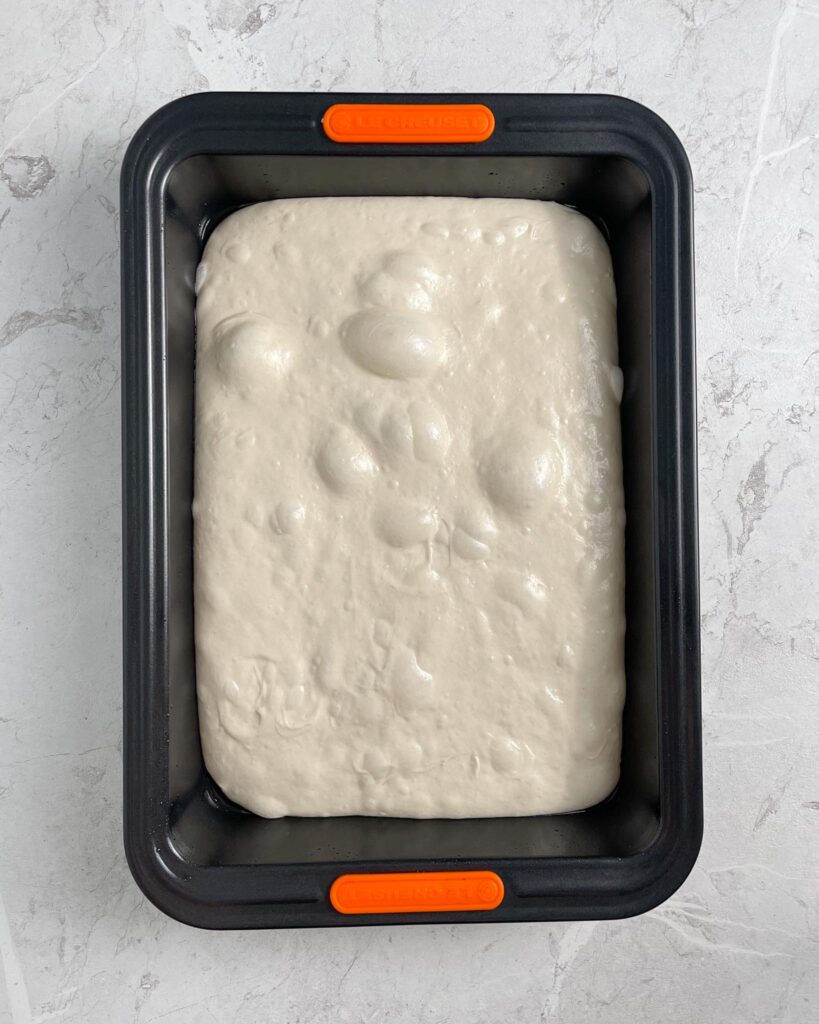
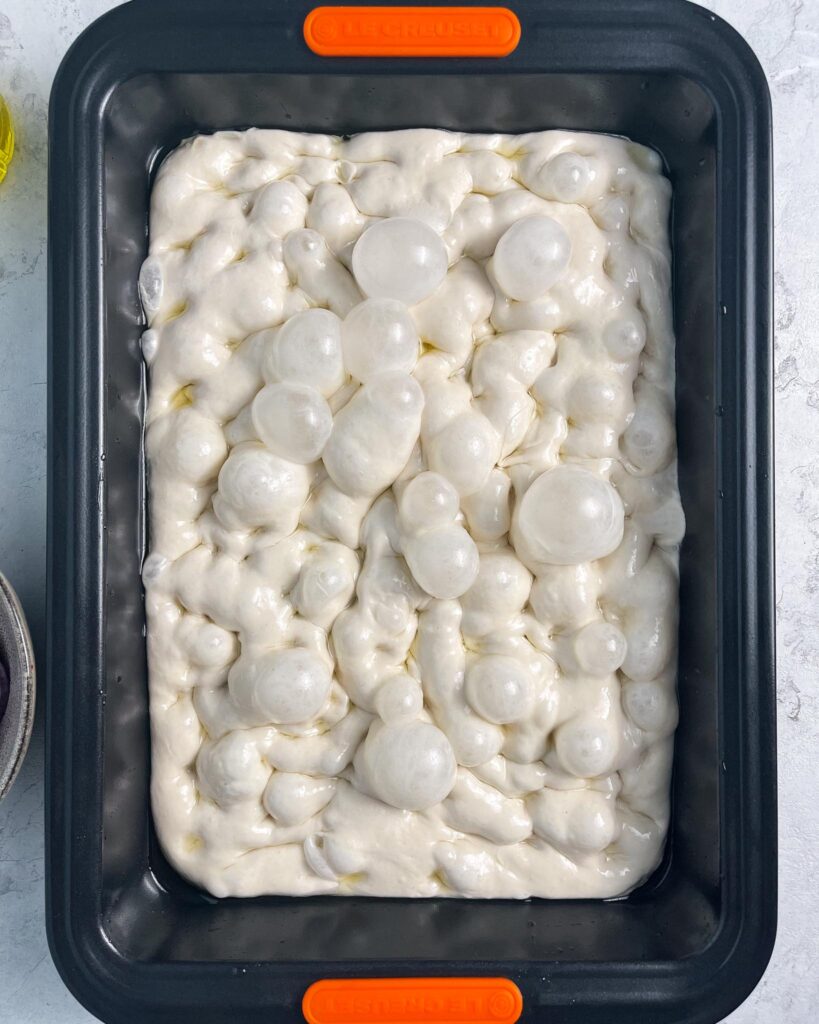
- Final proof – Cover the baking pan and proof at 75°F/24°C until approximately doubled in size. The dough should jiggle if you shake the pan. The final proof typically takes 1-2 hours, but look less on the clock and more on how the dough looks.
Assemble and bake the focaccia
- Preheat your oven to 430°F/220°C 30-45 minutes before you plan to bake the focaccia.
- When the focaccia has doubled in size: drizzle a generous amount of olive oil over the doughs’ surface. Use your fingers to poke dents all over the dough. Sprinkle fresh rosemary and flaky salt on top.
- Bake for 18-25 minutes, until deep golden brown. Remove from the oven, drizzle with additional olive oil and let it cool for about 15 minutes before serving.
How To Do A Coil Fold
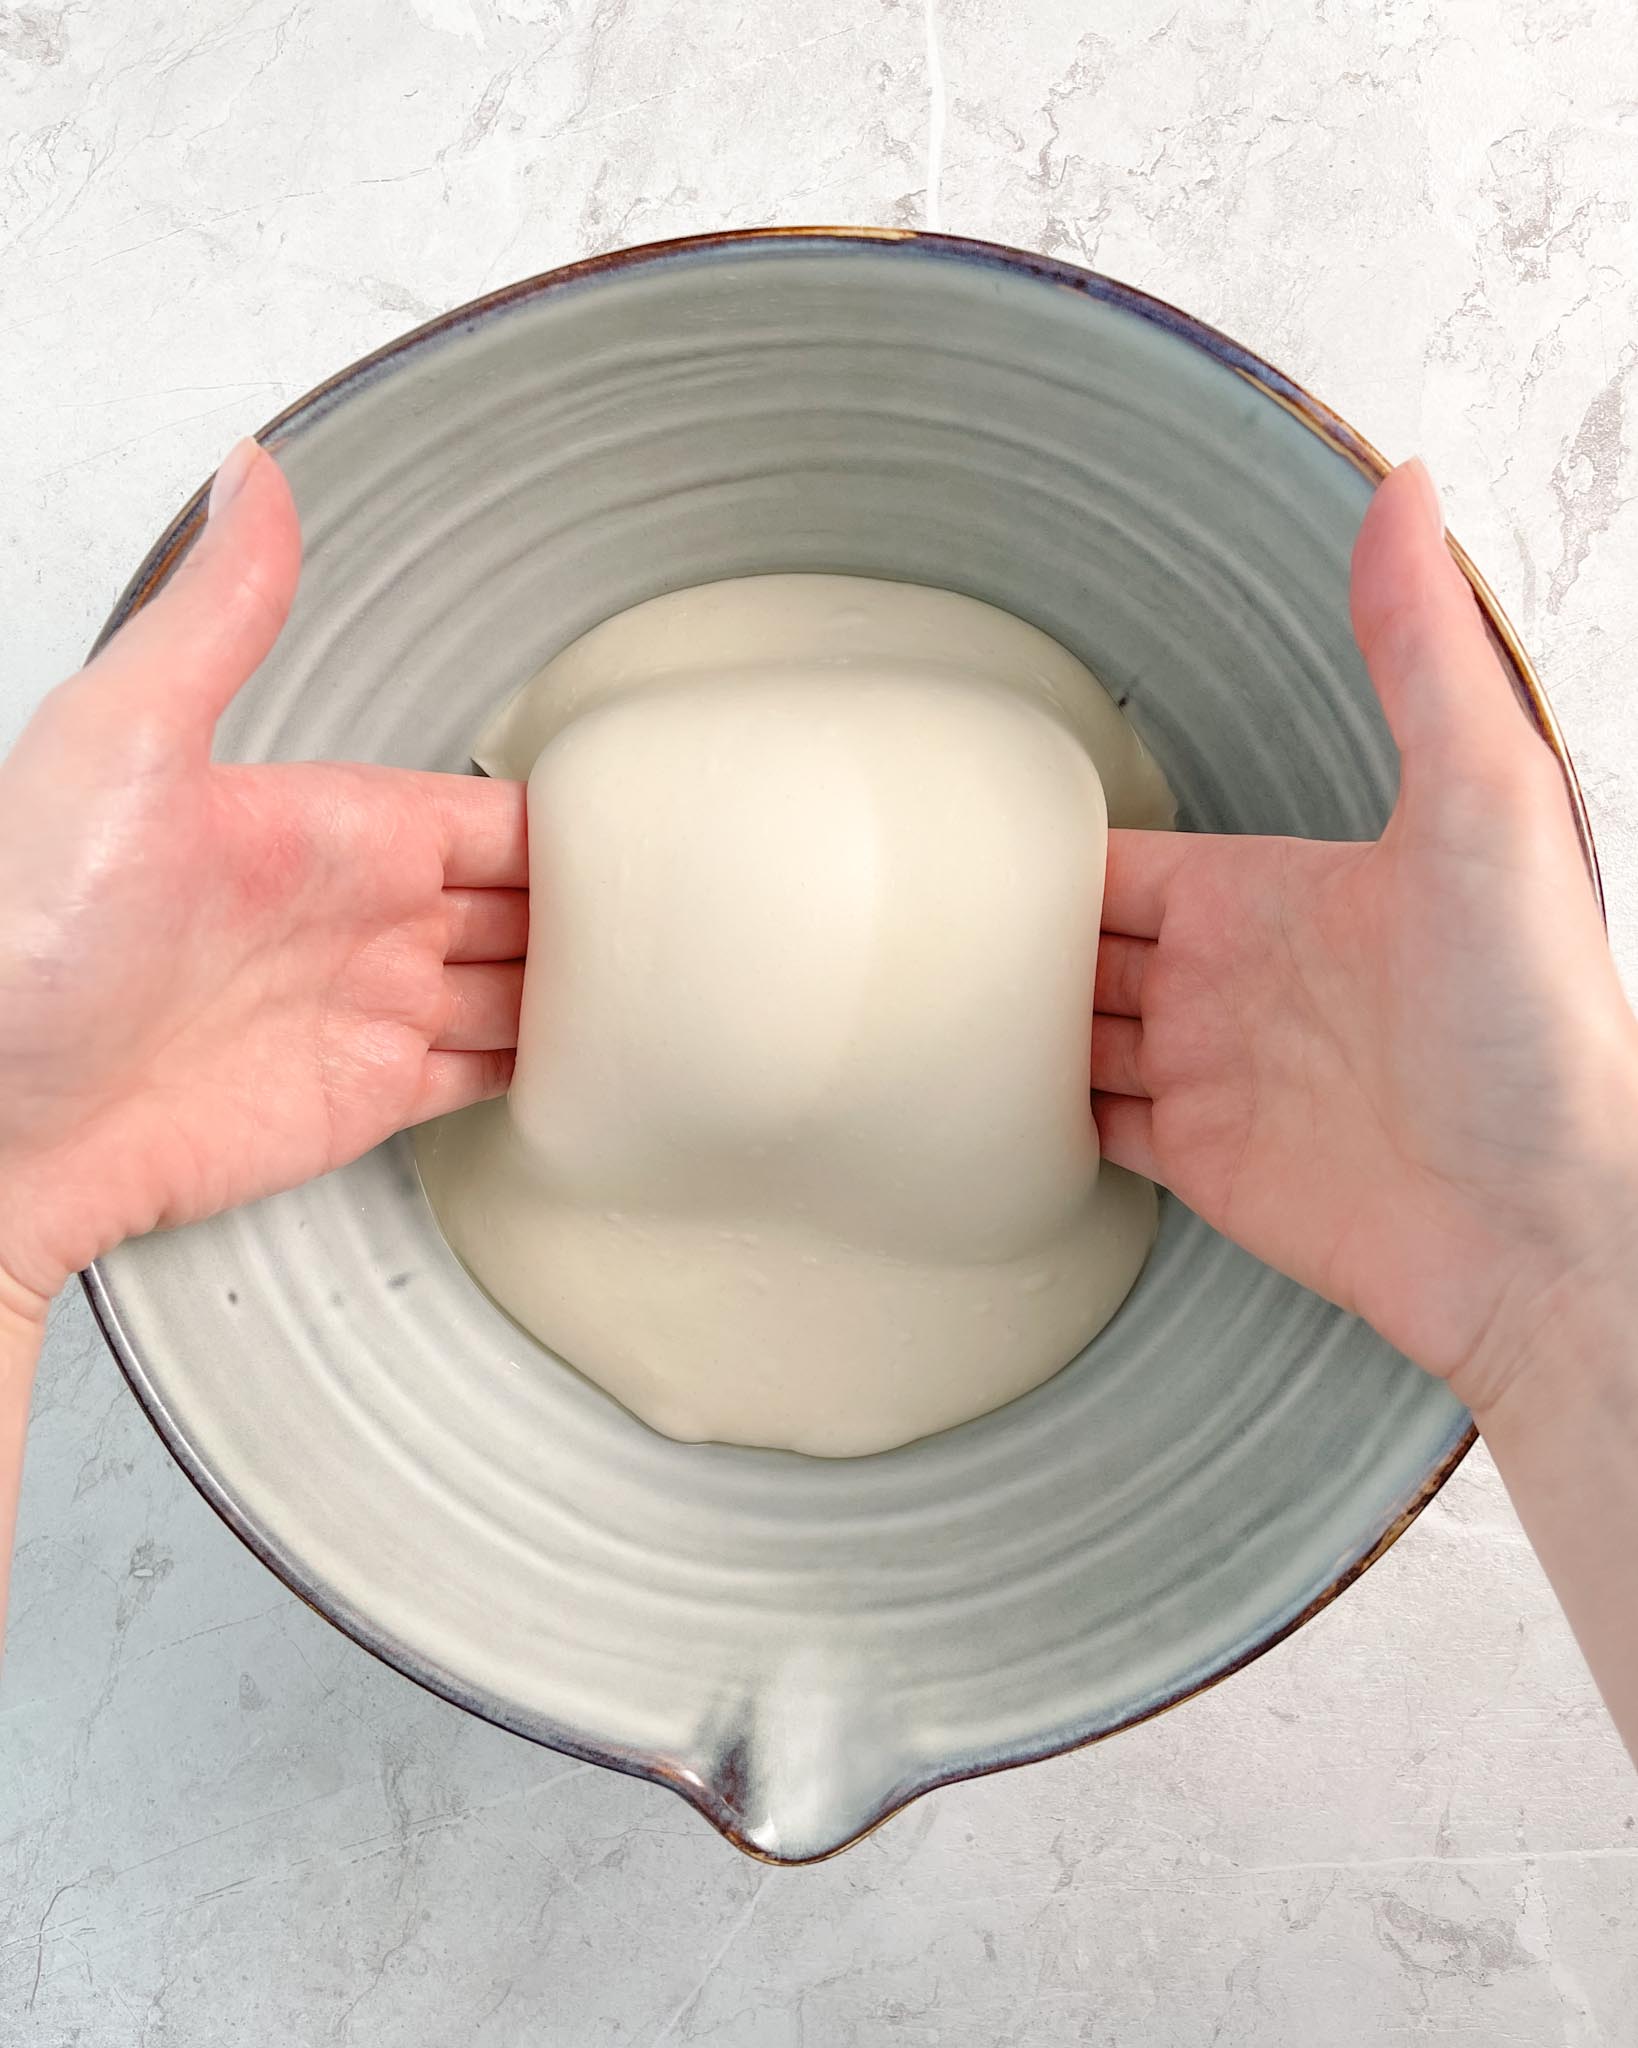
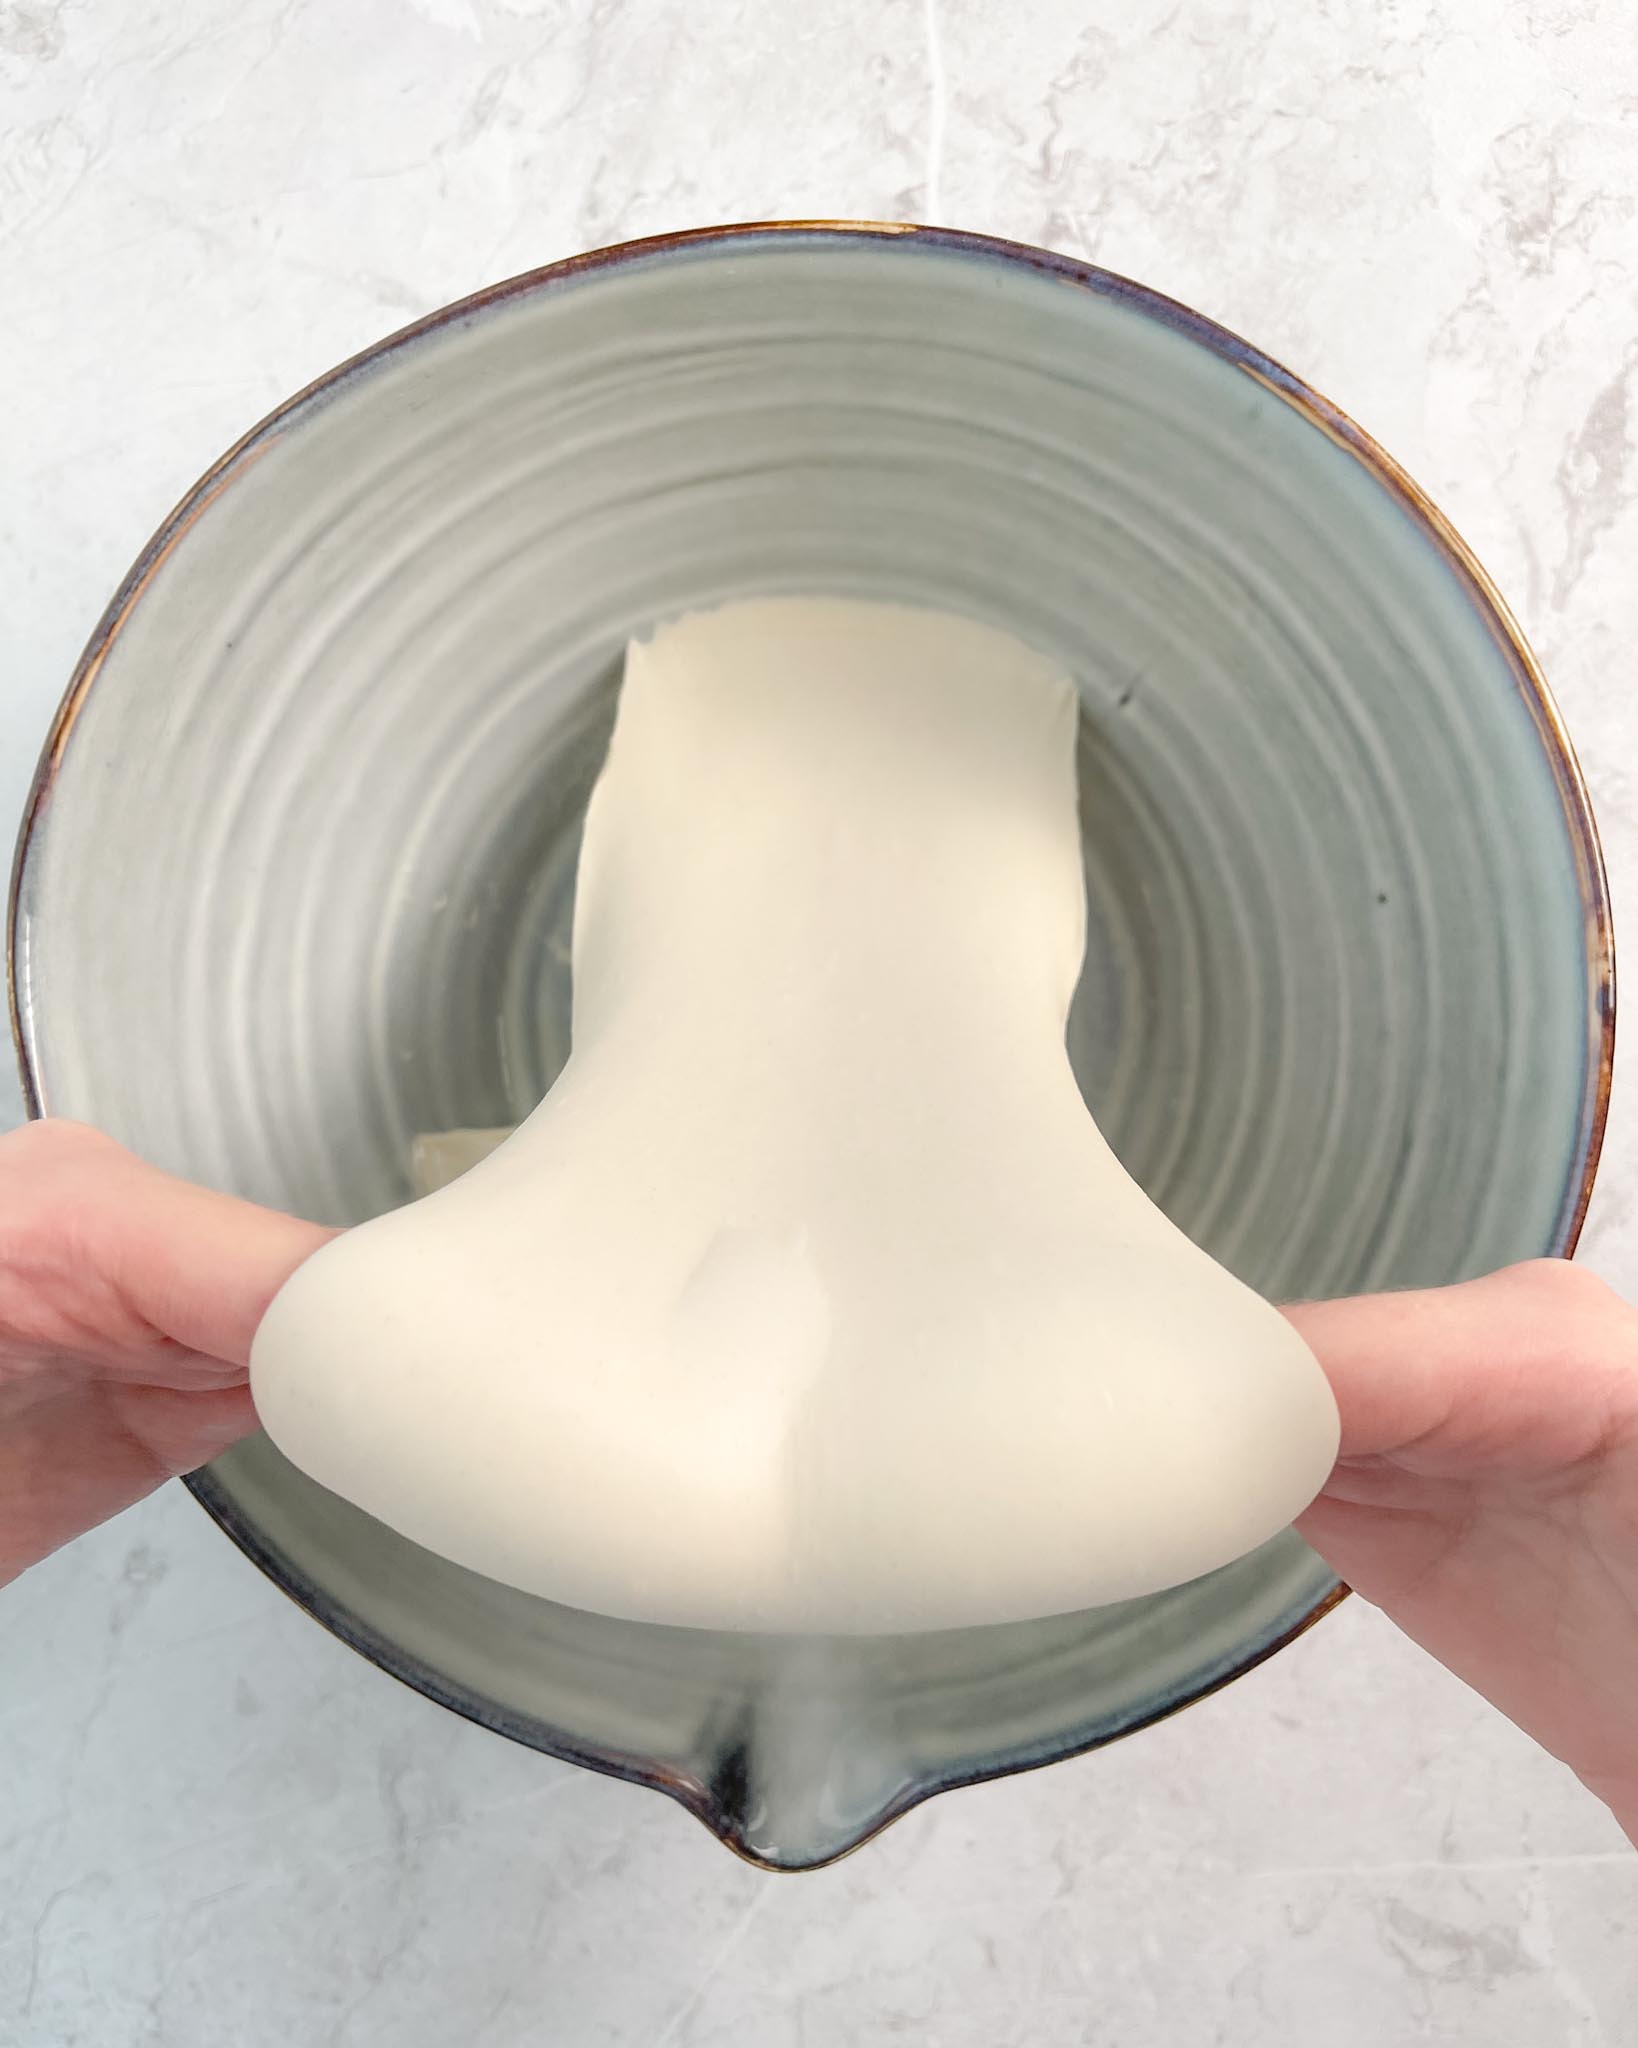
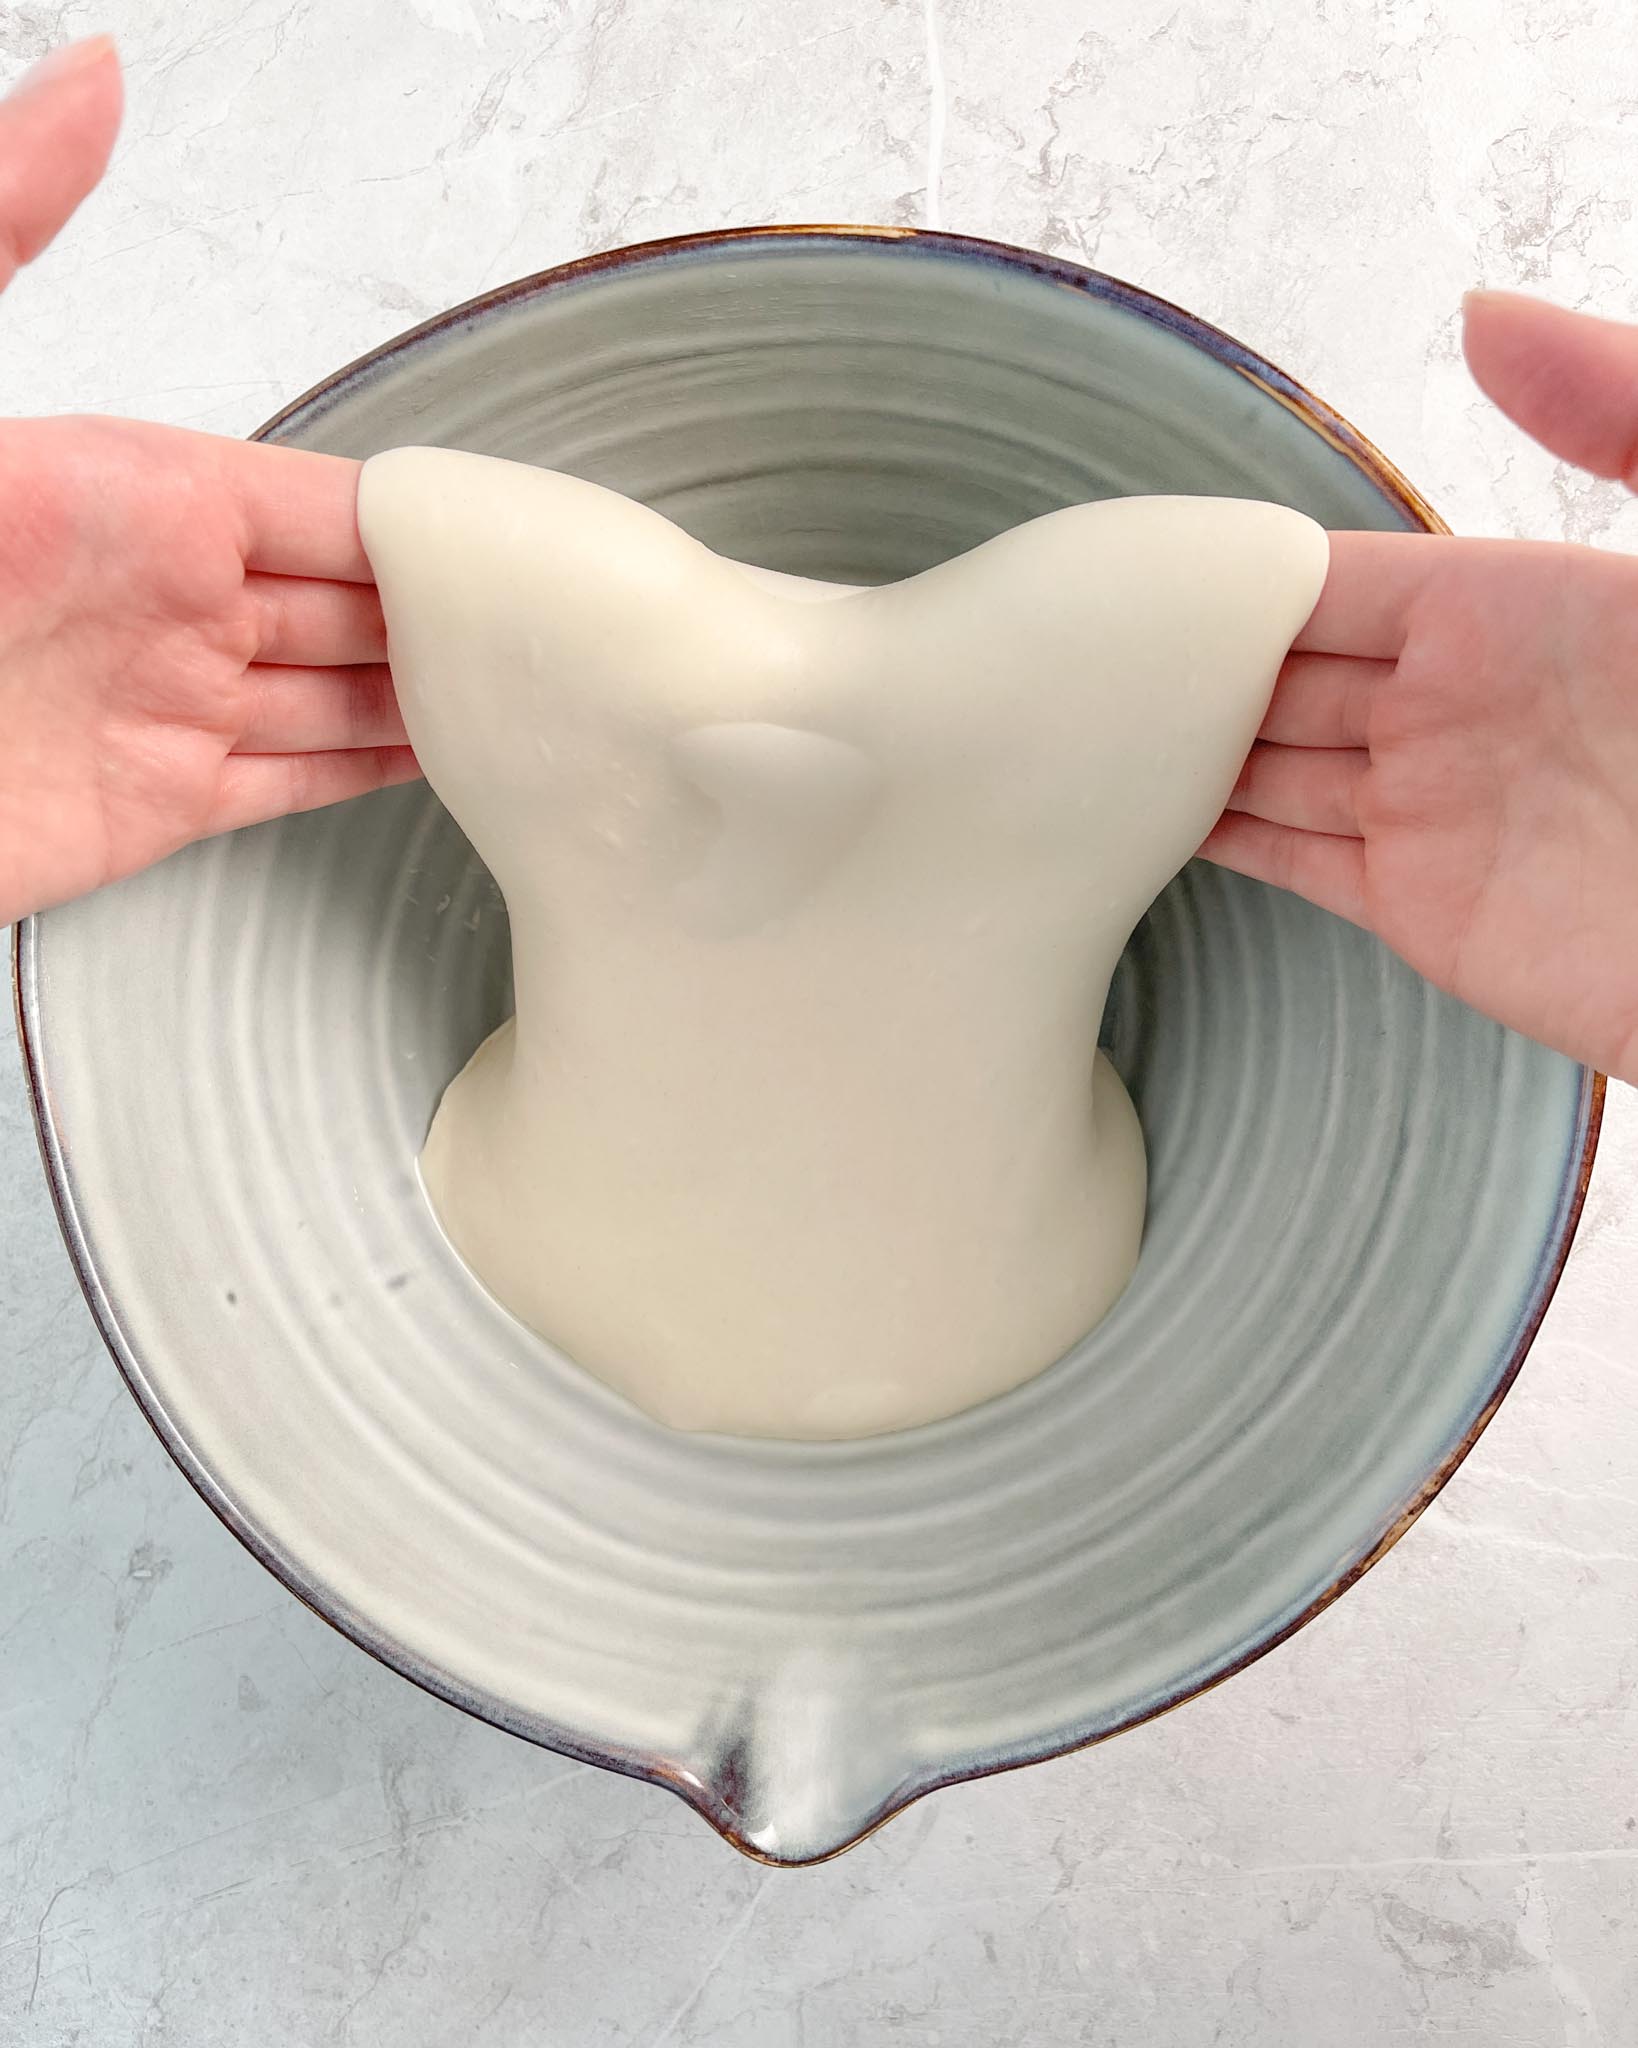
Folding the dough helps develop the gluten network, and we do it to build a strong dough that can hold its shape and rise tall in the oven. With wet hands, slide both hands under the dough and slowly lift while pulling the dough towards you, then bring your hands slightly forward, letting the dough coil underneath itself on the way down. Repeat on all four sides. We are performing two sets of coil folds in this recipe – separated by 45 minutes in the first 1.5 hours of proofing.
Scroll to view all images.
Shop the Tools


The Ultimate Homemade Focaccia
Equipment
- Stand mixer
- Large Mixing Bowl
- Brød & Taylor proofer box (optional, but recommended)
Ingredients
Dough
- 500 g tipo 0 flour | 100%
- 1 g instant dry yeast | 0,2%
- 360-400 g water at around 75°F/24°C | 72-80%
- 12 g sea salt | 2,4%
- 20 g olive oil | 4%
Toppings
- fresh rosemary
- 3-4 tbsp olive oil
- flaky sea salt
Instructions
Day 1: Prepare the dough
- Add flour, instant dry yeast, and water to the bowl of your stand mixer fitted with a dough hook. If you're not used to working with high hydration dough, I recommend starting with the minimum amount of water recommended. Also, please keep in mind this dough is supposed to be wet and sticky – so don't freak out if it seems a little uncontrollable at first.500 g tipo 0 flour, 1 g instant dry yeast, 360-400 g water
- Turn the mixer on low and knead until it forms a very shaggy, sticky dough and is just combined; this step shouldn't take longer than a minute or so. Cover the bowl and let the dough autolyse/rest for 30 minutes.
- After the 30 minute rest, add salt and olive oil to the dough. Start your mixer and knead for 10-15 minutes on low speed. Knead until the dough has come together and is beginning to let go of the sides of the bowl.12 g sea salt, 20 g olive oil
- Grease a large baking bowl with olive oil. Transfer your kneaded dough into the greased baking bowl and place it in a warm spot (ideally at 75°F/24°C) for 45 minutes.
- After 45 minutes, you want to perform the first coil fold. See the pictures above for reference. Then, place the dough back to proof for another 45 minutes before performing a second coil fold.
- Next, leave your dough to proof for another 1-2 hours before transferring it to the fridge for 24 hours (up to 48 hours). The total amount of folds: 2. Total proof time before placing the dough in the fridge: 2.5-3.5 hours.
Day 2: Final proof
- Take the dough out of the fridge and dump it in an oiled, non-stick baking pan (9×13 inches/23x33cm).
- Gently stretch the dough to flatten it out in the pan. It doesn't matter if the dough isn't covering the whole pan yet, as long as it's somewhat even throughout.
- Cover the baking pan and proof at 75°F/24°C until approximately doubled in size. The final proof typically takes 1-2 hours, but look less on the clock and more on how the dough looks.
Assembly and Bake
- Preheat your oven to 430°F/220°C 30-45 minutes before you plan to bake the focaccia.
- When the focaccia has doubled in size: drizzle a generous amount of olive oil over the doughs' surface. Use your fingers to poke dents all over the dough. Sprinkle on fresh rosemary and flaky salt on top.
- Bake for 18-25 minutes, until deep golden brown. Remove from the oven, drizzle with additional olive oil and let it cool for about 15 minutes before serving.


Hello! Thank you for sharing your foccacia recipe. Foccacia is my favourite bread. I plan to make this on this weekend. Should we use tipo 0 flour or can we use regular all purpose flour or bread flour too?
Thanks, Shweta.
Looking forward to making this this weekend! Any thoughts on subbing 00 flour for the 0 flour? 0 flour is hard to come by in my area! Thanks in advance!
I’ve made this twice now, and it’s exactly what I’ve been looking for. Thank you so much.
To those who may wonder, I used the flour I had on hand, which was a standard “Best for Bread” flour, and I couldn’t imagine it turning out better (though I accept that it could).
I’ve tried a few recipes and this is by far the best. I accidentally lost it, and have spent a couple of hours to find it again. I won’t be losing it now!
Hi! I’m so bad at planning, and I’ve started this recipe now realizing it won’t be ready on time. Is there a way I can shave 3-4 hours off this? Like, can I pull it out of the fridge around 20 hours instead?
I’ve already made it before exactly as written, and it’s incredible.
Thanks so much!
This recipe is so NEAT!!
I thought I messed up cause when I pulled my riser dough out of the fridge and spread it out there was no bubbles, let it rise and still no bubbles…
Lathered it with oil and finger dimpled and vola!! Bubbles bubbles everywhere (HEART)
Wish I could post pictures cause I was really proud.
This recipe is amazing!
Thanks for sharing.
It’s processing and amazing recipe and thank you for sharing … much love
Literally didn’t rise, followed the recipe exactly. Was left with something dense and flat.
Sorry to hear your dough didn’t rise! Did you add yeast?
Sooooo….realized my yeast was expired after I tried to proof it. Feel free to delete that negative review, I’m sorry I didn’t notice that before!
This flour to water ratio was great. I used regular flour and it worked just fine. I used a glass baking dish and probably will go for metal next time to see if it helps with sticking to the glass. Thank you!
Seems kind of unfair to give one star just because your yeast is bad—if you remembered to add it at all. This is a perfect recipe.
Another thing that could affect the rise is altitude, but that would not prevent it from rising at all.
SO SO GOOD. I made focacccia for the first time and it was a success. I added cherry tomatoes and rosemary and it was so so good. Toasted it in the morning for breakfast and damnn, its a good start for my day.
I just prepared it. it rises before cooking. I will tell you if it has been devoured by my guests. See you later …
The best focaccia I have made so far, recipe easy to follow everything about this recipe is perfect. thank you for sharing and being transparent in your recipe
First time I’ve ever chosen to bake bread, and I wanted something easy to follow and not too complex for my first attempt. Even without a stand mixer, this recipe was so simple to follow! I ended up with a beautifully fluffy end result, which I thought would last a couple of days but was absolutely devoured by my guests – all 12 slices done and dusted in a matter of minutes! Thank you so much ☺️
Absolutely LOVE this recipe. I’ve subbed the flower for what I had in hand and it turns out beautifully every single time. It’s the light of every dinner party!
Recipe proved perfect!! soft, airy and crispy on the outside . I baked it in a well oiled glass 9×13 but had a slight sticking issue when removed after resting. Still the best bread out of this kitchen. Perfect recipe I’ve been looking for.
Thanks
Loved it!
Thank you 🖤🖤🖤
This Focaccia is delicious!!! Fluffy, tasty, not bland! Will save this recipe and for sure do it again. It’s well worth all the waiting and resting time.
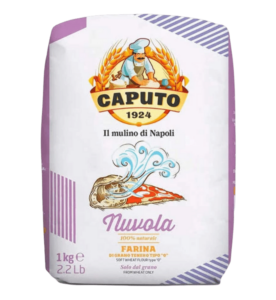
Hi Elise, This looks great! I have a few questions before I dive in and try to make this focaccia. For the flour, can I use — Caputo Soft Wheat Flour Type “0” Nuvola be used? Also what do you use to cover the dough for the first proof on the counter AND the second proof in the refrigerator? Do you cover with plastic wrap or a kitchen towel ? Thank you for your help in advance!
Hi Jennifer! Yes, Caputo Nuvola (linked in Shop The Tools) works great. I use plastic wrap or reusable plastic bowl covers (also linked in Shop The Tools) to cover the dough while it proofs. Happy baking!
Love the complex flavour that this long, slow process creates. I have a wish for mine to look more like the pictures in the recipe. In particular, how do you get that really dark browning? Like, just a few minutes short of being a bit charred. Also, the top of yours has a shiny, almost burnished finish to it. Mine has more of a matte look. Are you doing an egg wash or something similar? Thank you for any advice!
That deep browning comes from a well-fermented dough, but your oven setup also plays a role – temperature accuracy, convection vs. regular bake, or even your pan choice. Try baking a bit longer, placing it higher in the oven, or using the convection setting (fan) for the last 5 minutes. The shiny finish comes from the final drizzle of olive oil after baking, as noted in the last step of the recipe. Hope that helps!
My absolute favorite yeast-focaccia recipe. On days when I don’t have the patience to prep my sourdough starter, this is the recipe that I use, the overnight rest allows the perfect interior, and the flavor is really impressive! My #1 recommended focaccia recipe as well.
this has become our go-to focaccia recipe over the past couple of years and always produces excellent, flavorful results! it’s also expanded my baking skills in general by introducing me to coil folds and overnight proofing. thank you. 🙂
Made this tonight after prepping two days ago. It was knock your socks off good. The directions were simple enough to follow. I noticed my dough was thicker than this one from the photo of the cold fold, mine didn’t stretch as far nor bubble hardly at all. But it was delicious.
THIS is truly the Ultimate Focaccia. I have made it at least 20 times over the last two years and I NEVER had a bad result. When there’s a discount at the store for cheese my husband begs for focaccia. when I go to a potluck people beg me to make focaccia. This recipe is so easy I made it a few weeks after my baby was born. I still make it even though I am a busy mom now. I will never stop making it and I will never even search for another recipe. Thank you