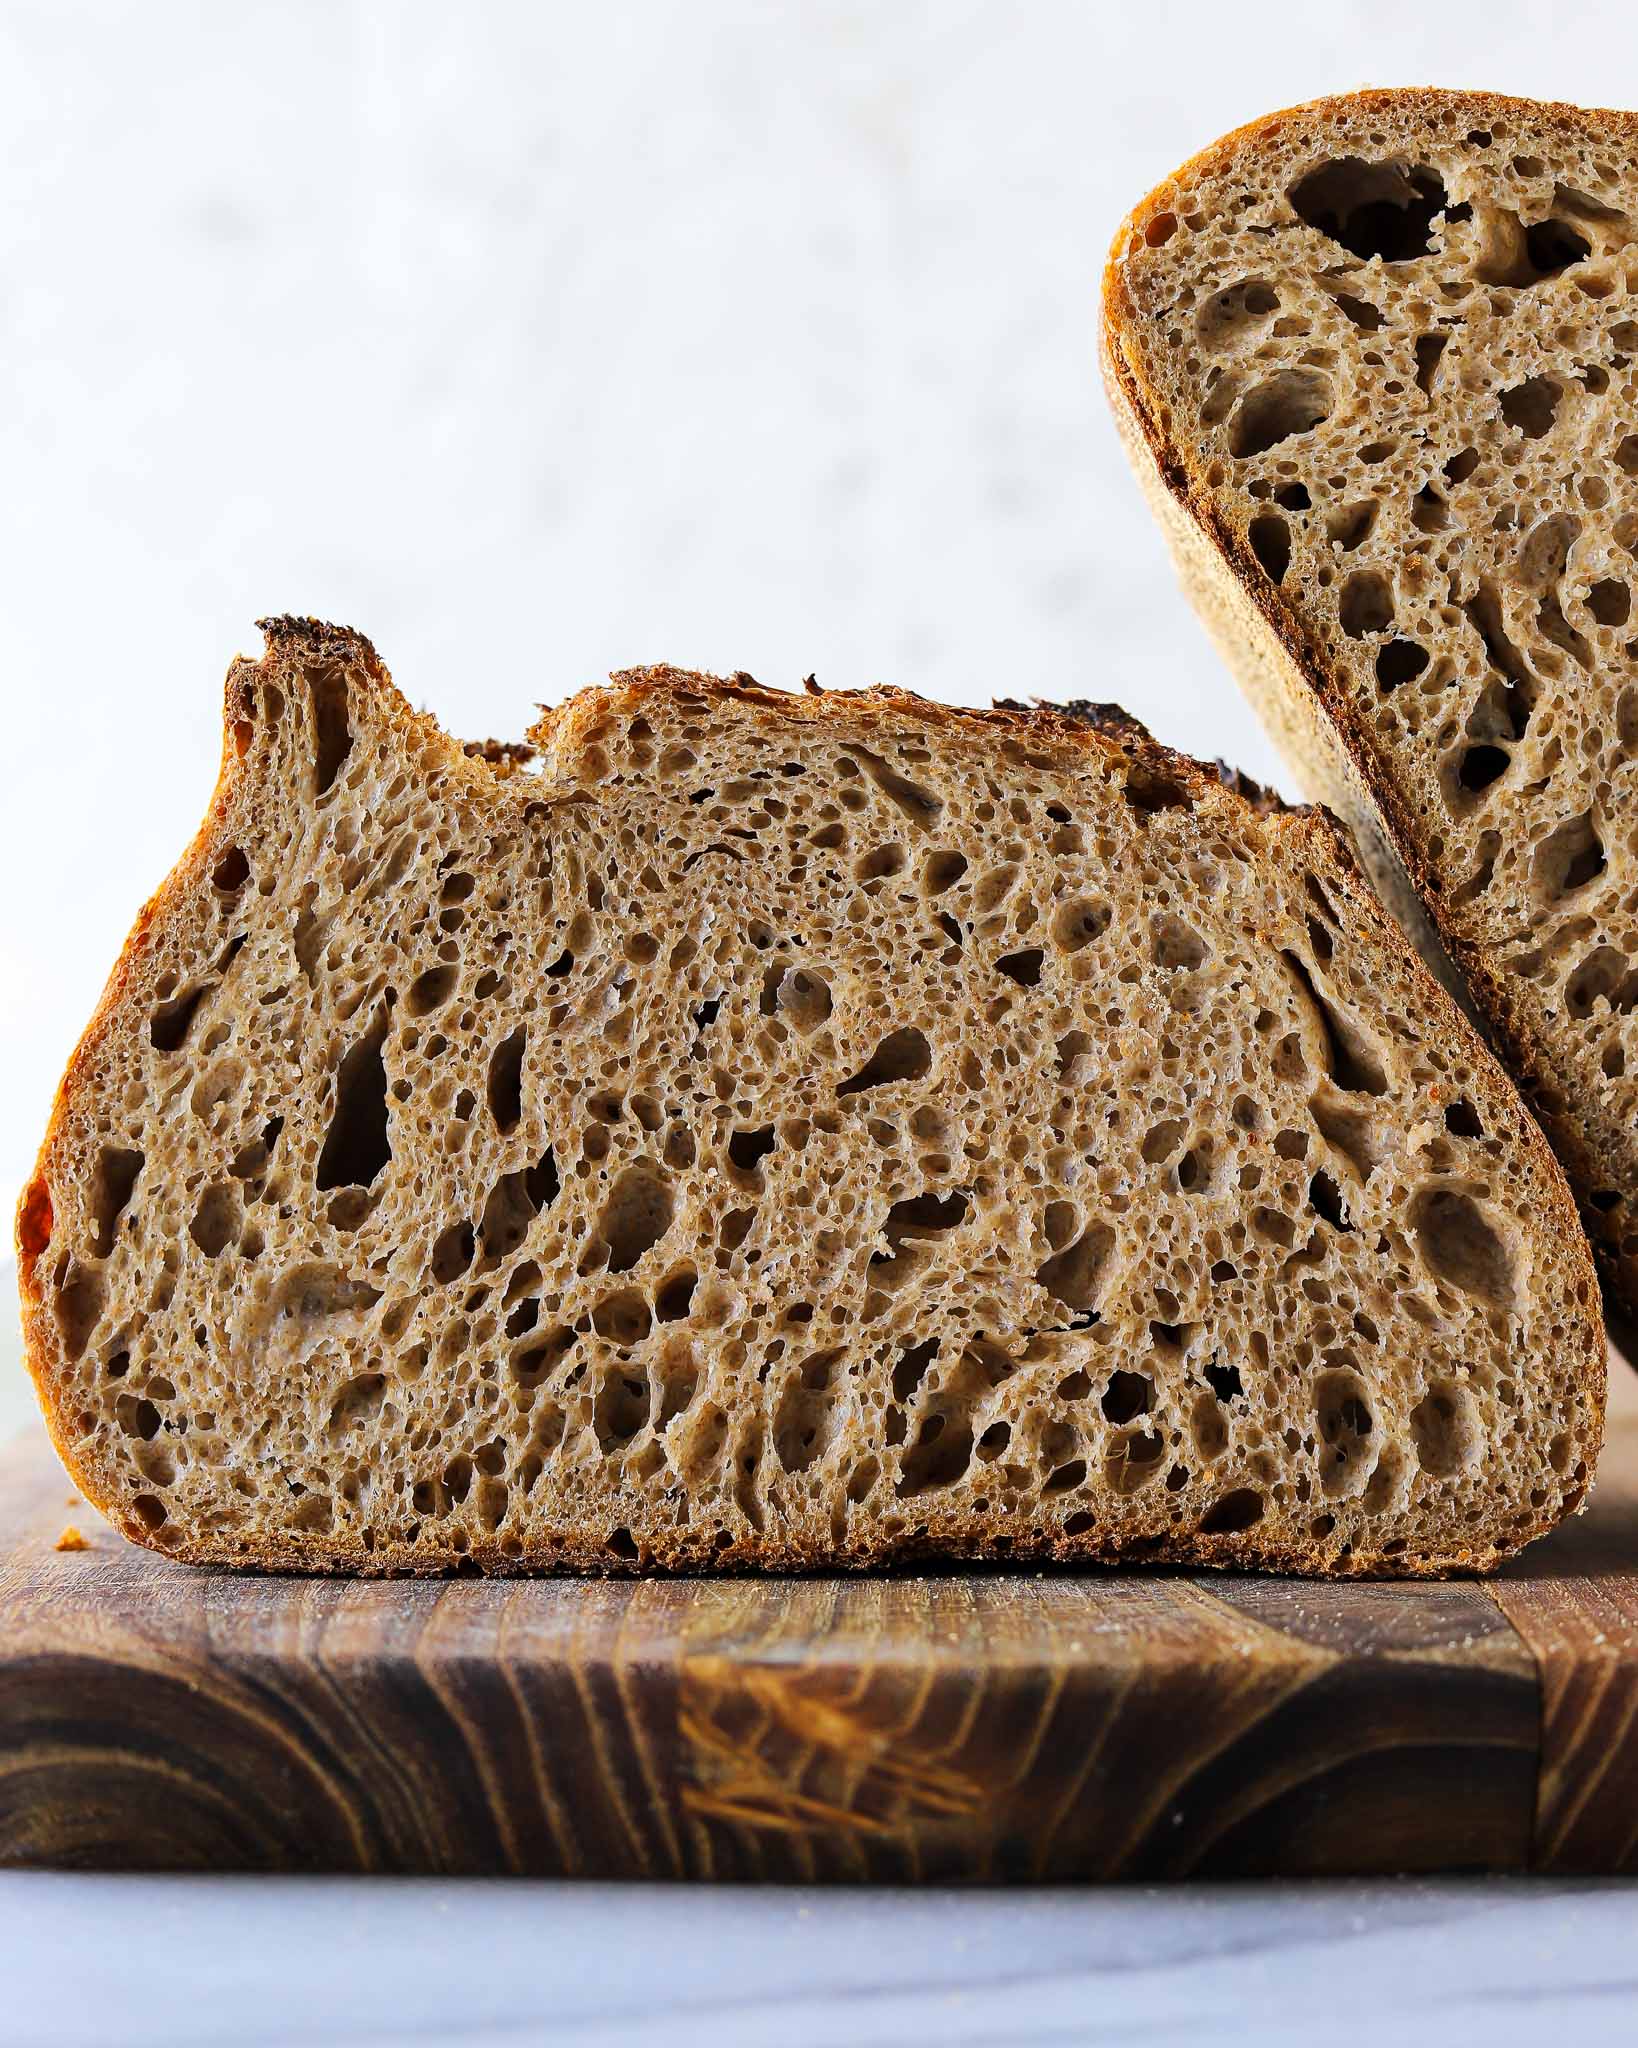
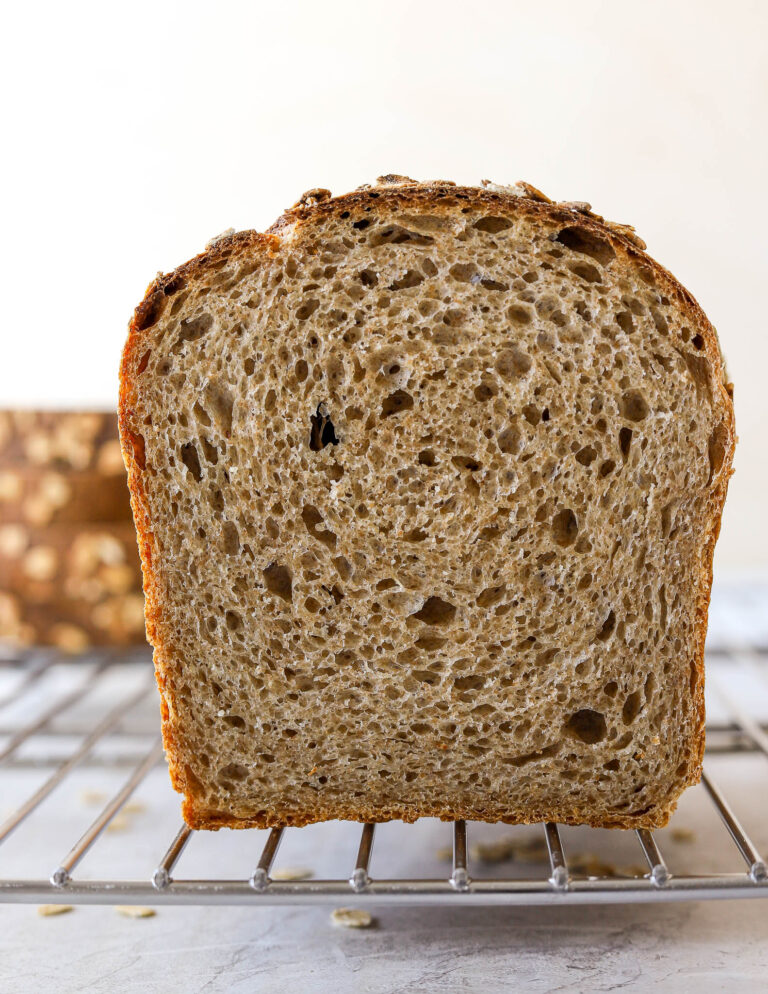
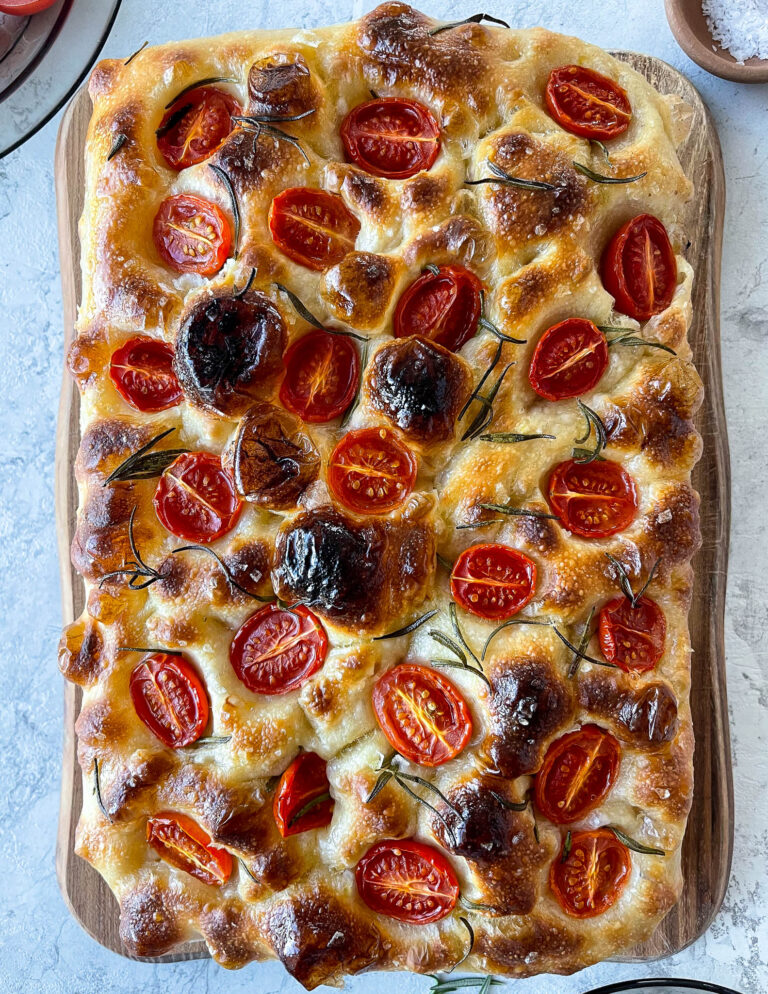
Whole Grain Sourdough Bread
This website contains affiliate links.
Some of the links below are affiliate links. This means that, at no additional cost to you, Bread By Elise may earn a commission if you click through the link and finalize a purchase. Please read our Privacy Policy for more details.
This rustic whole-grain sourdough bread is packed with flavor. The recipe consists of three simple ingredients: flour, water, and salt. While the ingredients are simple, the process might take a few tries to get exactly right. But it’s worth it, and I’m here to guide you through the whole process.
Before you begin, make sure to read through the recipe, watch the recipe video, and check out the Baker’s Timeline at the bottom of this post. Happy baking!

Table of contents
Recipe Tips
Sourdough Starter
Ensure your starter is active before using it in this recipe. If your starter is inactive or weak, it won’t provide enough leavening power for the bread to actually rise. Feed your starter regularly, and ensure it doubles in size within a few hours after feeding. If you usually store your starter in the fridge, please take it out a few days ahead and give it regular feedings every 12 hours before using it to build the levain.
Understand the significance of proper proofing.
Under-proofed dough will lead to dense bread with large holes and underdeveloped flavor. Which we obviously don’t want. Therefore, it is essential to give your dough enough time to ferment during the bulk fermentation and final proofing. Remember that factors such as room temperature, dough hydration, and the strength of your starter can influence proofing times.
Practice: Sourdough baking requires patience and practice. Experiment with different techniques and variables, such as hydration levels and starter feeding schedule, until you achieve the desired results. A good tip is to take notes during each bake to track your progress and adjust accordingly for the next time.
I have so many notebooks filled with notes on bread. When I first started baking with sourdough, I took notes for every loaf I baked, which I believe has helped me improve a lot.


Hydration Level
The hydration level will vary depending on your flour and experience handling high-hydration loaves. I recommend starting low and adding more water if needed. The Norwegian flour I’m using is incredibly thirsty, requiring quite a bit of water to form a dough. A bread dough consisting of a high percentage of whole grains, in this case over 70%, generally needs more water than a white dough.

Recipe Video
Ingredients For Whole Grain Sourdough Bread
Here is a list of all the ingredients you’ll need.
For the Levain:
- Active sourdough starter – fed 10-12 hours prior.
- Water – at 77°F-80°F/25°C-27°C.
- All-purpose flour
- Whole wheat flour
For the Main Dough:
- Whole wheat flour – organic whole wheat flour for the best flavor.
- Whole grain spelt flour – organic spelt flour for the best flavor.
- Bread flour – at 11-13% protein.
- Water – at 77°F-80°F/25°C-27°C.
- Levain
- Sea salt


Rustic Whole Grain Sourdough Bread
Equipment
- Digital kitchen scale
- Brød & Taylor proofer box (optional, but recommended)
- Banneton
- Lame
- Challenger Bread Pan or other cast iron pan
Ingredients
Levain
- 15 g active sourdough starter 50%. fed 10-12 hours prior
- 30 g water 100%. at 77°F-80°F/25°C-27°C
- 15 g all-purpose flour 50%
- 15 g whole wheat flour 50%
Main Dough
- 150 g whole wheat flour 43%
- 100 g whole grain spelt flour 29%
- 100 g bread flour 29%
- 270-300 g water 77%-86%. at 77°F-80°F/25°C-27°C
- 70 g levain 20%
- 7 g sea salt 2%
Other
- rice flour or whole wheat flour for dusting the banneton
Instructions
Levain
- Add all the ingredients to a small bowl and stir to combine. Place the levain in a warm spot, preferably around 78°F/26°C for 5 hours or until it has doubled/tripled in size.
Main Dough
- Four hours after you prepared the levain: Add flours and water to a large mixing bowl and mix until combined. How much water you will need depends on your flour and experience handling high hydration doughs. My recommendation is to start low with 270 grams of water and add more if needed. Cover the bowl and rest/autolyse for 1 hour until the levain is ready.
- Measure out 70 grams of levain and add it to the bowl of autolysed dough. Mix with your hands for 3-4 minutes. The mixing technique is demonstrated in the recipe video above. Cover your bowl and rest for 30 minutes.
- Add the salt and continue mixing for another 3-4 minutes until the dough has a smooth surface. It will still be quite sticky because of the high percentage of whole grains in the dough. Transfer the dough to a glass baking pan for easier handling later on. Cover the pan and proof at 75°F/24°C for 1 hour.
- After 1 hour, you want to perform the first coil fold. With wet hands, slide both hands under the dough in the center until your fingertips touch. Slowly lift the dough up and towards you until the dough lets go of the bowl. Fold the dough underneath itself by lowering your hands. Turn the bowl 180° and do the other side. Turn the bowl 90° and repeat (basically folding all four sides).
- Repeat the folding every hour for the first 3-4 hours of proofing. Leave the dough untouched for the remaining hour(s). Total coil folds: 3-4. Total proofing time (calculated from adding the levain): 5-6 hours at 75°F/24°C.
Shape
- Prepare an 8 or 10-inch oval banneton by dusting it with rice flour.
- Transfer the dough onto a lightly floured work surface.
- With the help of a bench scraper, fold in the doughs right side, then the left side, and roll it down towards you.
- Gently flip the dough over and lift it into the prepared banneton, seam side up. Cover, and transfer it to the fridge to cold-proof overnight (10-18 hours).
Bake
- Place your Bread Pan or large Dutch oven in the oven. Preheat for 45-60 minutes at 500°F/260°C.
- Carefully remove the preheated Bread Pan from the oven. Tip the bread into the pan, seam side down.
- Use a lame or razor blade to score the surface of the bread. Try scoring at a slight angle to give the bread the distinctive "ear." Put the lid back on and bake for 20 minutes.
- After 20 minutes, you can remove the lid, turn down the heat to 430°F/220°C and bake for another 15-25 minutes until the bread has a deep golden crust. Bake it dark for the most delicious crust ever.
- Transfer to a wire rack and cool for at least one hour before slicing.


Thank you. I made the strater, but I have not been getting the nice whole grain sourdough loaves I want.
I’d like more tips pn hoew to keep my starter alive, when I really only bake once a week. There mucst mbe a way to manage a small amount that stays lively between baking without goinng crazy with waste. I did make whole wheat and teff sourdough discard english muffins that I like. My neighbor even gave them a thumbs up for flavor – only they could have a better crumb.
I love your sourdough bakers schedule, it’s so helpful to have.
Sarah
Hi Sarah,
I keep my sourdough starter in the fridge until a few days before I’m going to bake, when I bring it out and begin feeding it. The discarded starter can be kept as well though, and is highly useful in all sorts of baking recipes. Keep the discard in a Tupperware in the fridge, keep an eye/nose on it for signs of going bad though. I find it especially useful as a binding agent in vegan baking, but it gives a lovely sourdough hint to all recipes – pancakes, brownies, Christmas cookies, are just some of the few I’ve enjoyed the discard in!
Cheers
I already had a sourdough starter I have been using for years. I feed it bread flour or all-purpose flour. Sometimes I mix in a little rye flour and a little whole wheat flour too. Starter will take several days, and sometimes several attempts before you have a nice working bubbly starter. When not making bread, I feed and store it in the refrigerator but I have to take it out and feed to wake it up a few days before use. It all depends on how long it has been in the fridge. If making bread every day I keep the starter on the counter in a cool location. I found that extra starter makes nice pancakes, and flour tortillas when I have too much. I’ve put the extra in my outdoor composter along with vegetable scraps. Today is my first time trying this recipe and it sounds promising. I used a scale and though I used a lesser amount of water my dough still came out more wet than in the video. I think it will still work. I probably should not post this until after I have baked. I thought about using rye also, maybe next time…
I love your recipes! I have had great luck with whole wheat sourdough. I want to make this recipe but only have bread, whole wheat and rye. Could
Rye be used instead of spelt? If not I’ll buy spelt.
Thank you!,
Karen
Thank you Karen! You can use whole wheat flour instead of spelt.
Very clear recipe. I’m new to baking. I ordered stone ground whole grain bread flour from Breadtopia and sprouted rye flour. After I ordered it, I realized I cannot find any recipes for sprouted rye flour or for whole grain bread flour. Very frustrated since these were quite pricey.
Hey , what can I use instead of spelt flour ? I don’t have any and I still want a hearty flavour in my bread.
Hi! You can use whole wheat instead.
The recipe is easy to follow, the video is helpful, and the results are delicious. The first feeding was 24 hours before I mixed up the levain. I doubled the amount of levain and let it sit overnight, instead of five hours. For the final rise, I shaped the bread into a boule and put it in a basket. The cold proof was 24 hours, I let it warm up for an hour, and then used a peel and baked it on a stone.
loved this! only question is, can the starter be equal amounts water and flour? i can’t tell if it’s 100% hydration or not. thanks!
100% hydration means equal amounts of water and flour. Happy baking!
Such a great recipe! I used to think I didn’t like spelt bread but the combination of flours in this recipe results in one of the most flavorful loaves I have ever made. The timeline was very helpful.
This is a wonderful bread, Elise!
SO tasty, light and airy, not heavy and dense like whole wheat breads can be. Not to mention, healthier from all the whole grains (72% of the flours vs. 28% of white) as well. Thank you for sharing it with us!