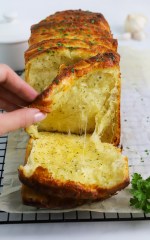
Cheesy Pull-Apart Garlic Bread
This website contains affiliate links.
Some of the links below are affiliate links. This means that, at no additional cost to you, Bread By Elise may earn a commission if you click through the link and finalize a purchase. Please read our Privacy Policy for more details.
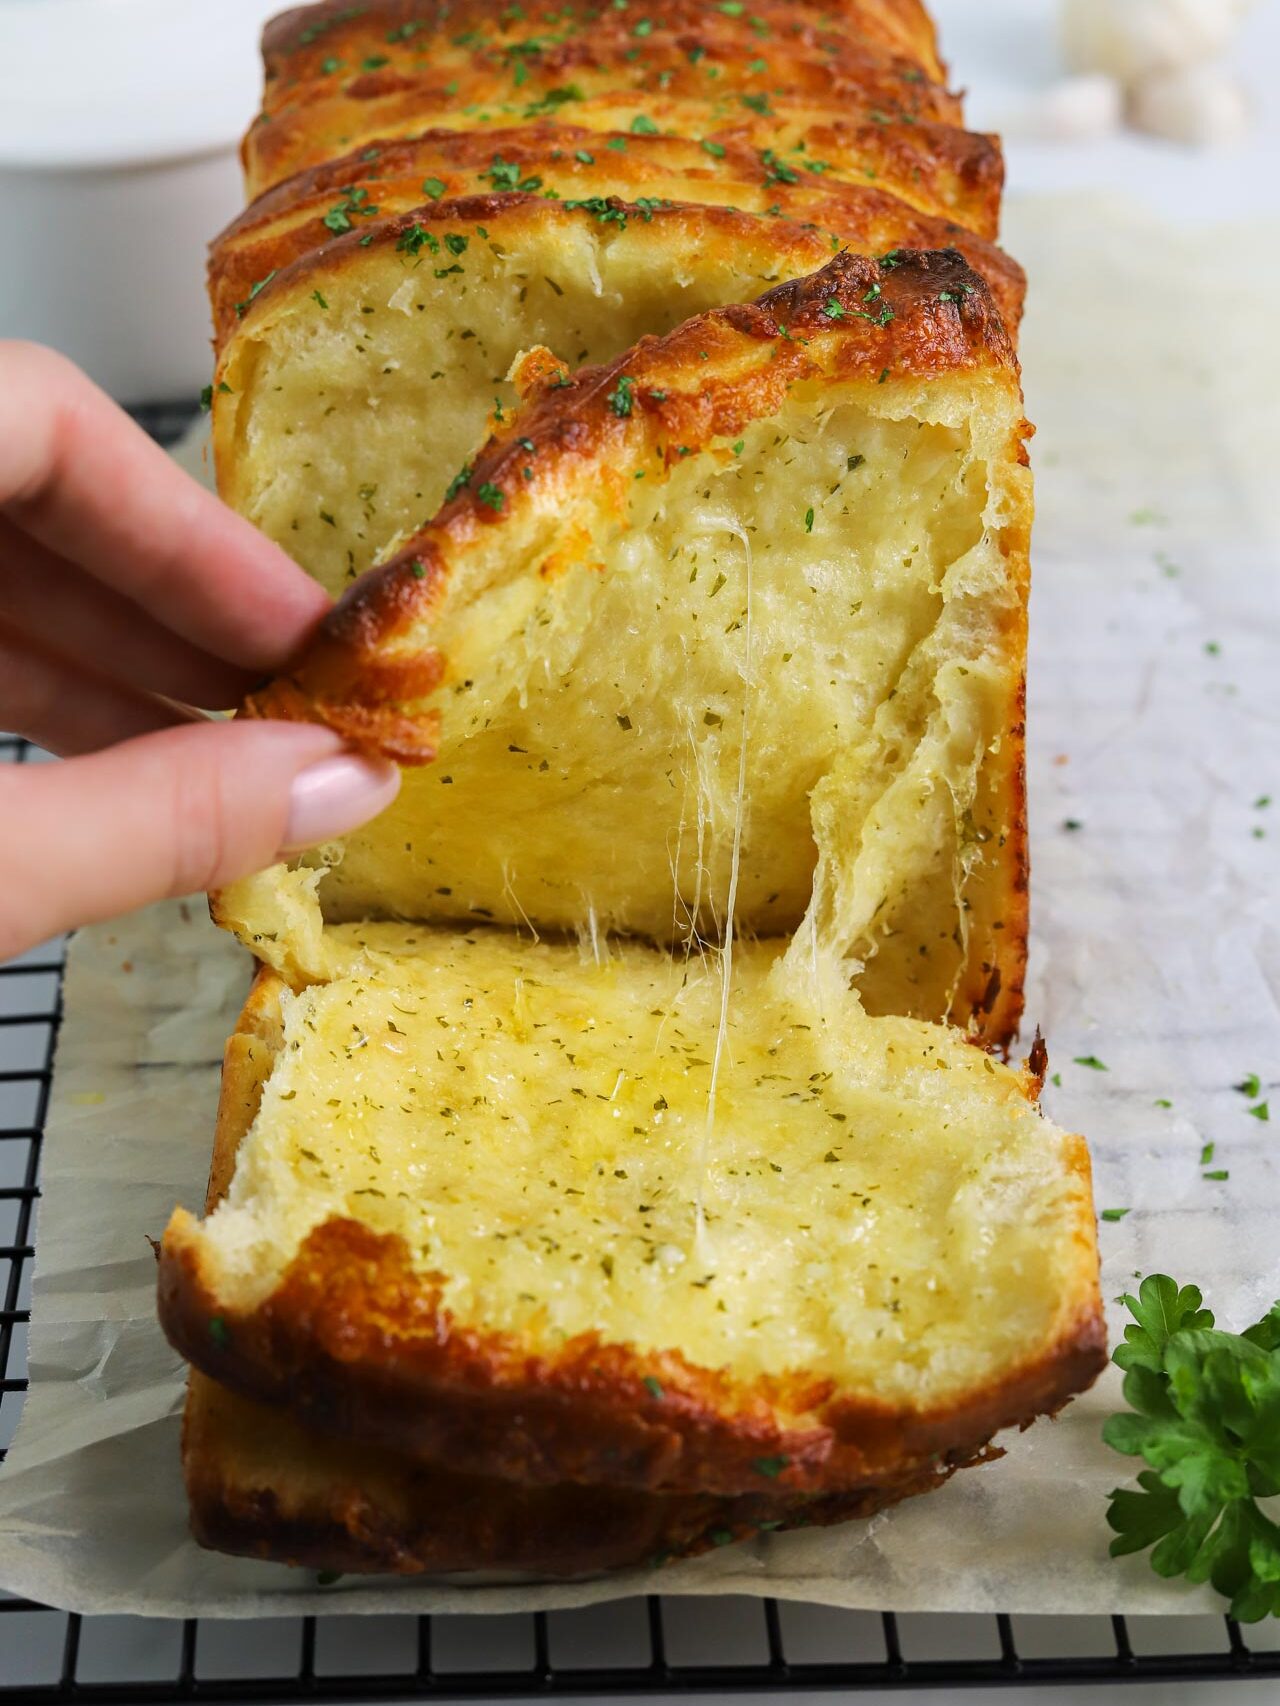
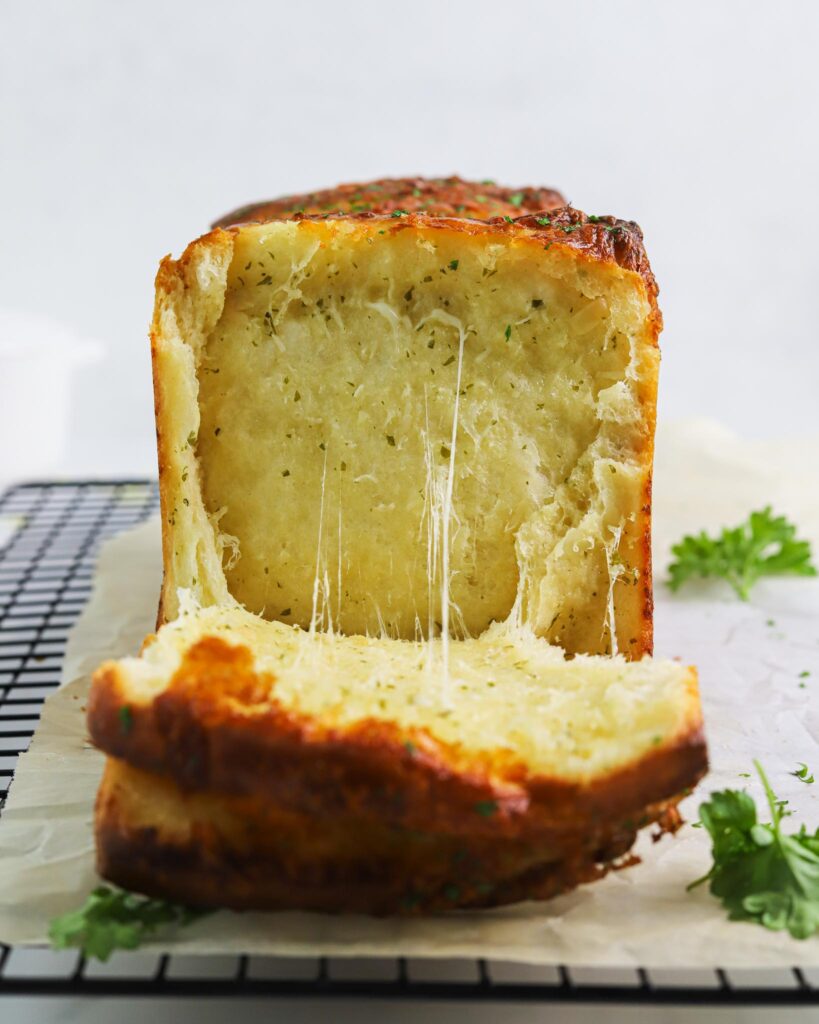
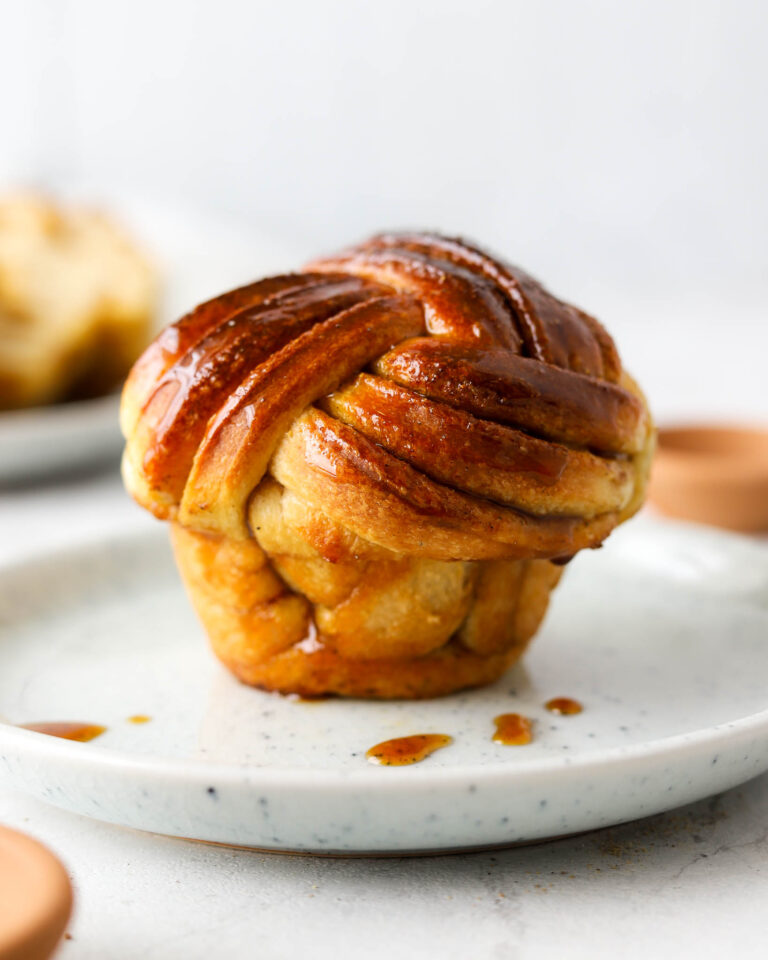
The ultimate Cheesy Pull-Apart Garlic Bread. This light, soft bread is layered with the most delicious roasted garlic butter and cheese. This bread has crispy edges and an inside that is fluffy, cheesy, and garlicy. Not to mention it is both easy to make and looks super impressive. What’s not to love?
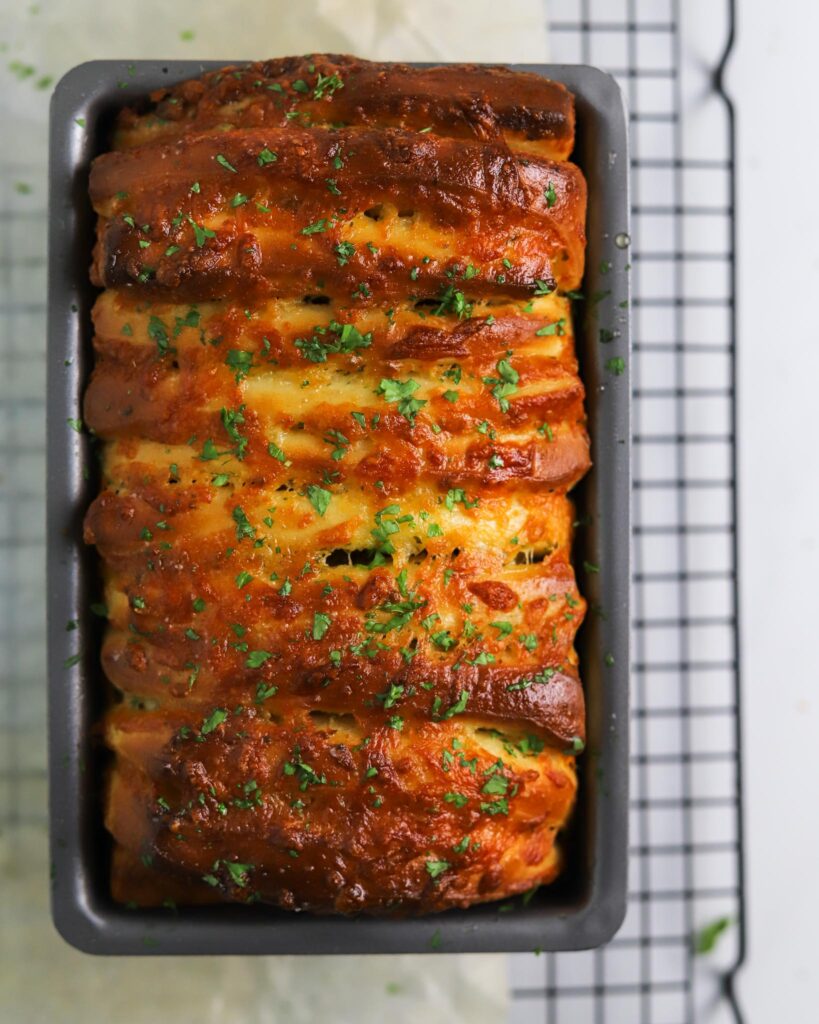
Table of contents
The Ultimate Homemade Garlic Bread
This bread is best served straight from the oven while still warm. I’m sticking with the classic mozzarella for the cheese, but feel free to use whatever cheese you prefer.
Recipe run through
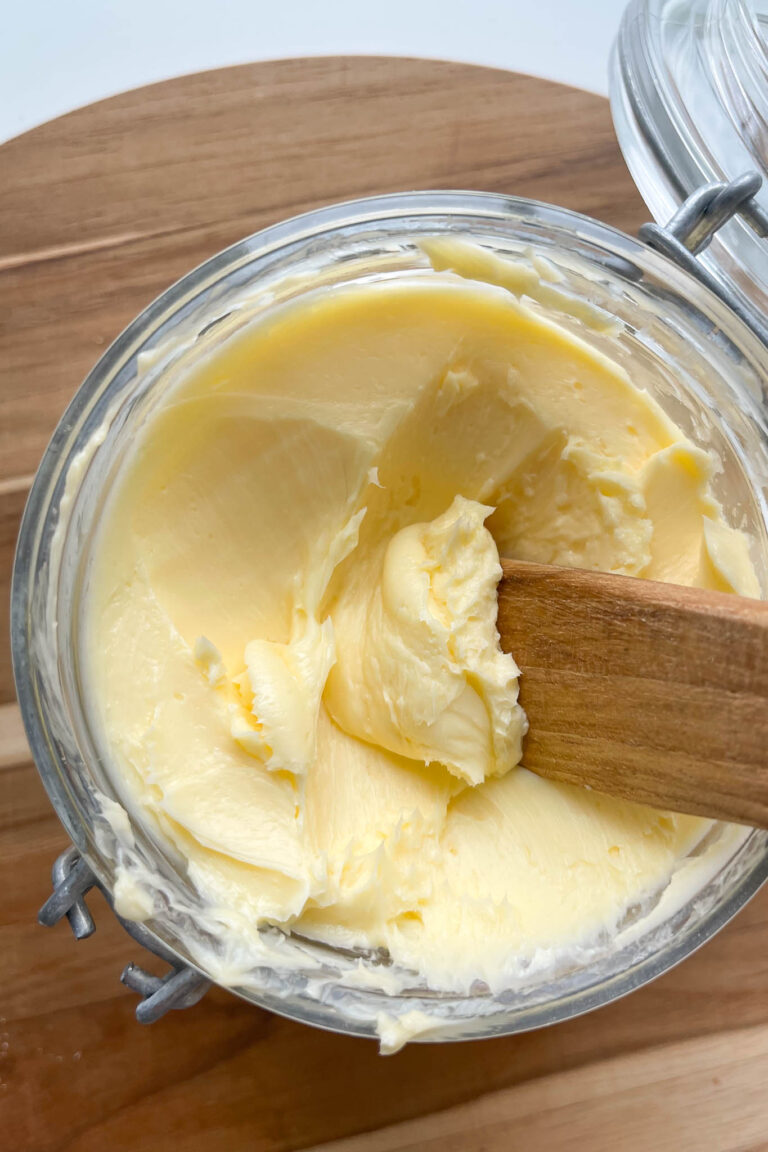
Roasted Garlic Butter
While the dough is proofing, you want to make the roasted garlic butter. The process is straightforward but takes about an hour. Here’s how:

Scroll to view all images.
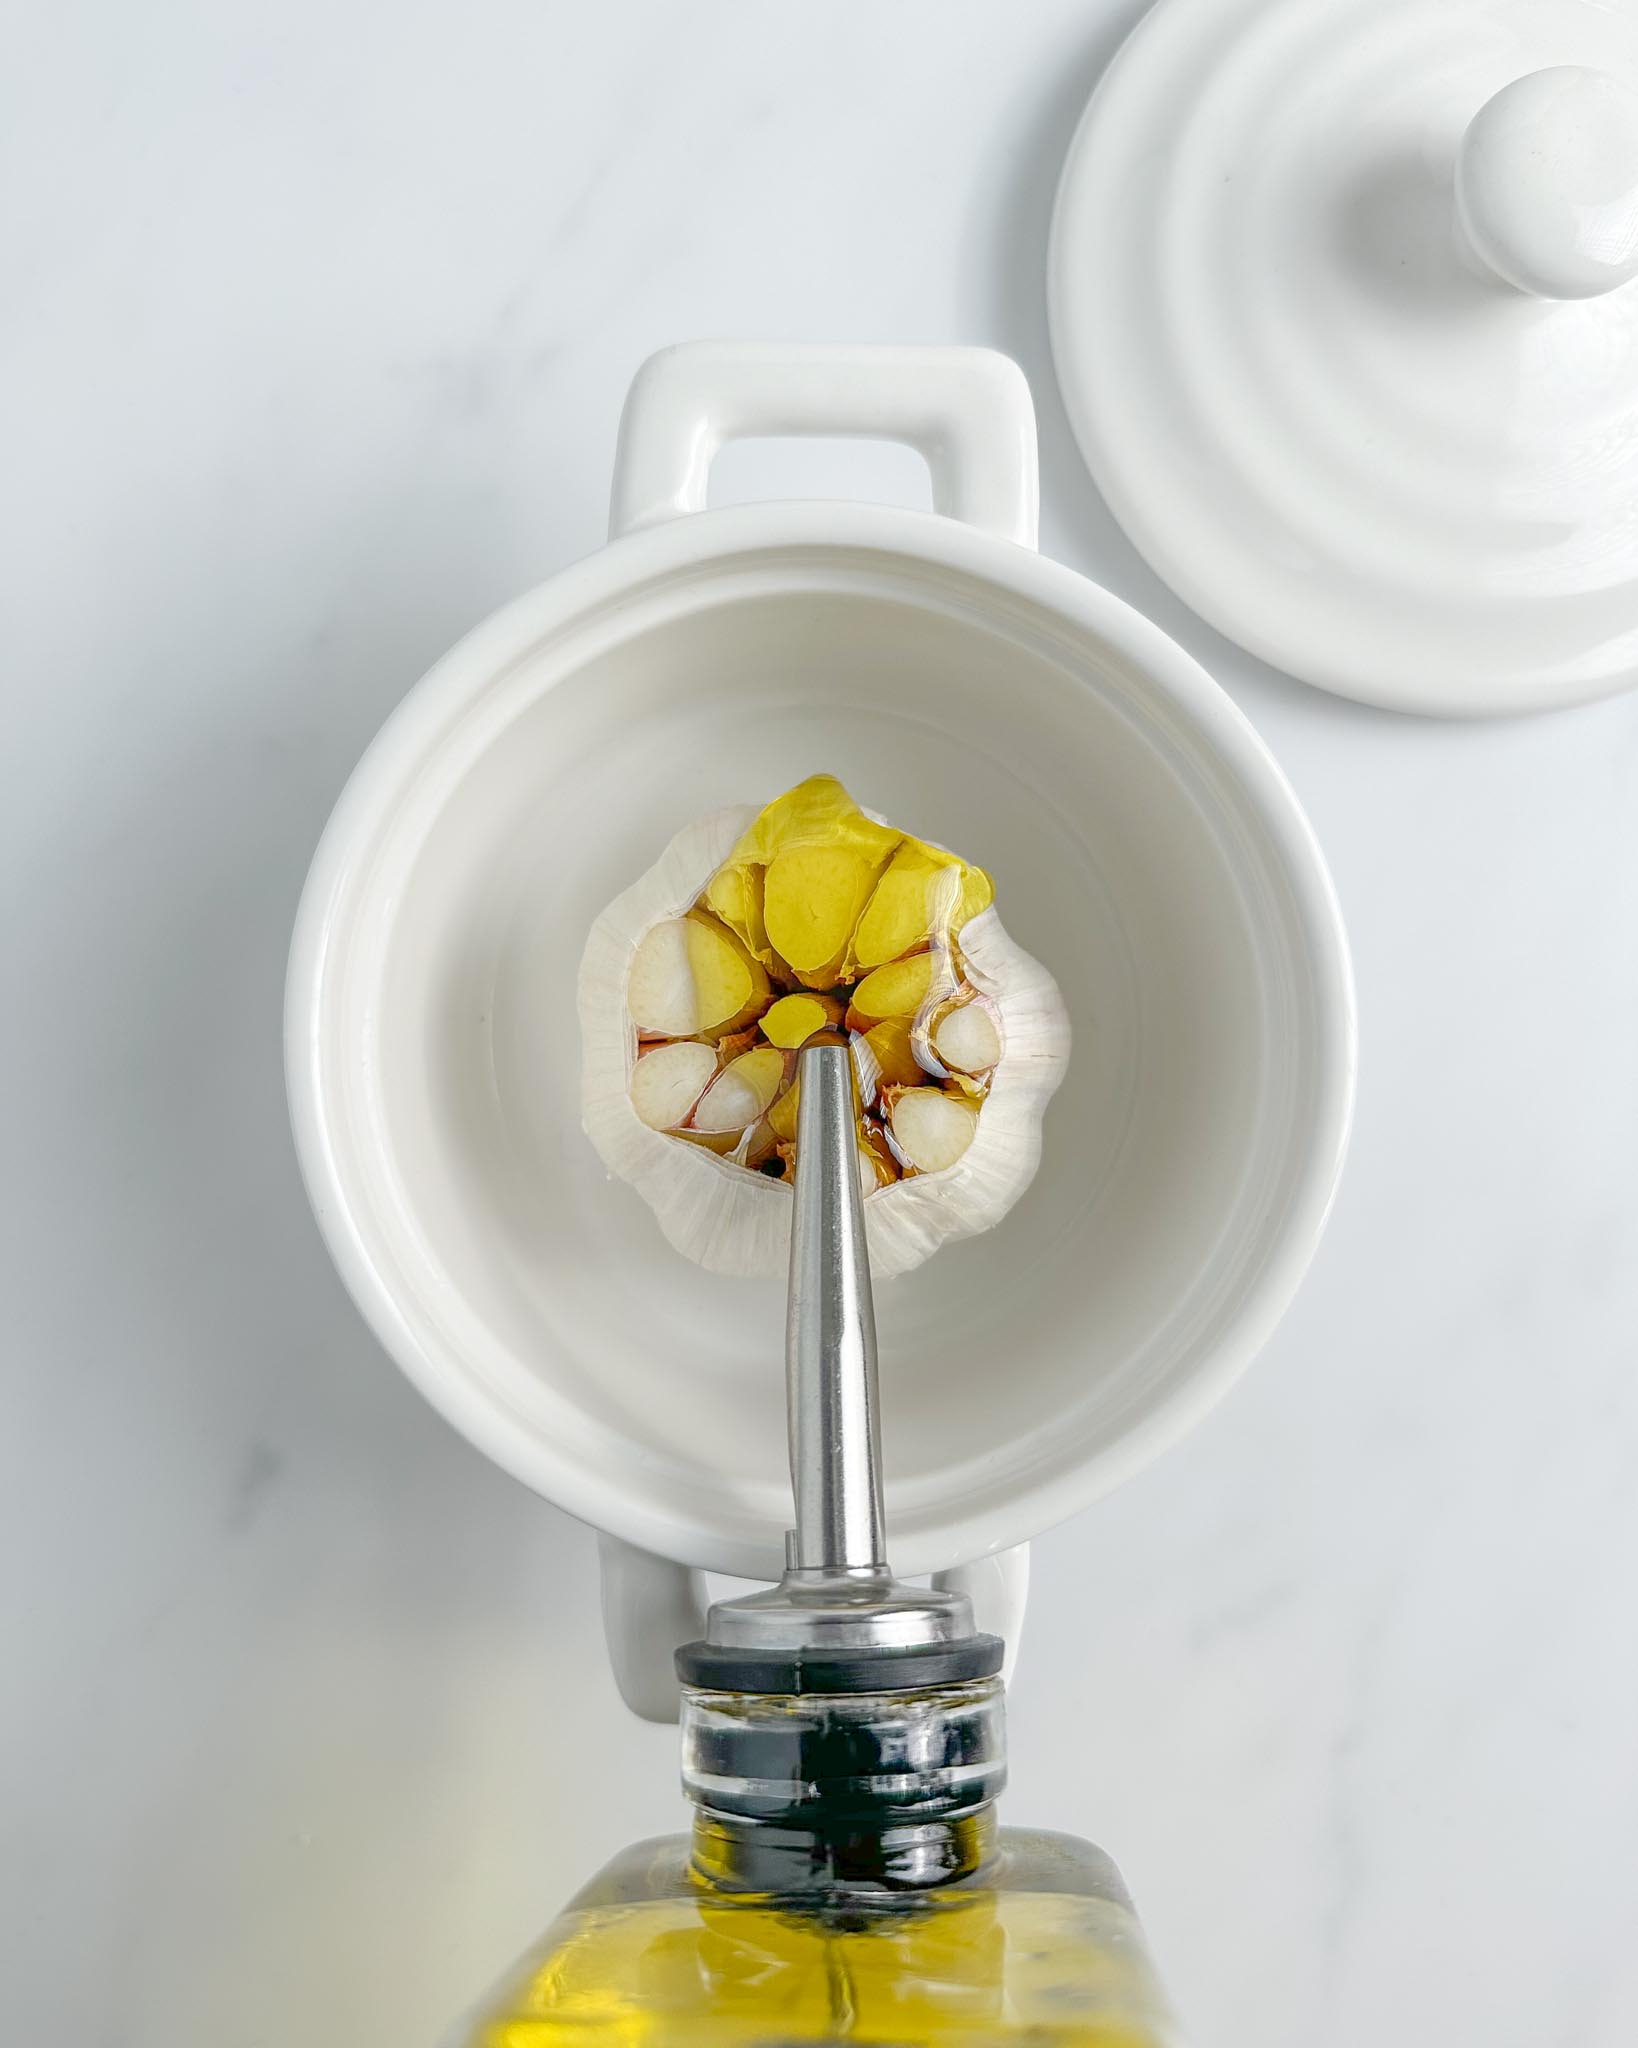
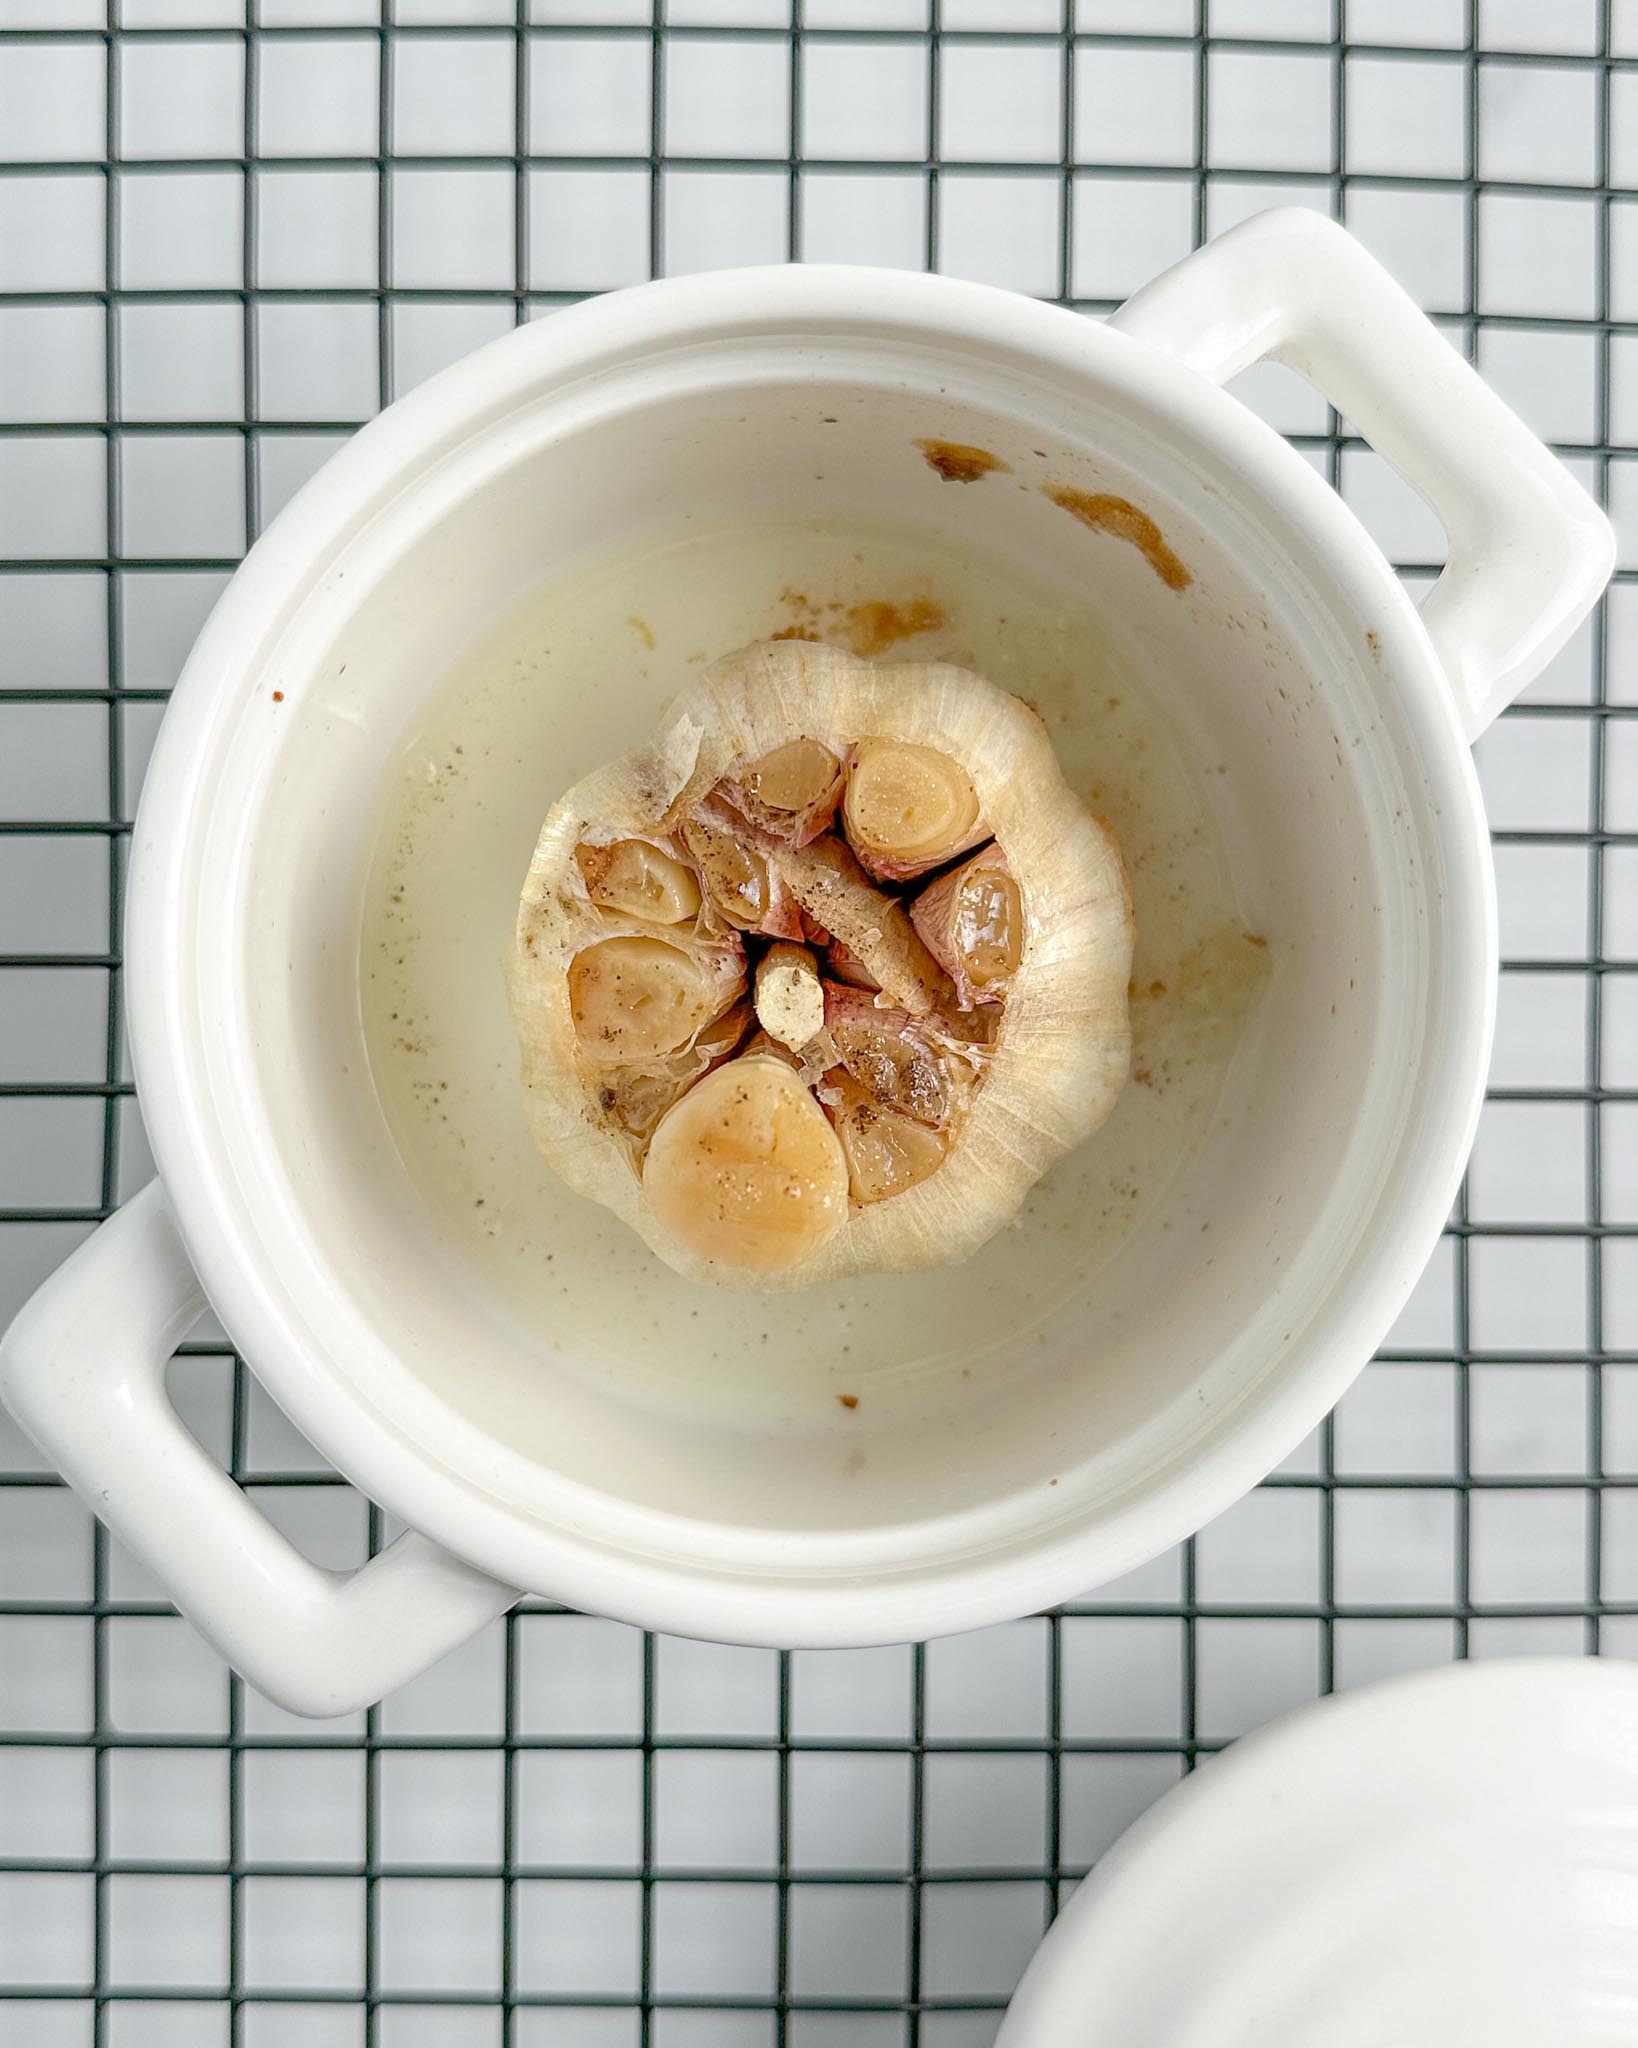
- Chop off the top of a garlic head, leaving the cloves exposed.
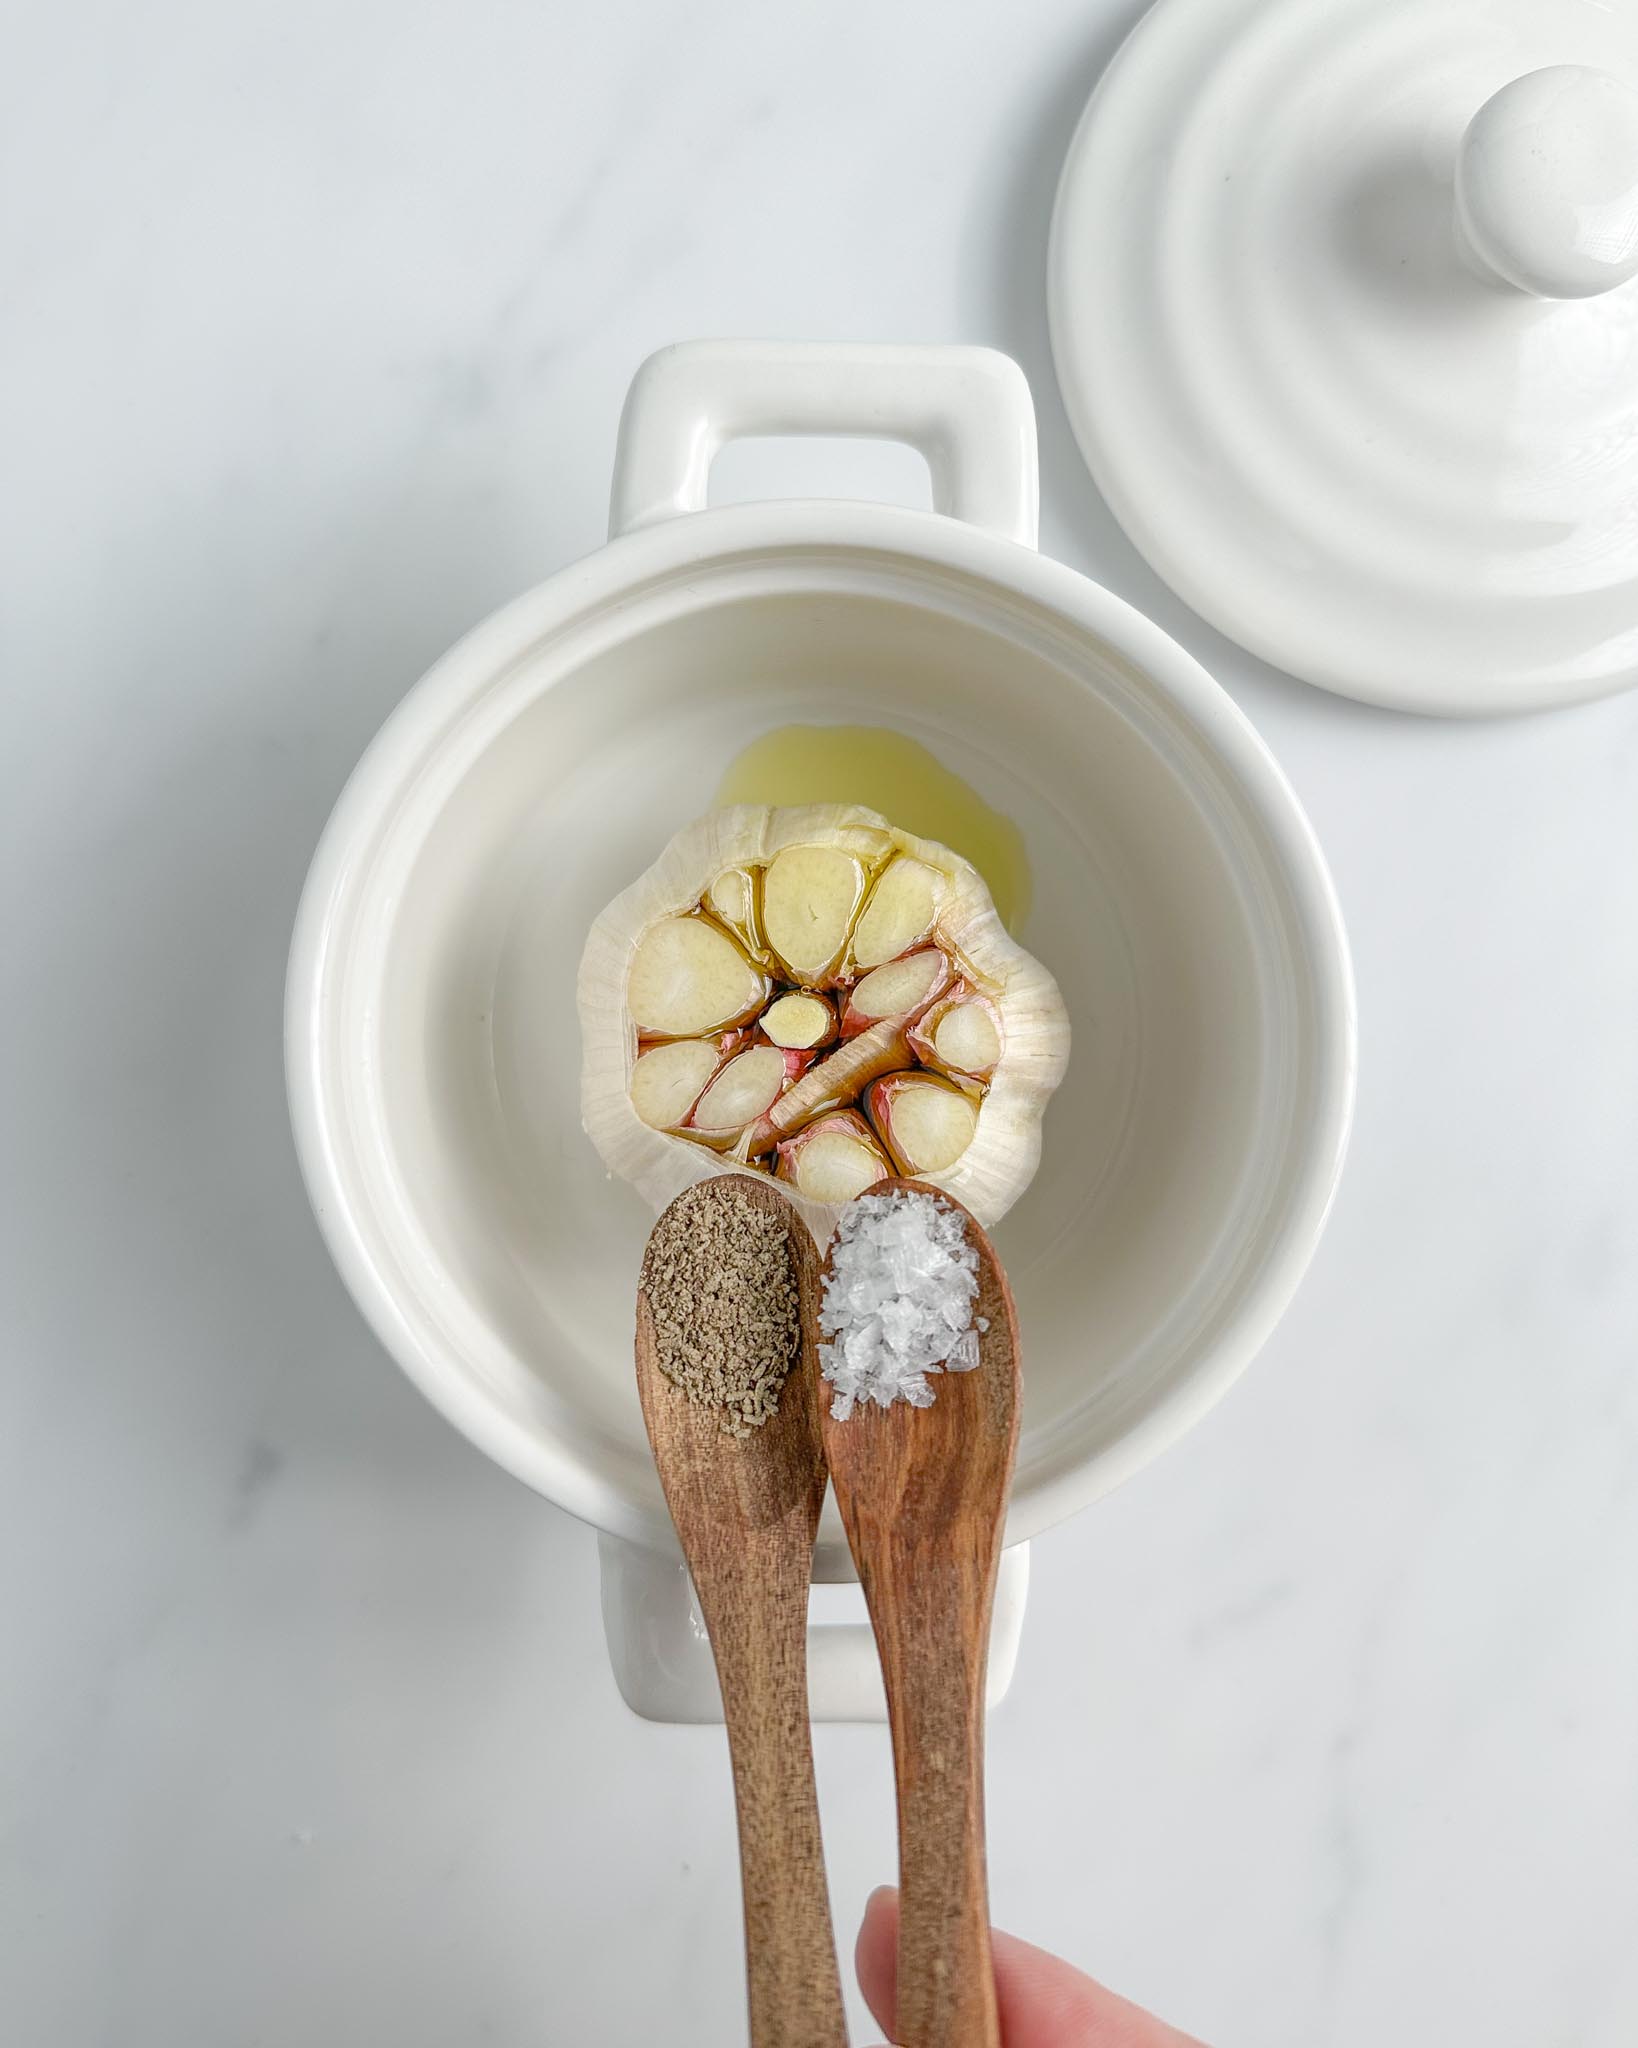
- Drizzle with olive oil, flaky salt, and pepper.
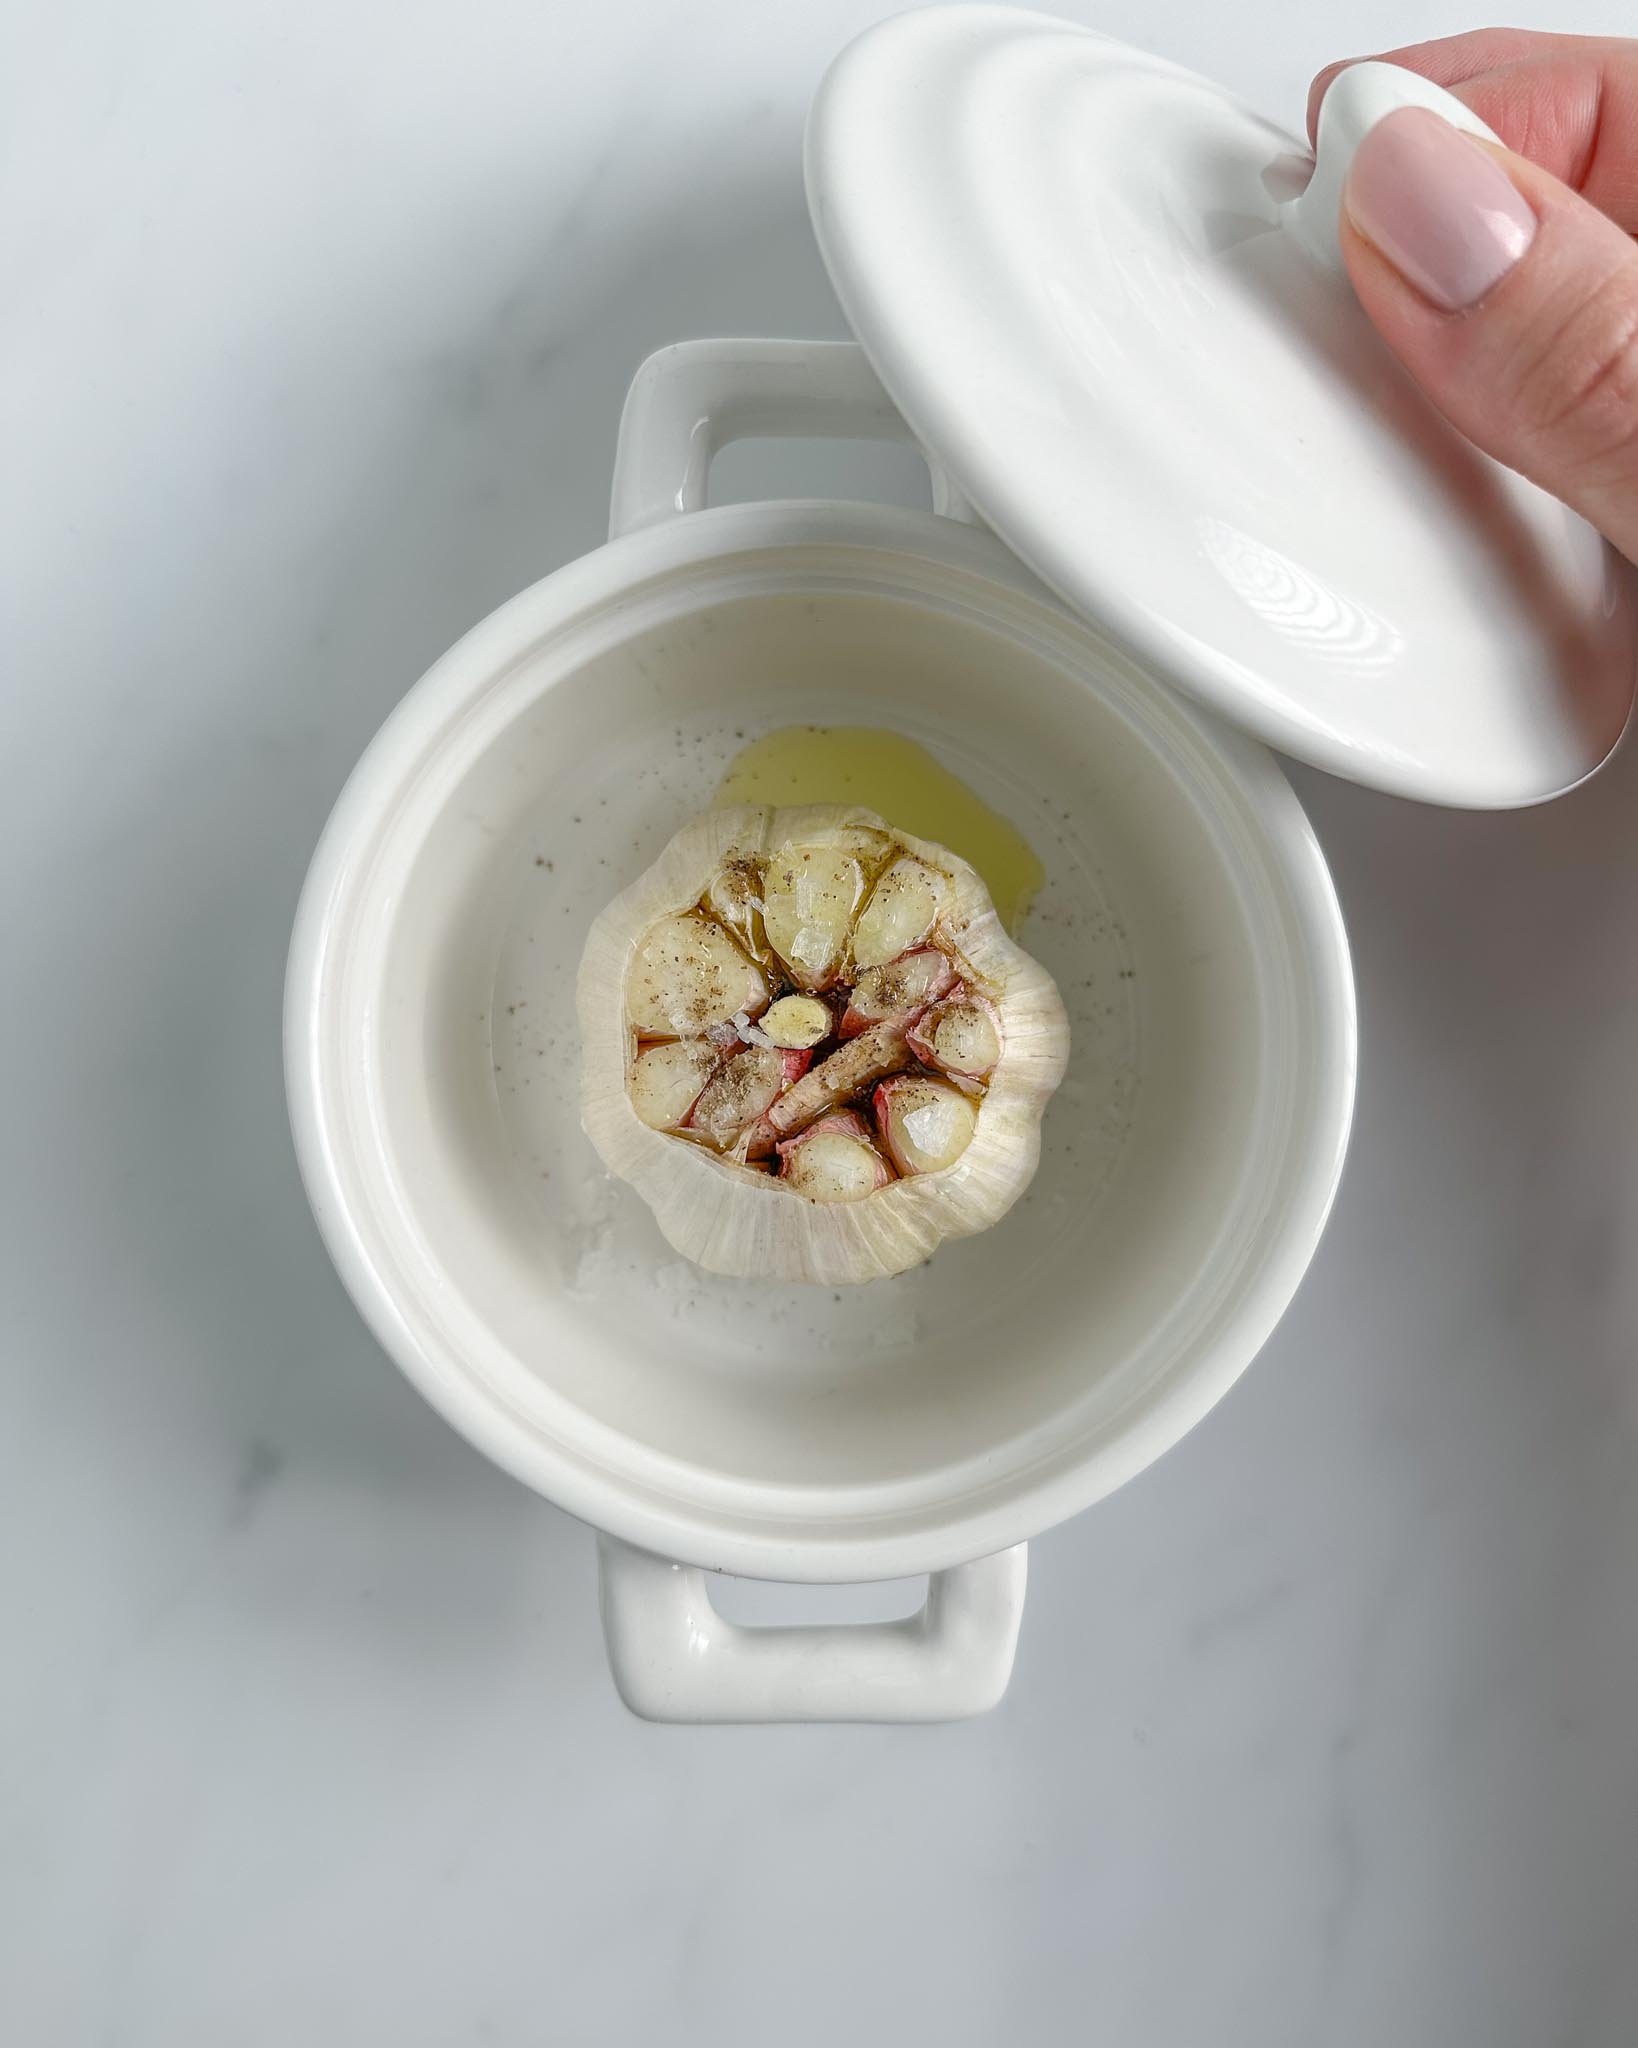
- Cover with a lid or wrap the whole garlic head in aluminum foil.
- Bake in a preheated oven at 350°F/180°C for 45-60 minutes, until the garlic cloves are soft as butter.
- Allow the garlic to cool completely.
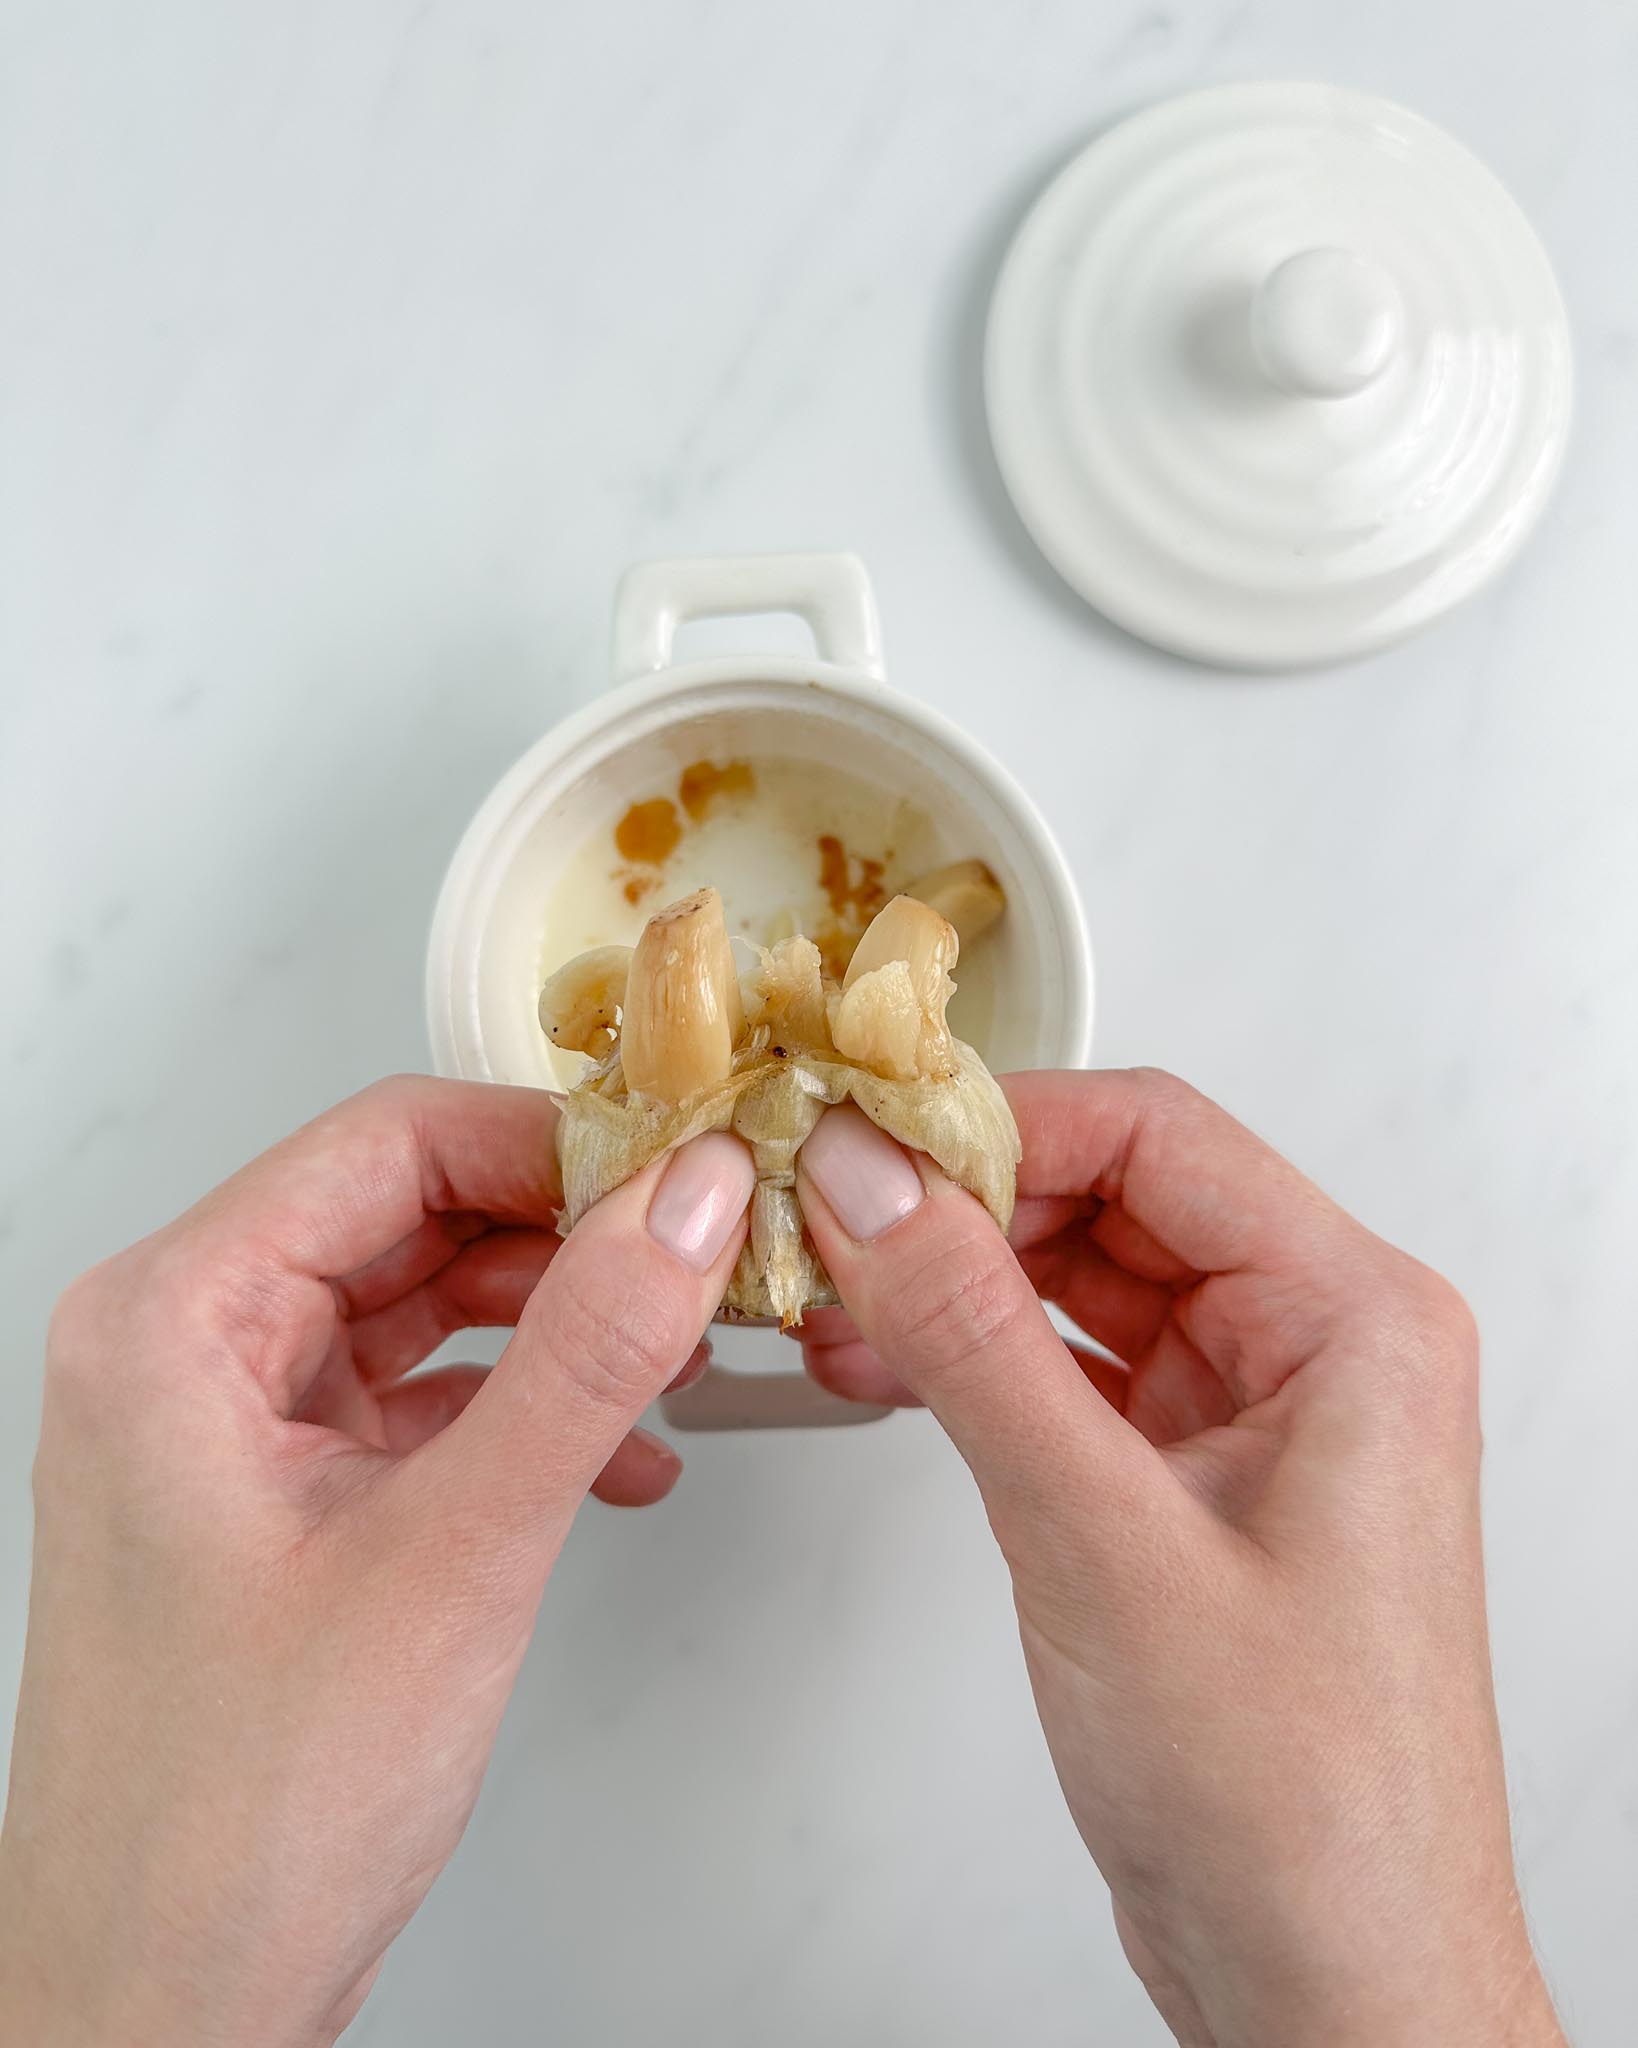
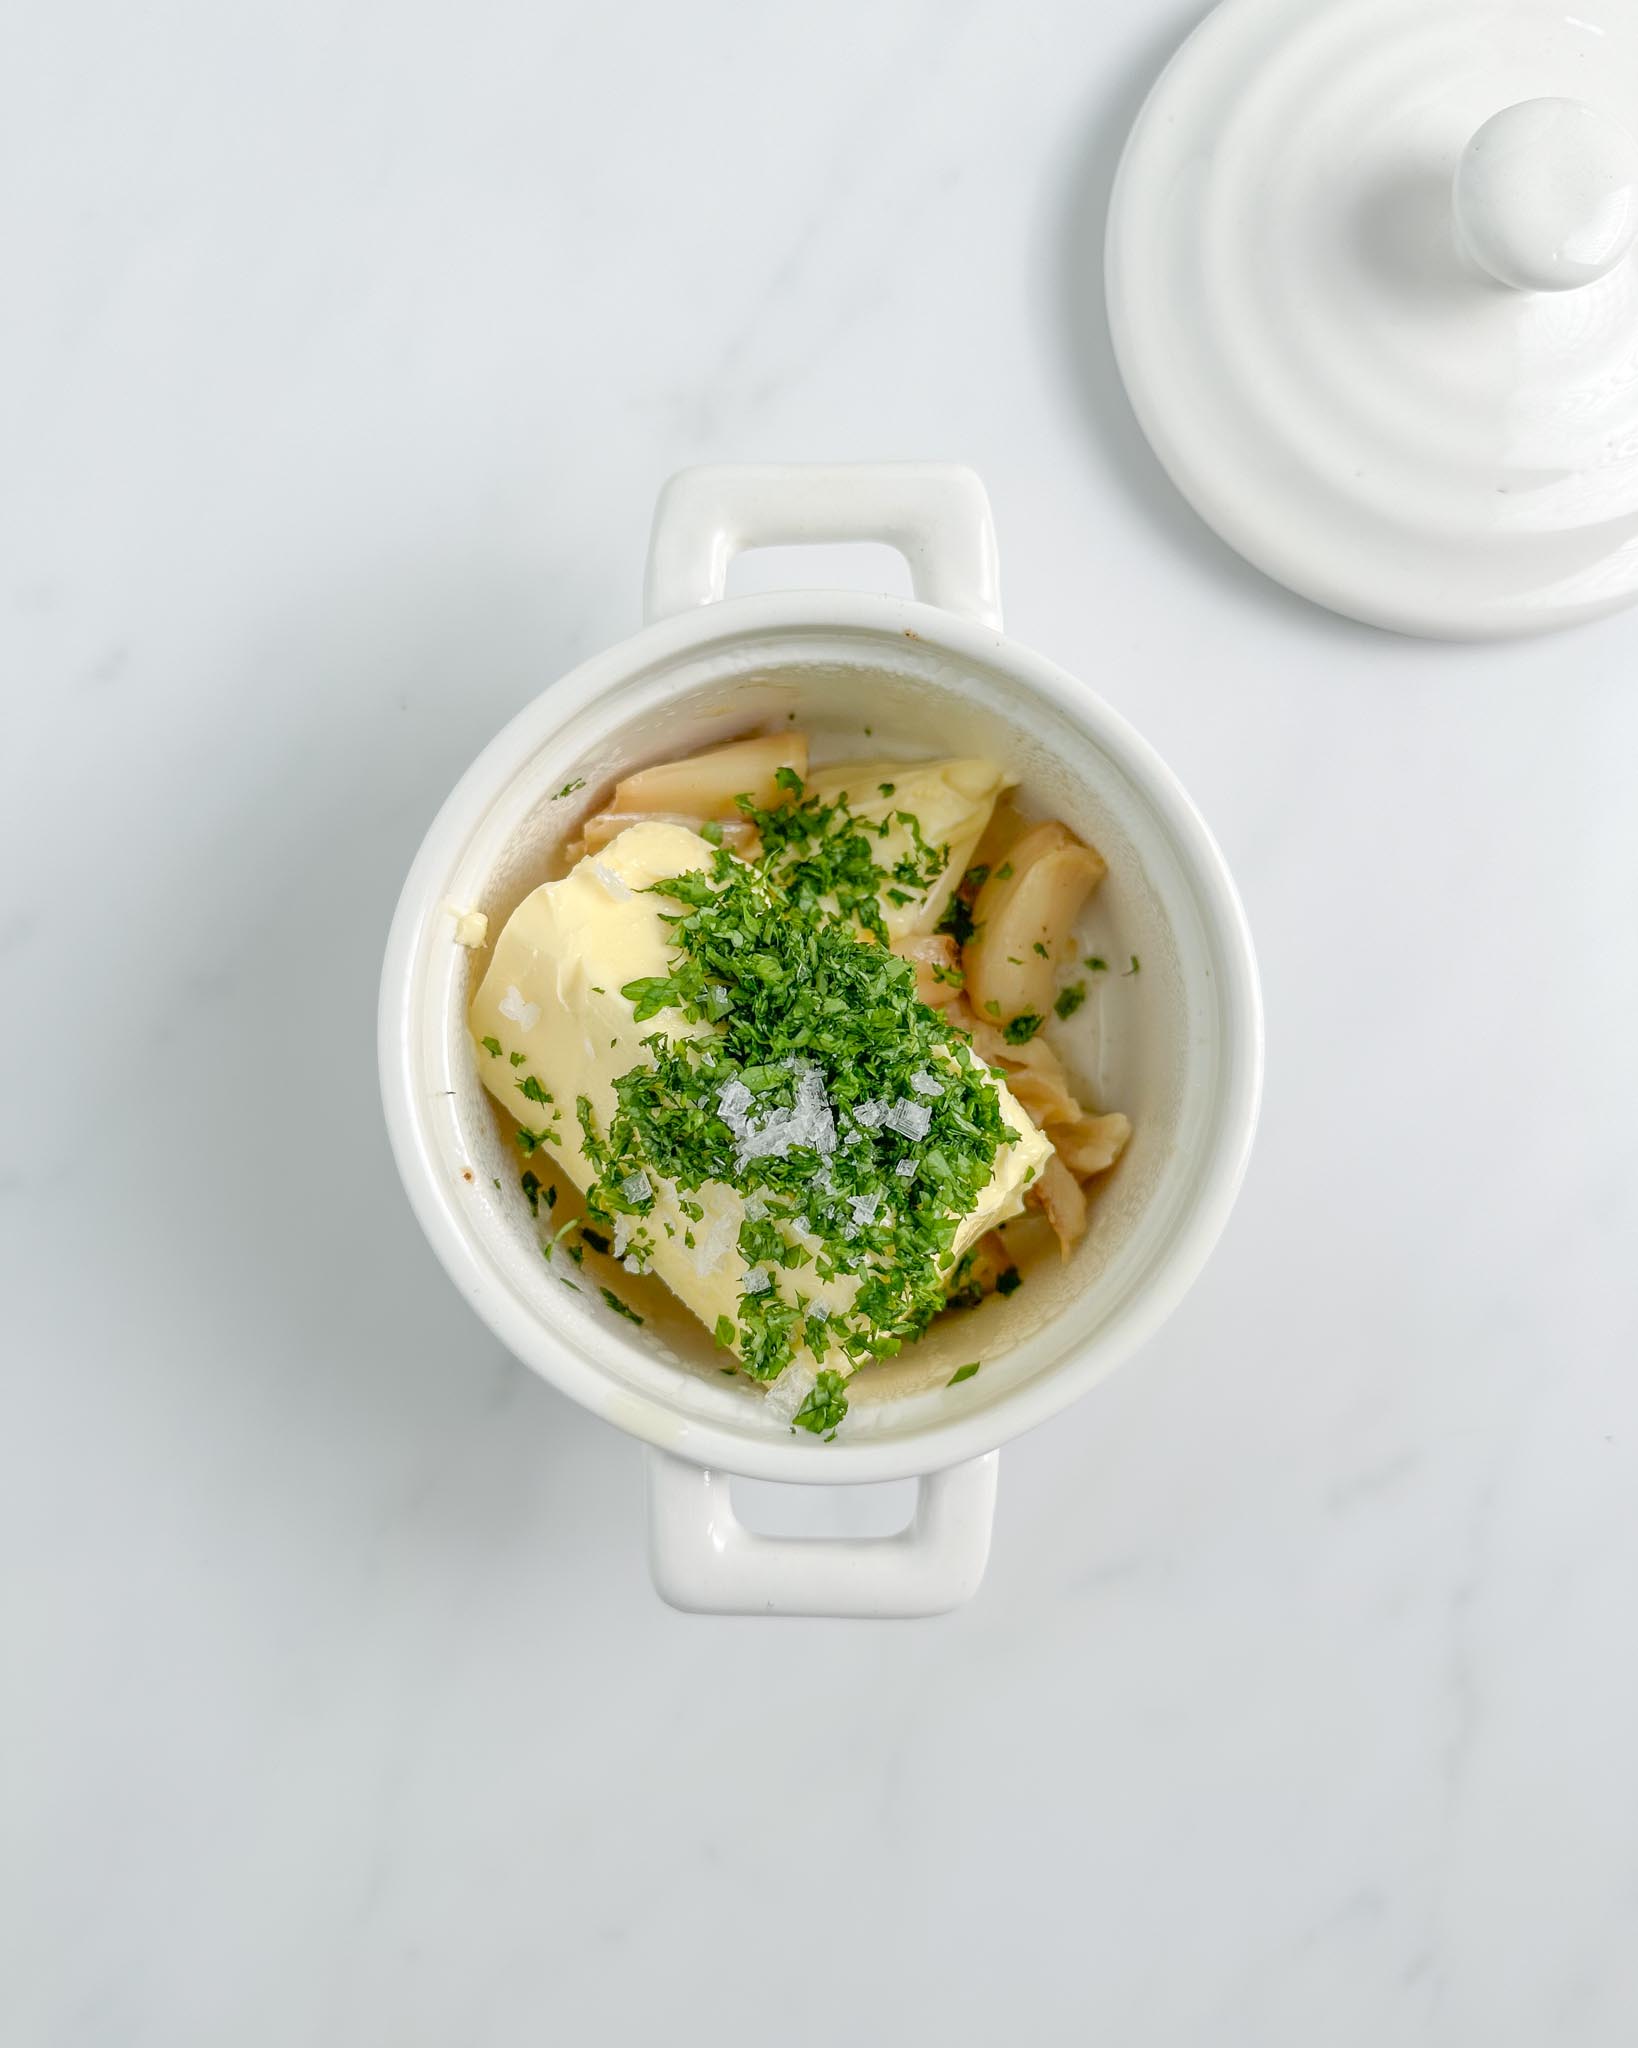
- Squeeze the garlic cloves into a bowl.
- Add softened butter, chopped parsley, and a sprinkle of salt.
- Mix with a fork until smooth.
How to shape Cheesy Pull-apart garlic bread
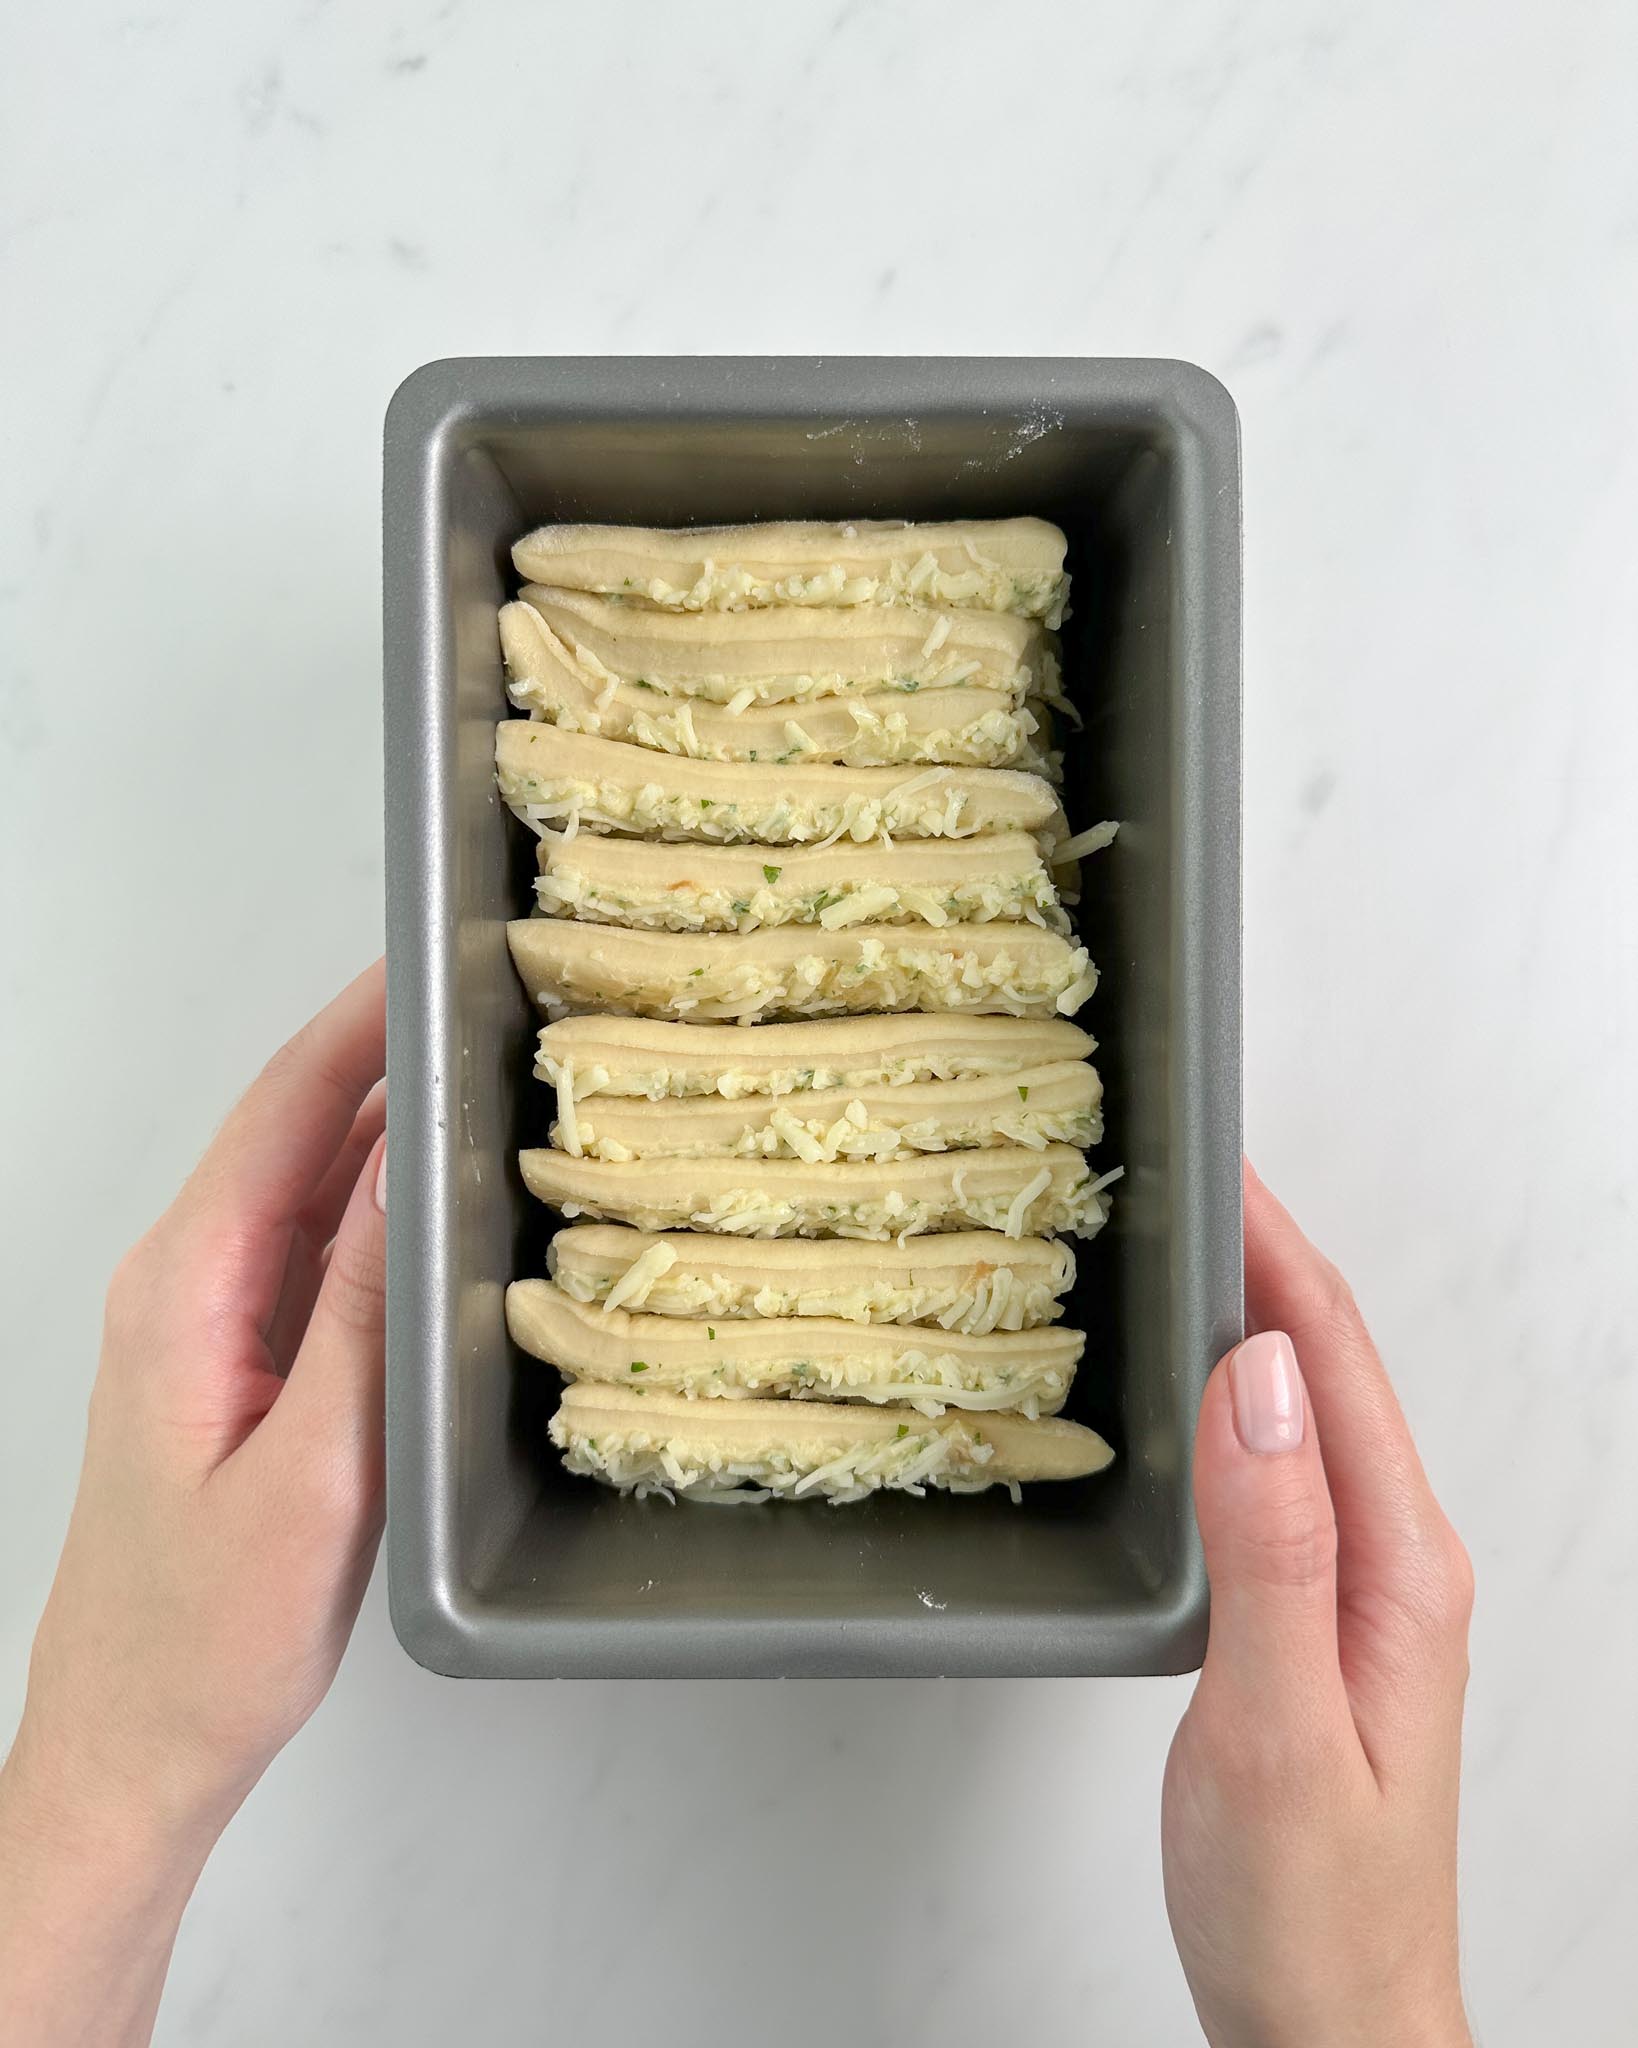
When you have made the roasted garlic butter, and your dough has doubled in size, you’re ready to shape the Cheesy Pull-Apart Garlic Bread. Here’s how:
Scroll to view all images.
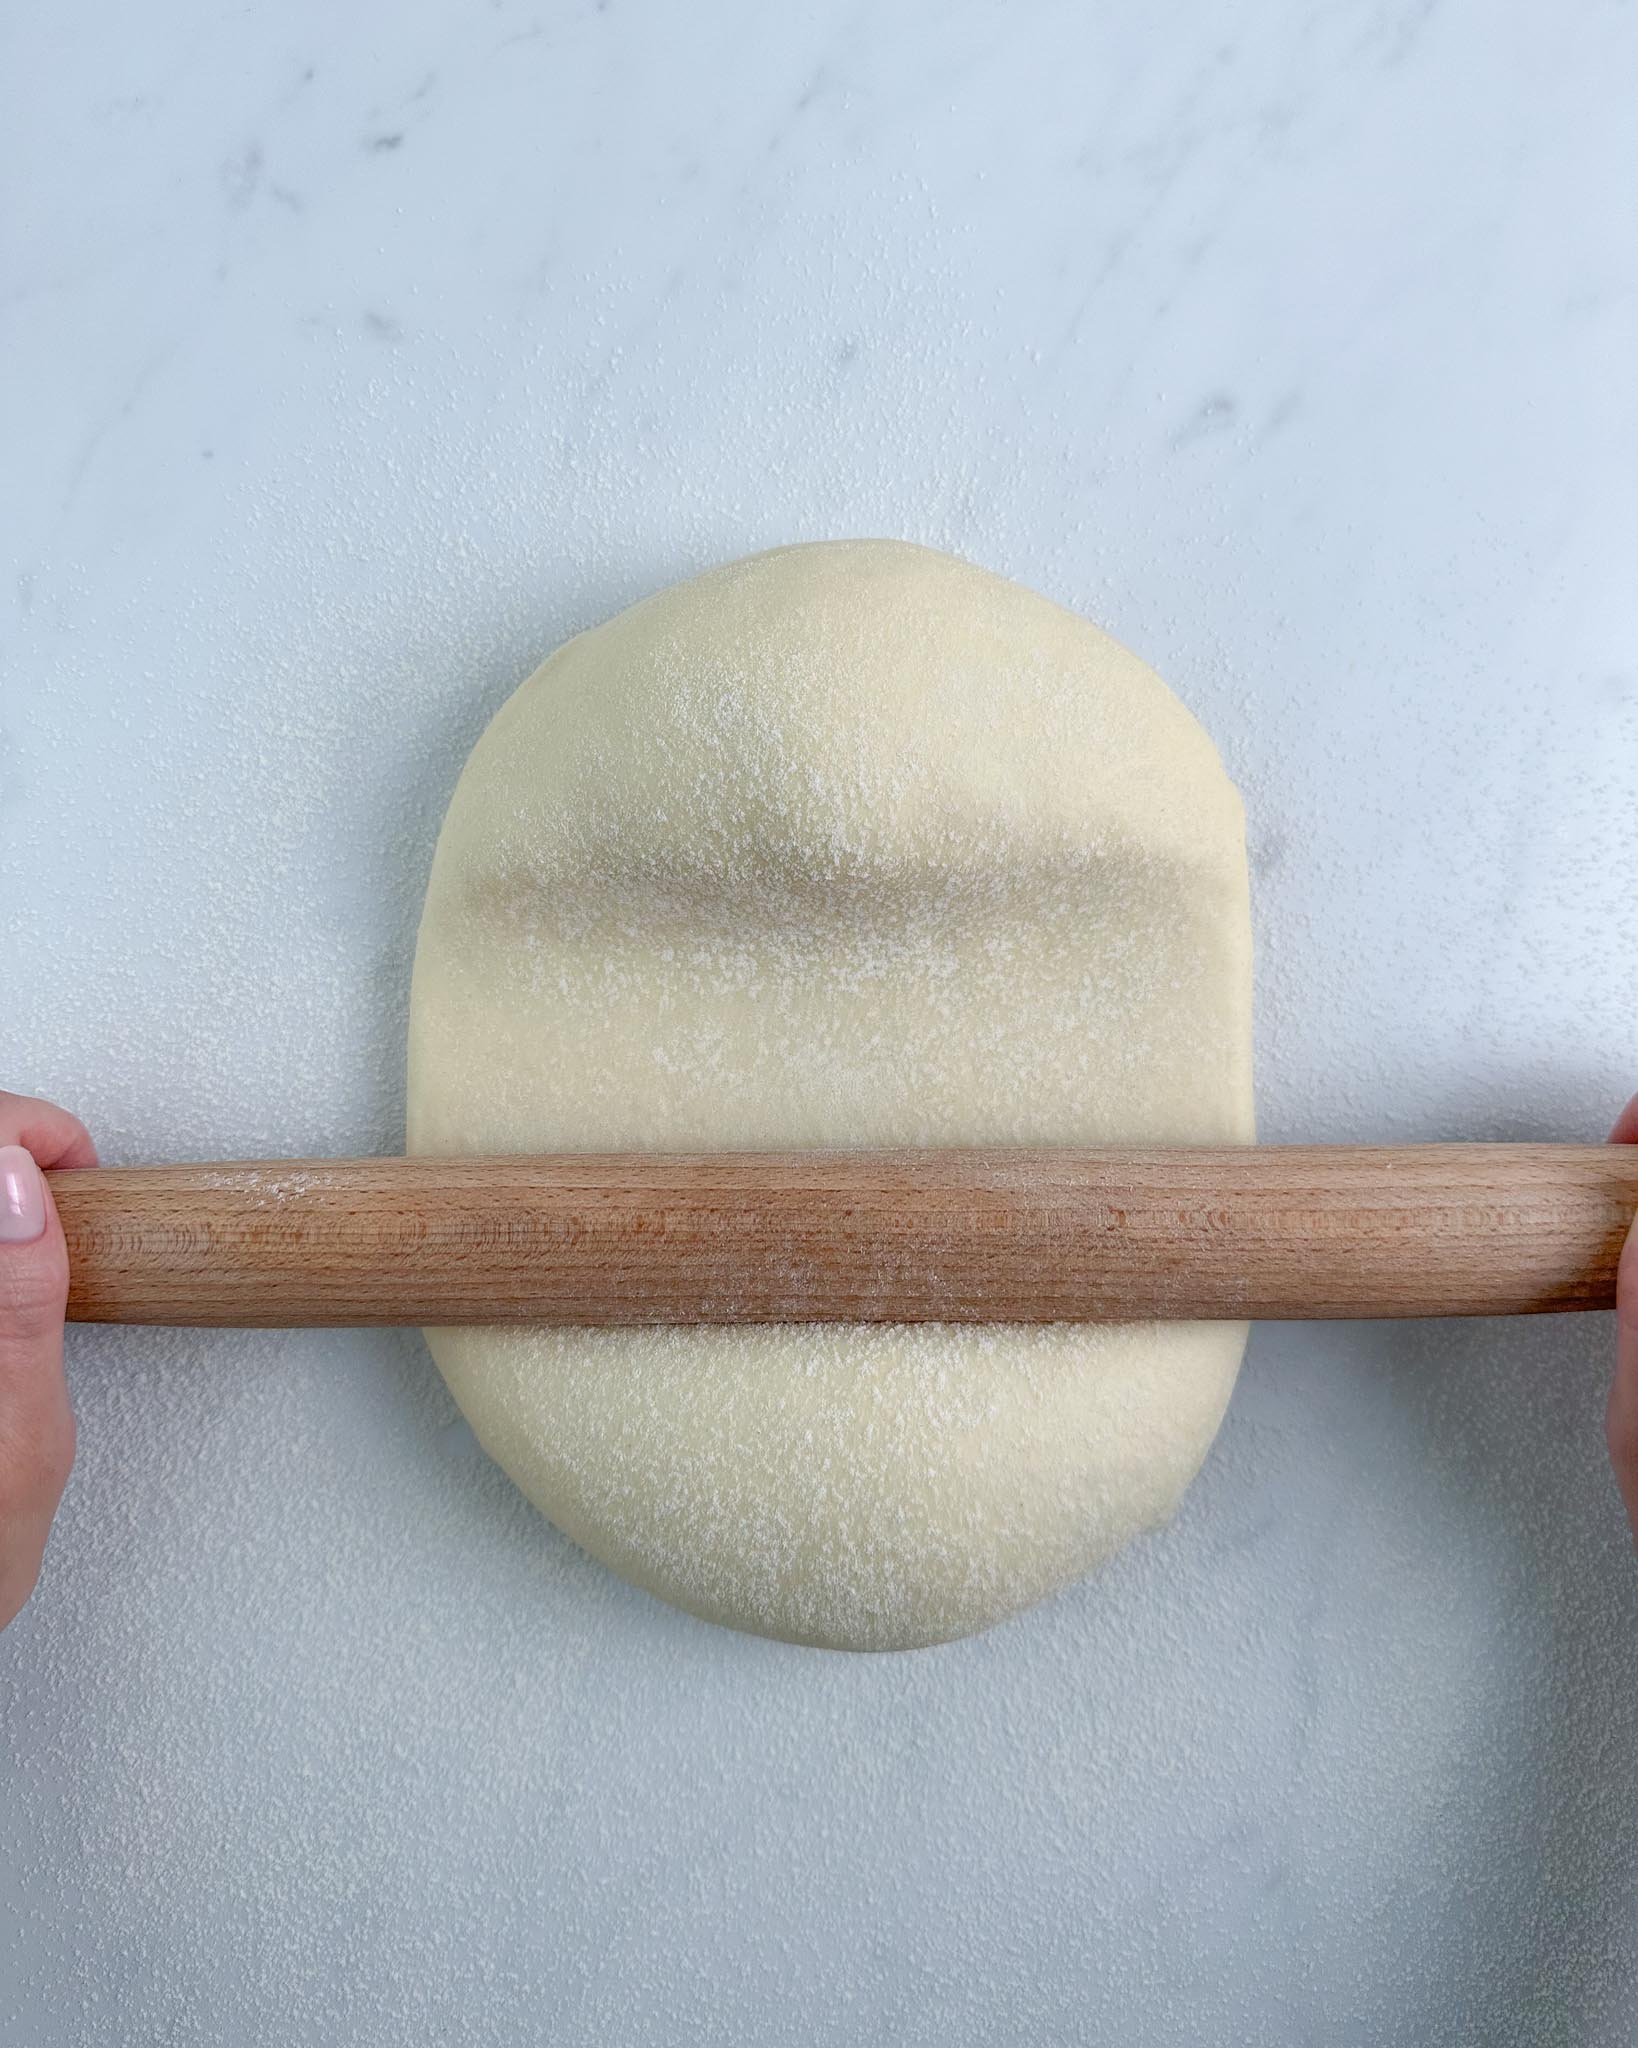
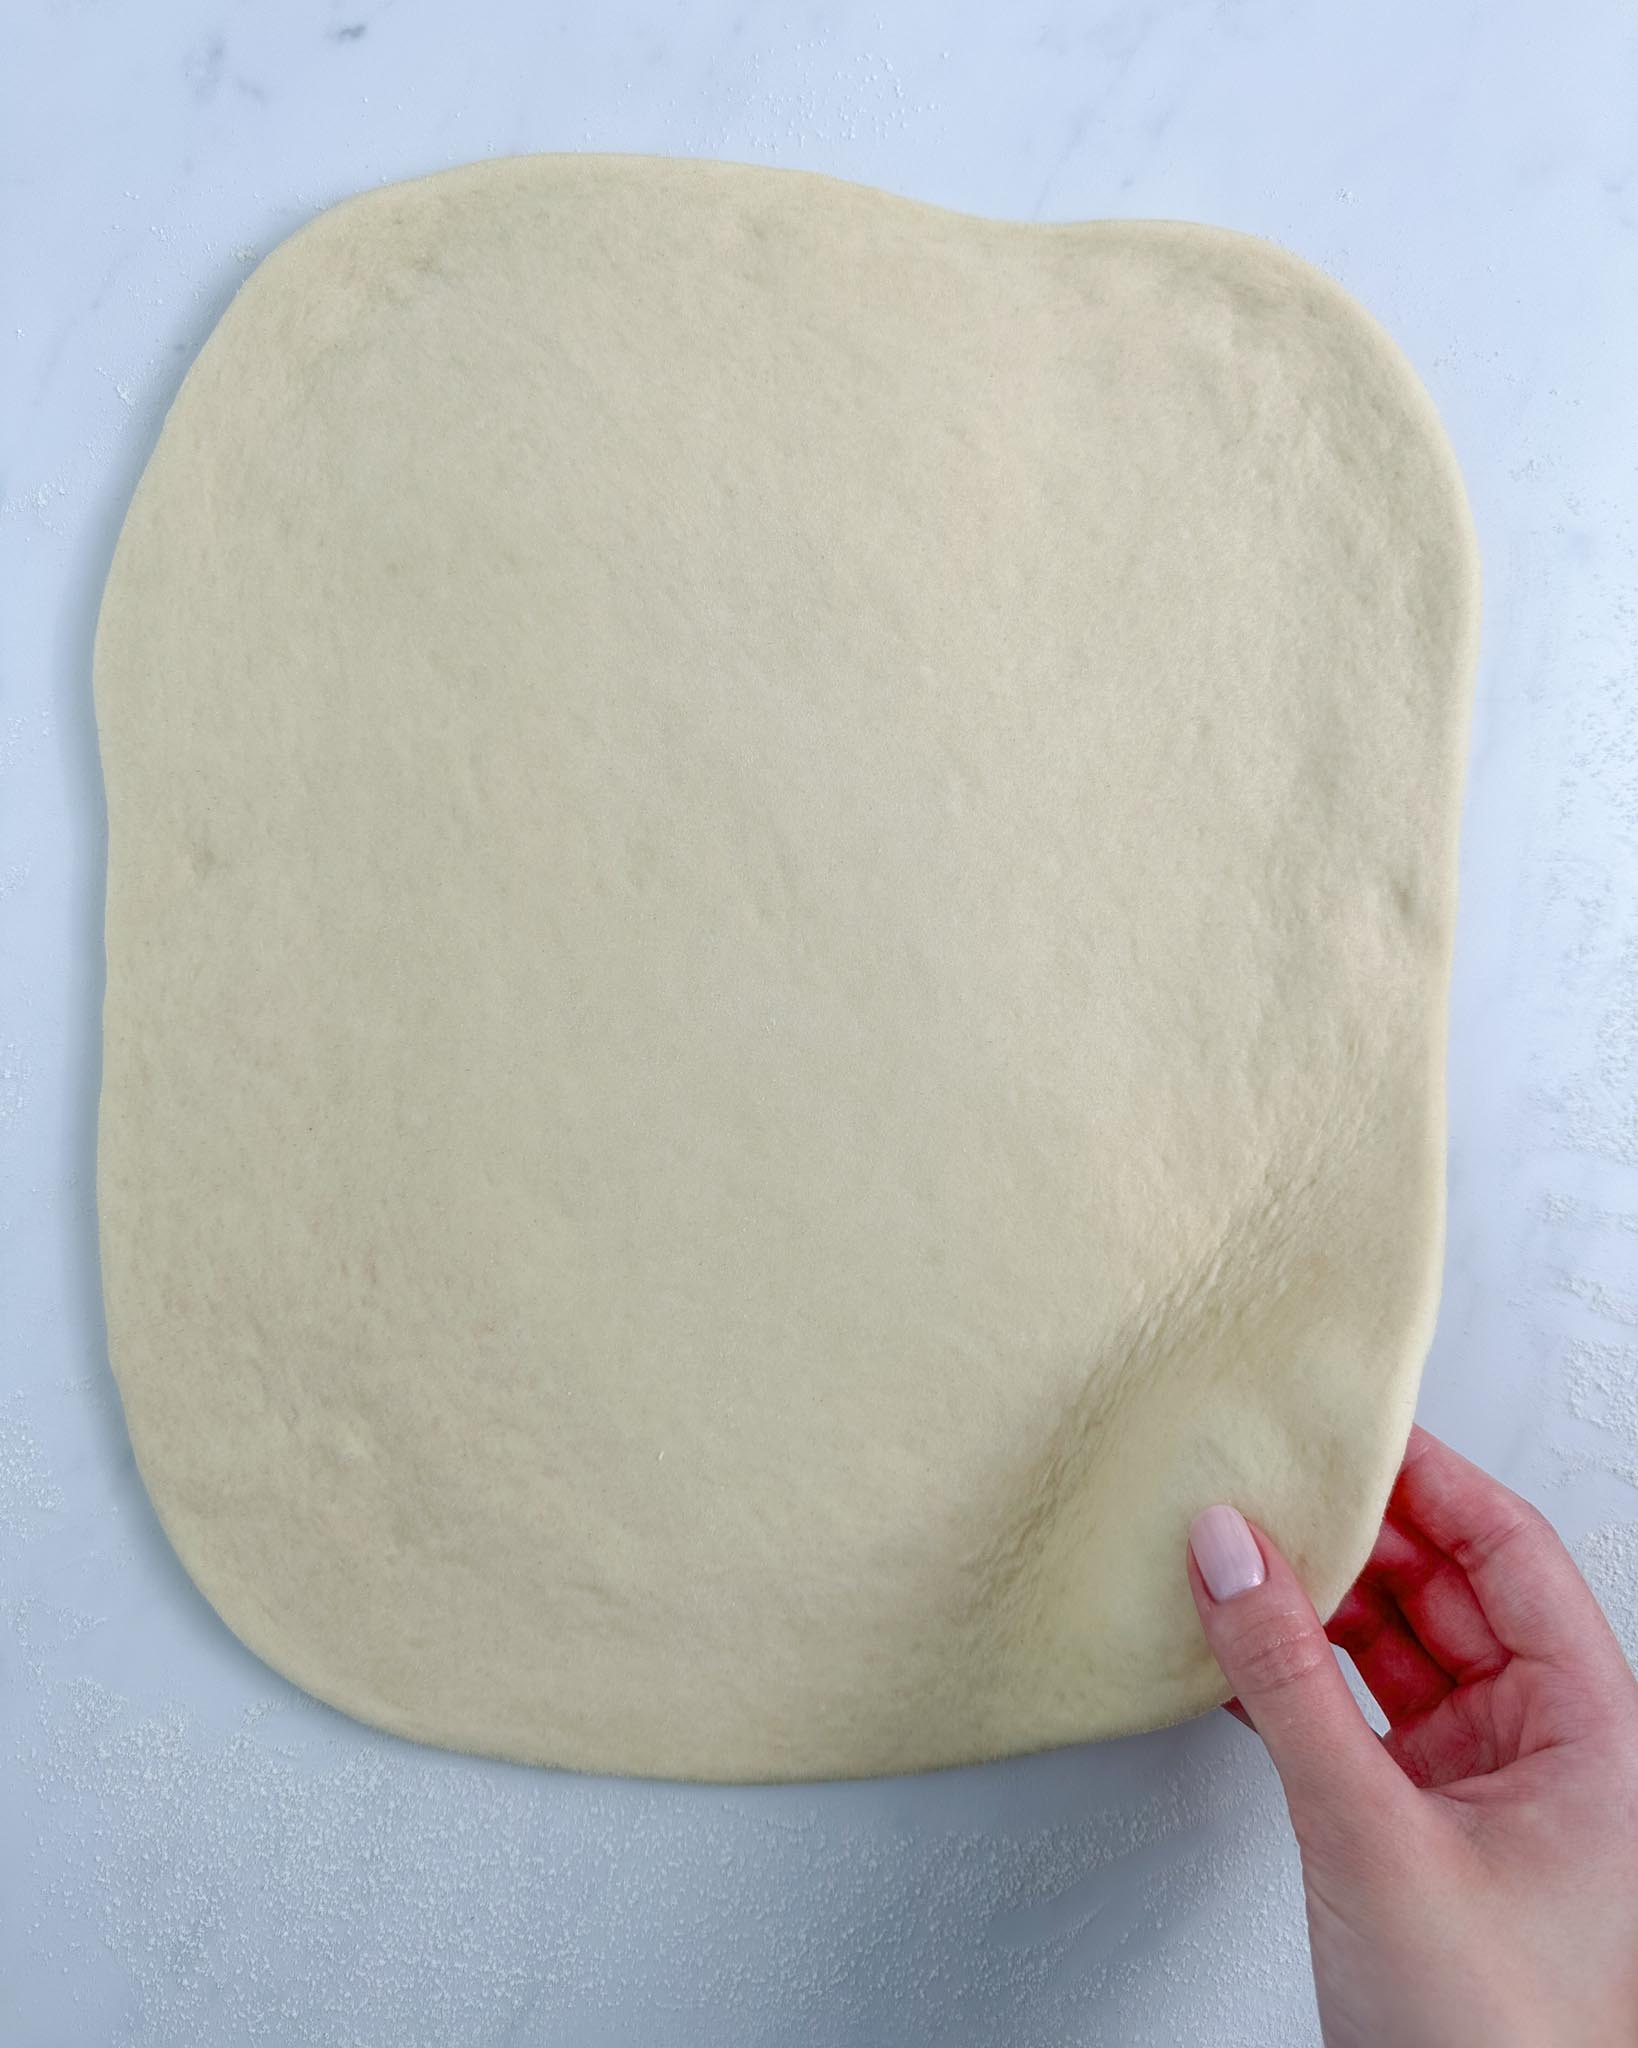
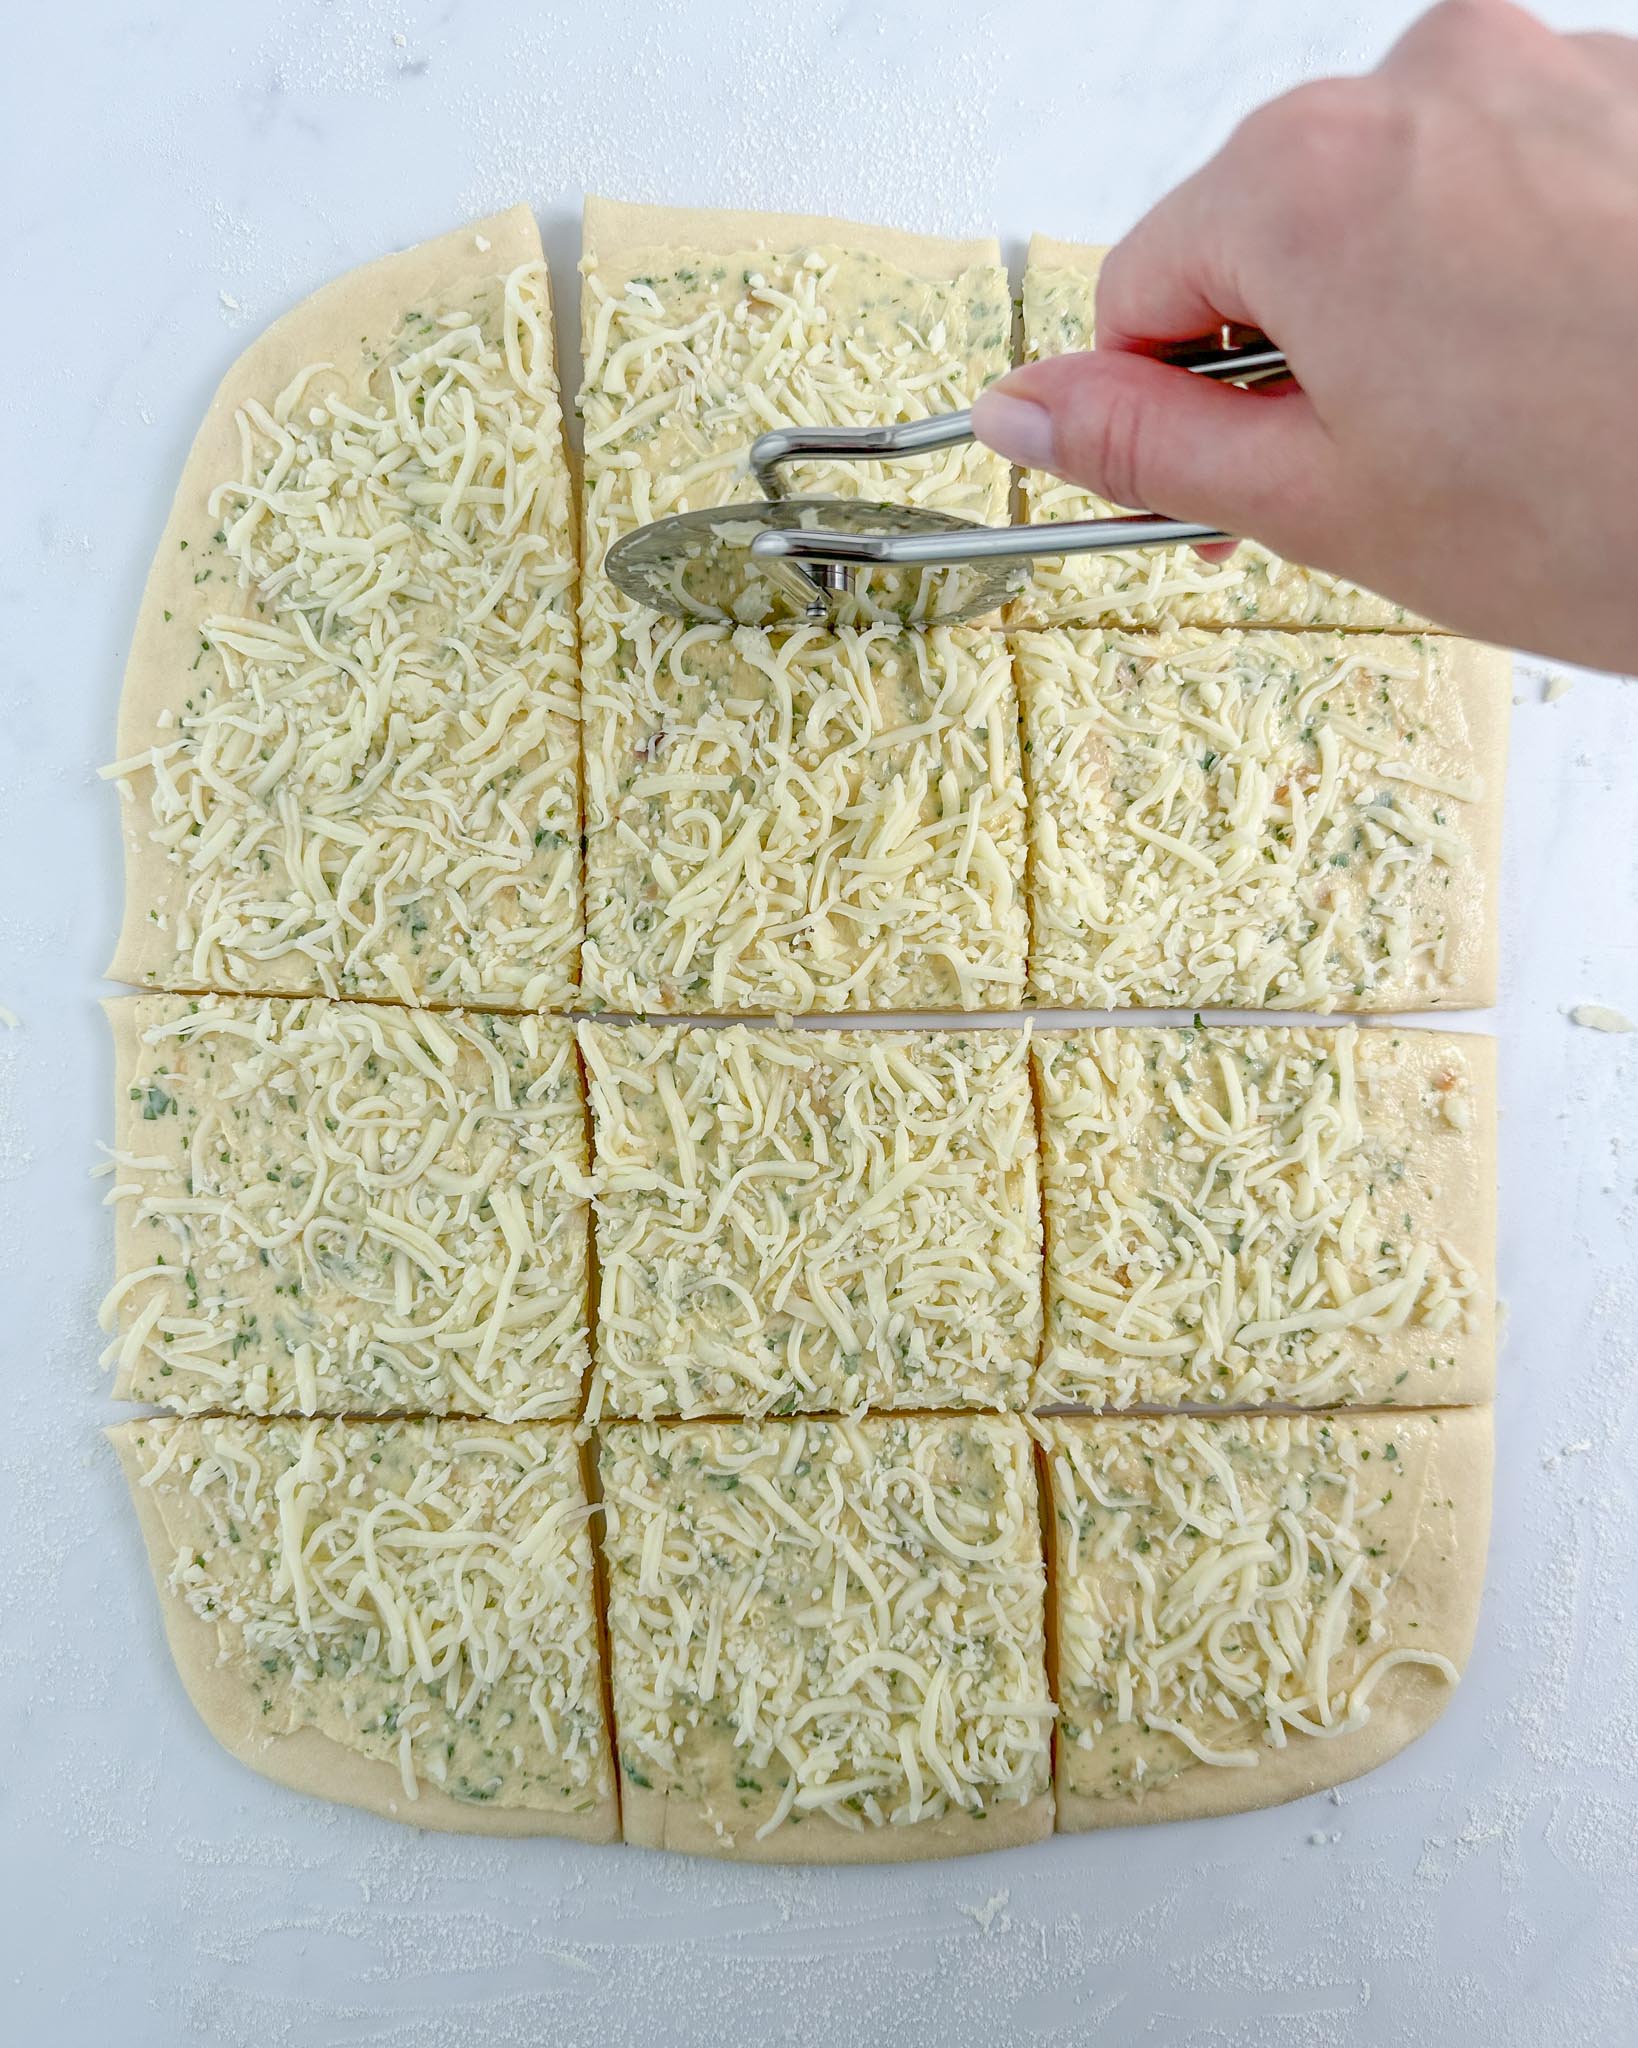
- First, lightly flour your work surface and the top of the dough.
- With a rolling pin, roll out the dough to a 12×12-inch square
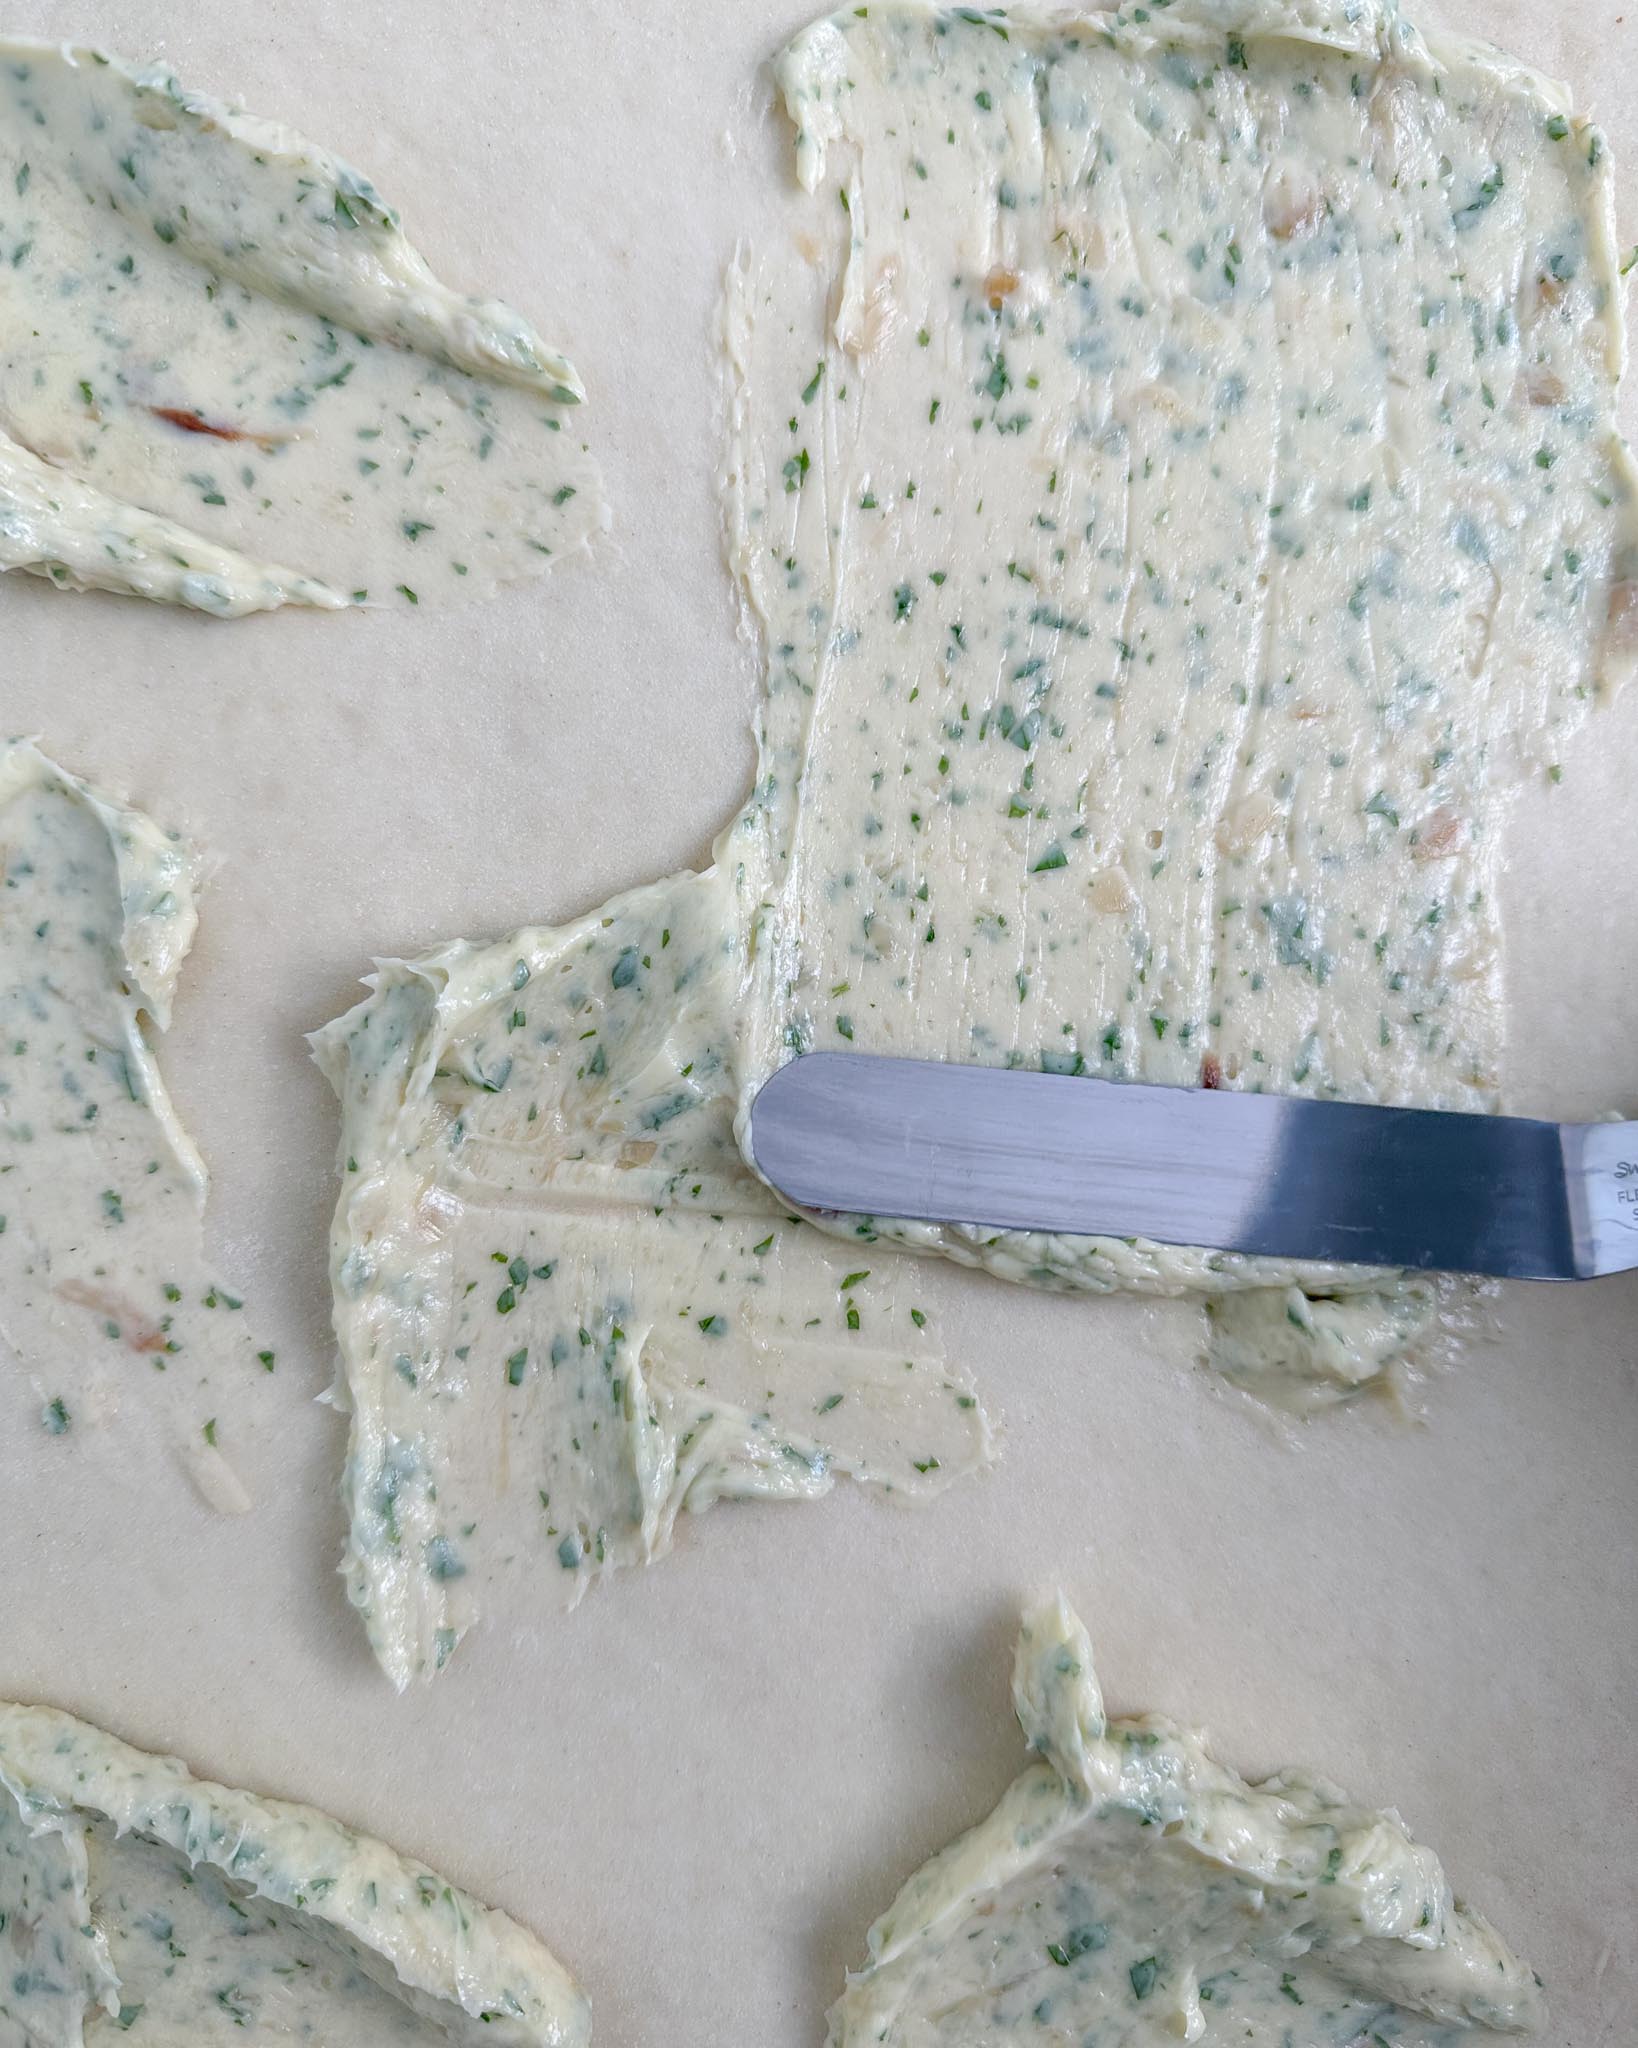
- Evenly spread garlic butter on top using an offset spatula.
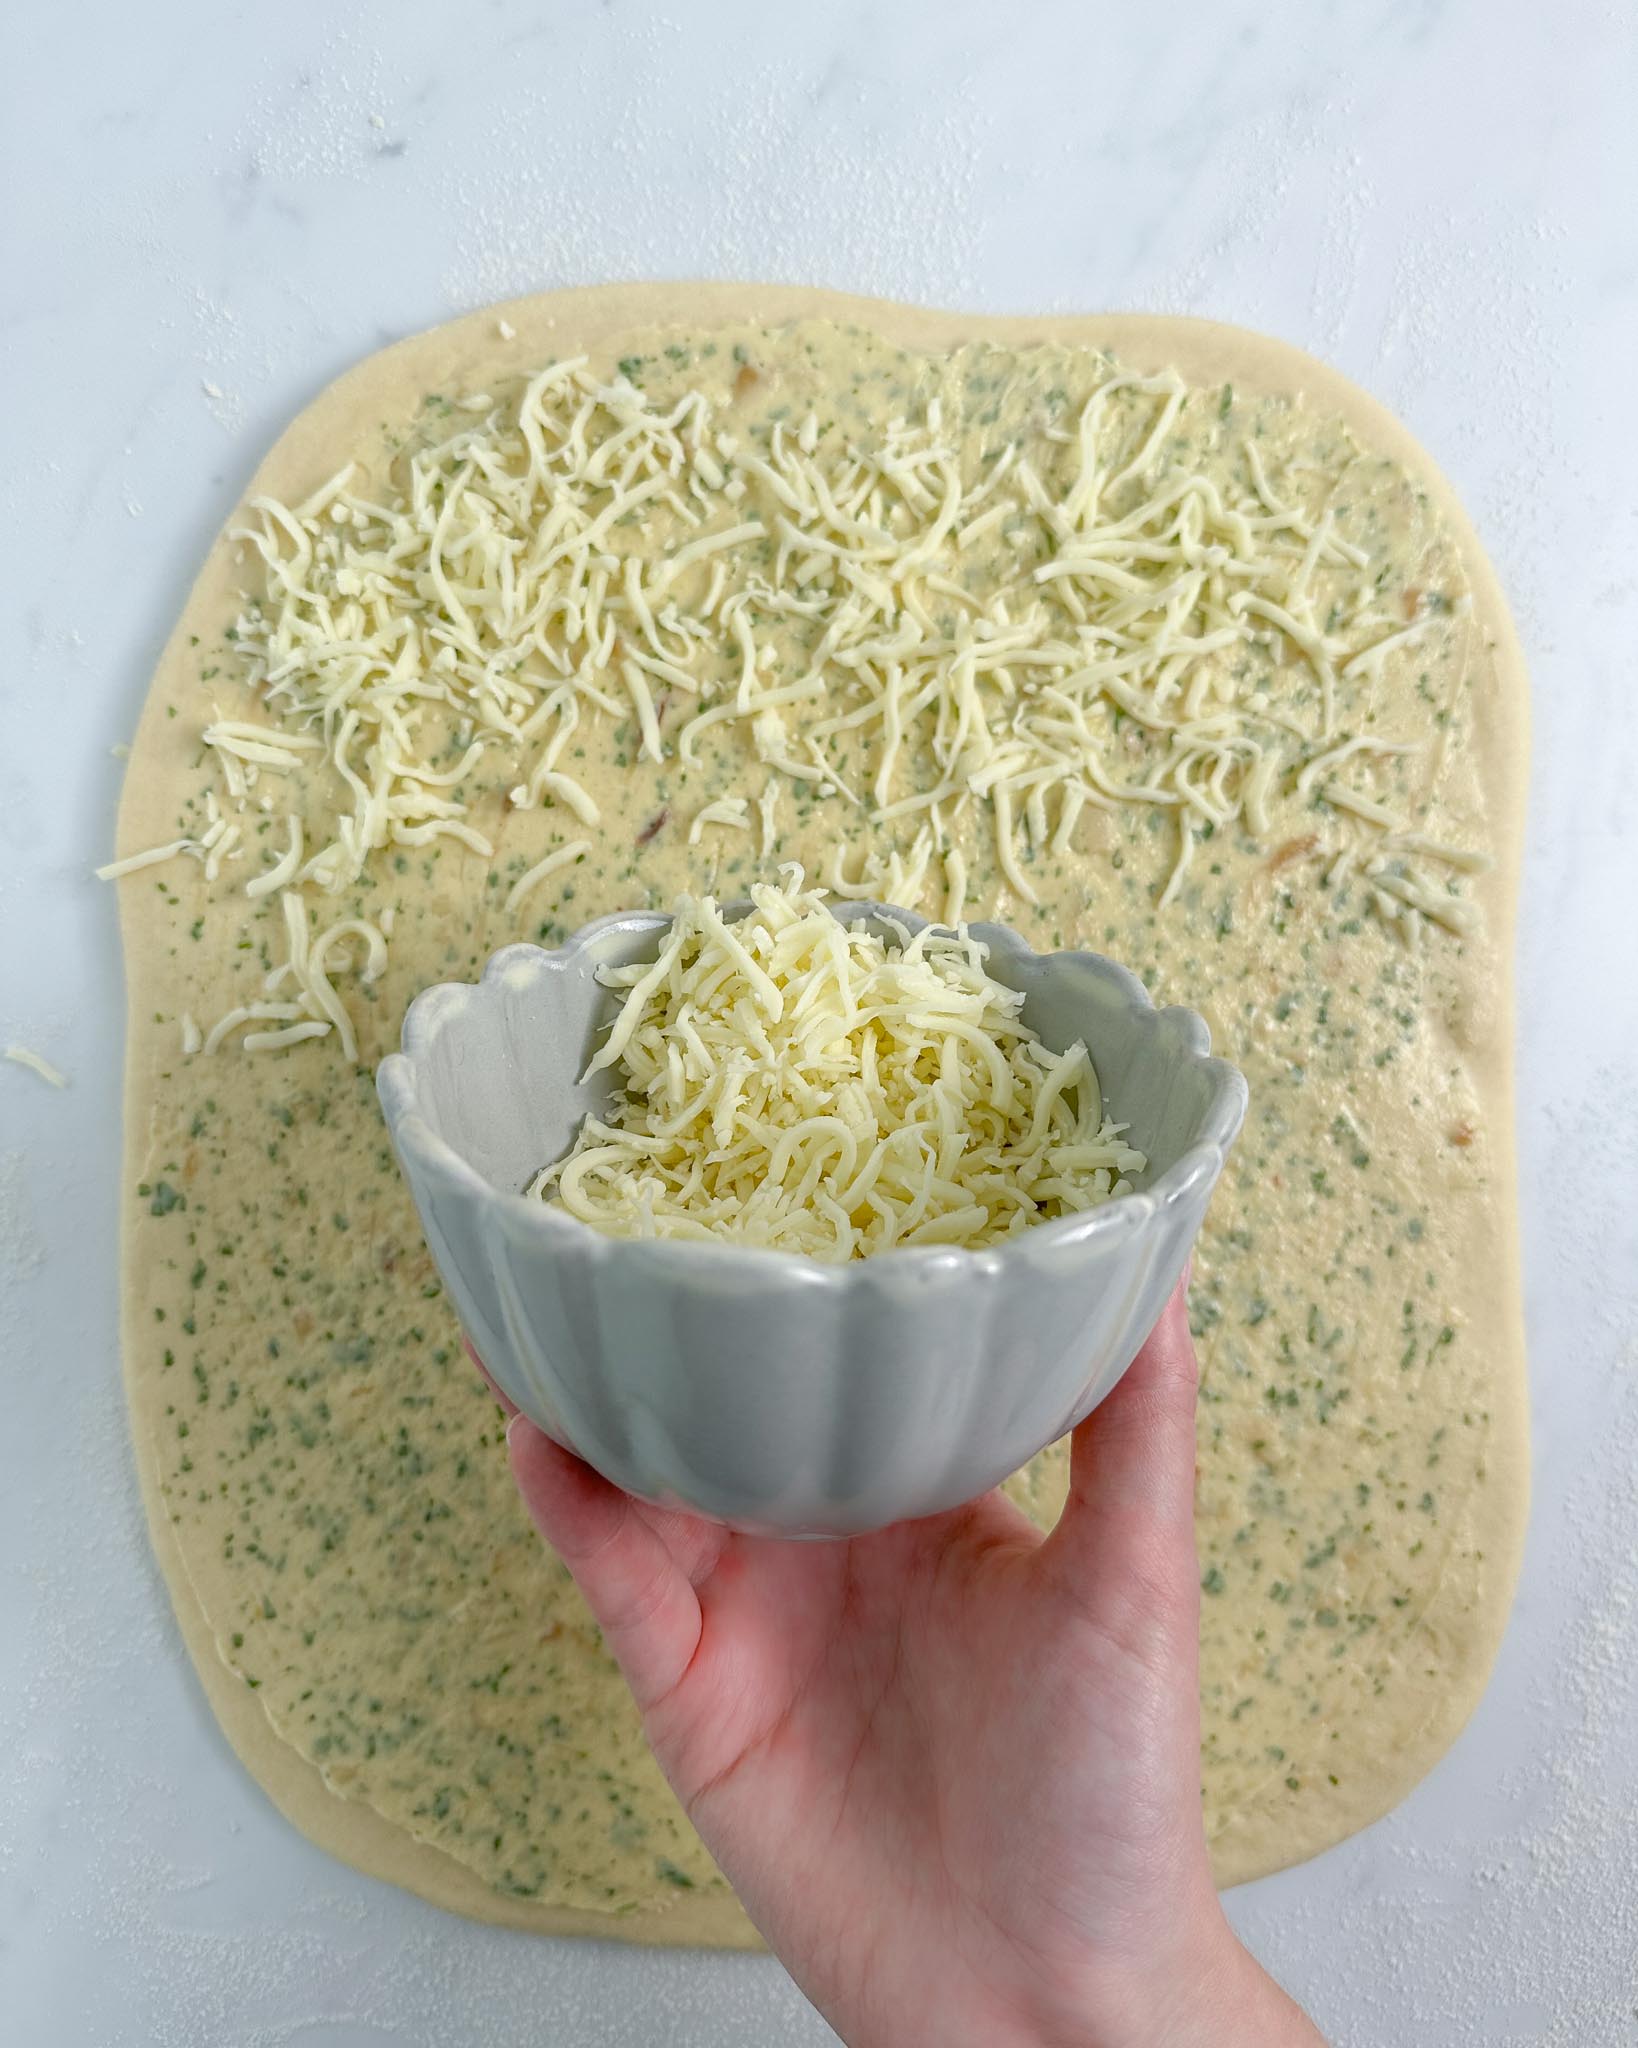
- Add grated mozzarella.
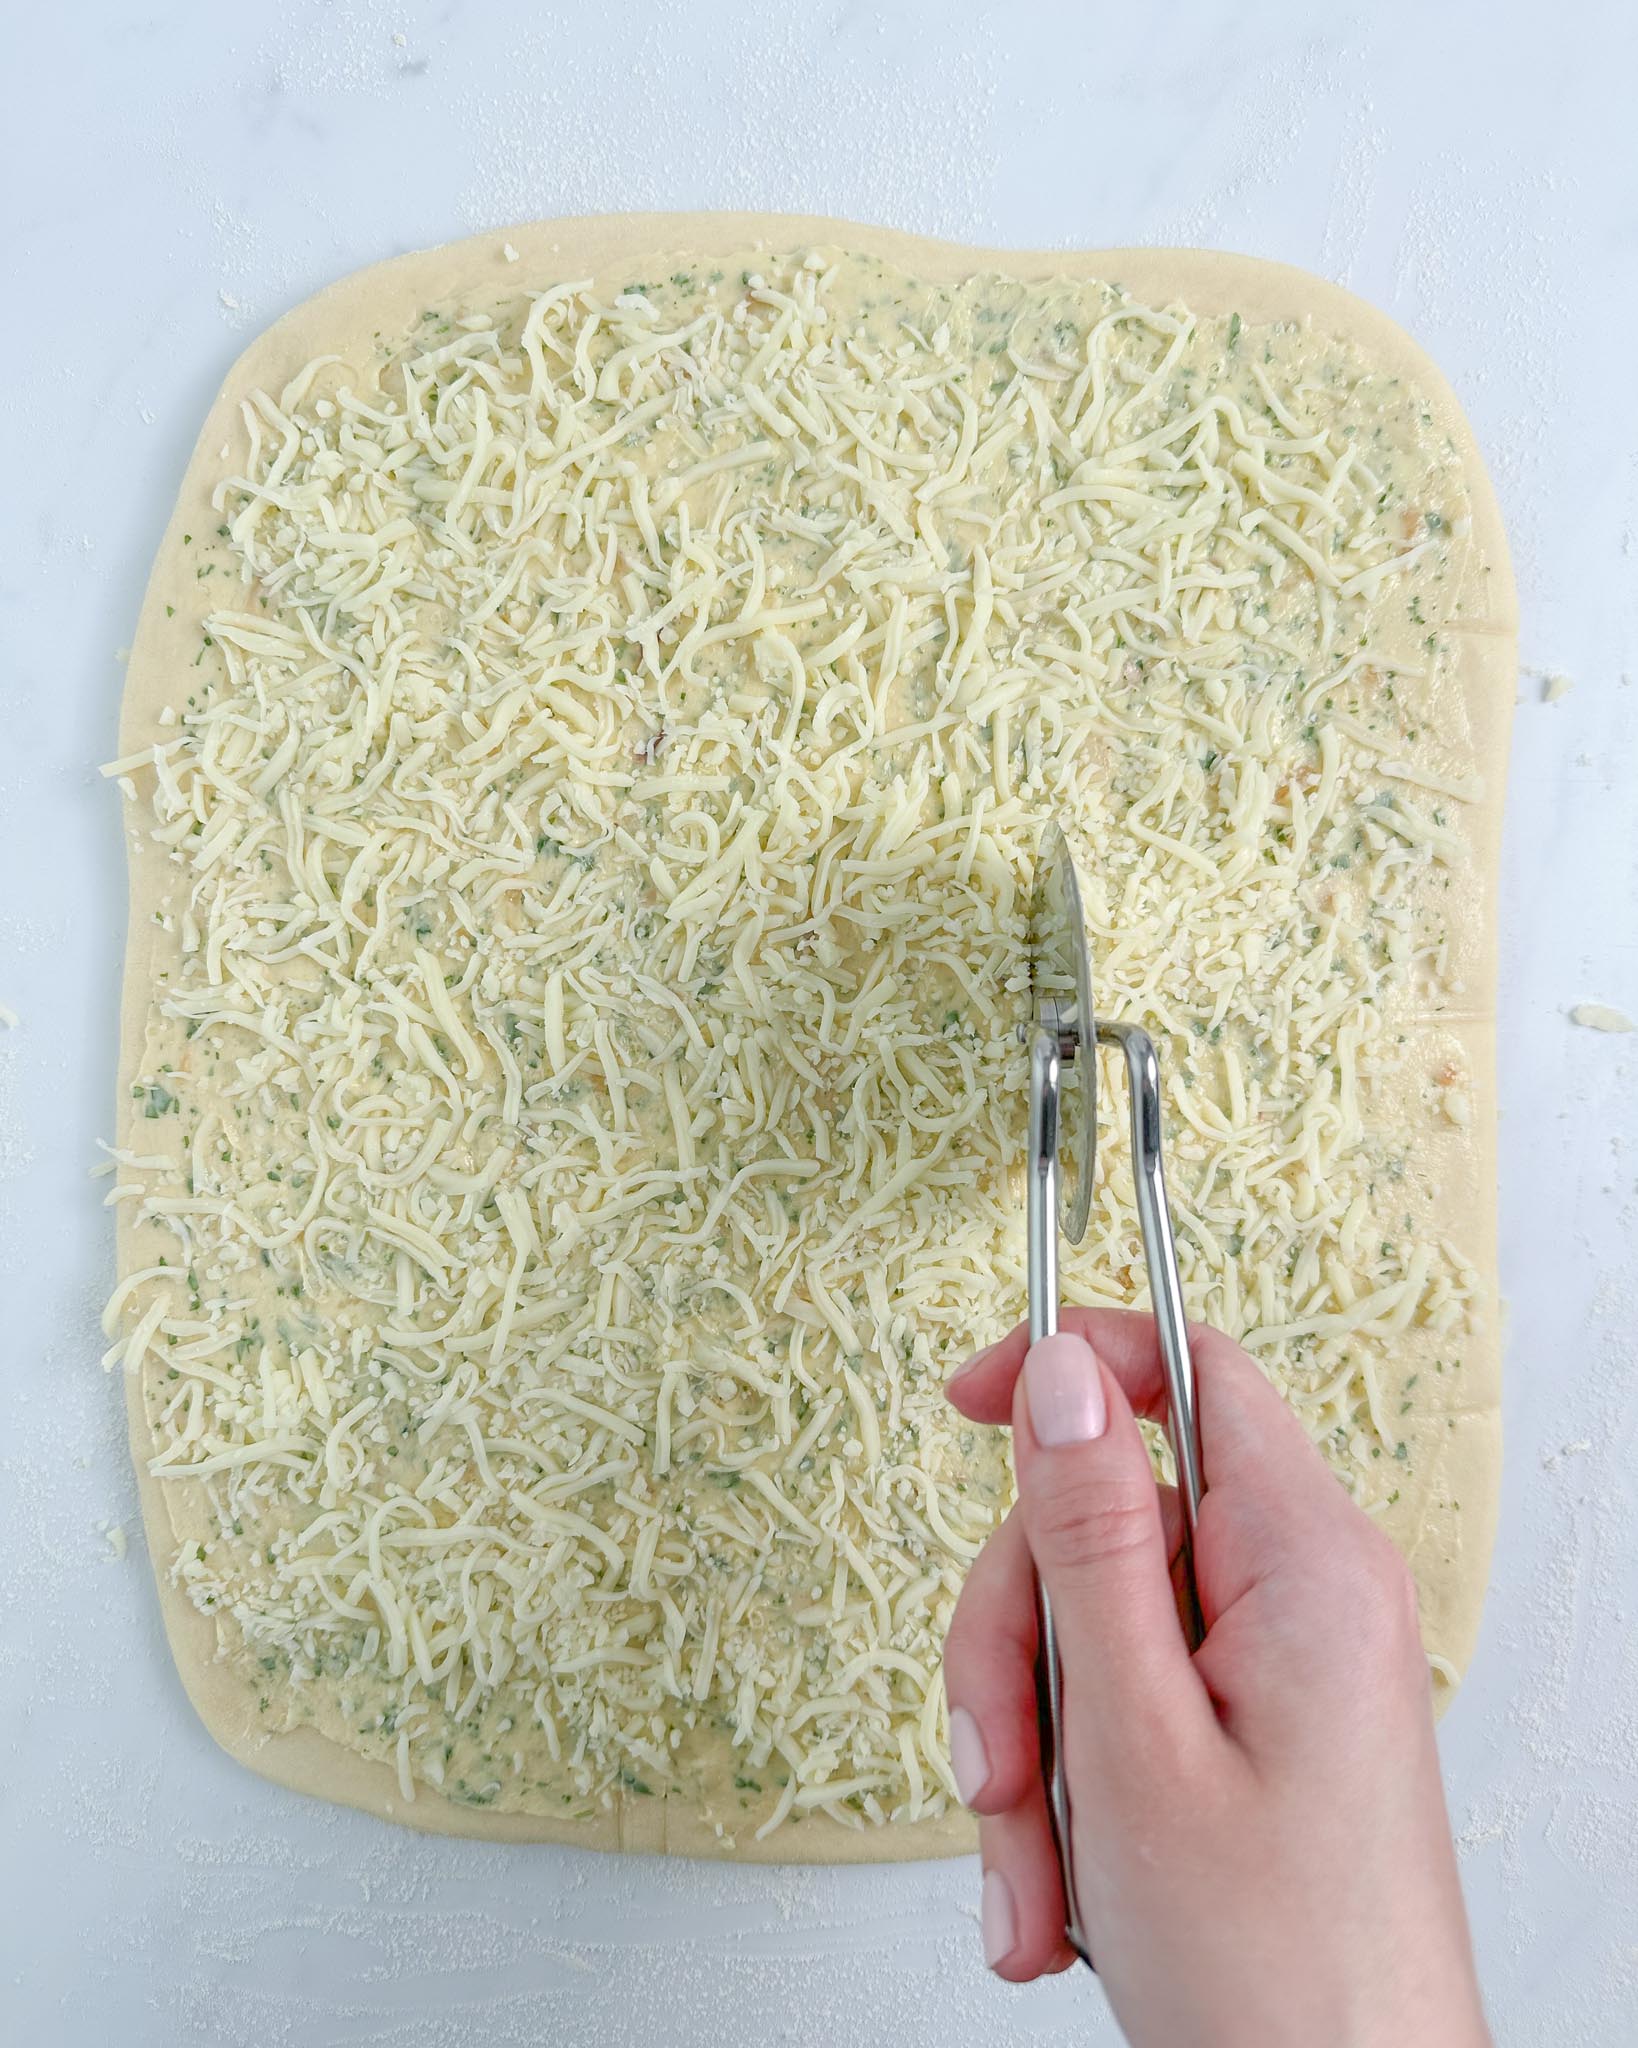
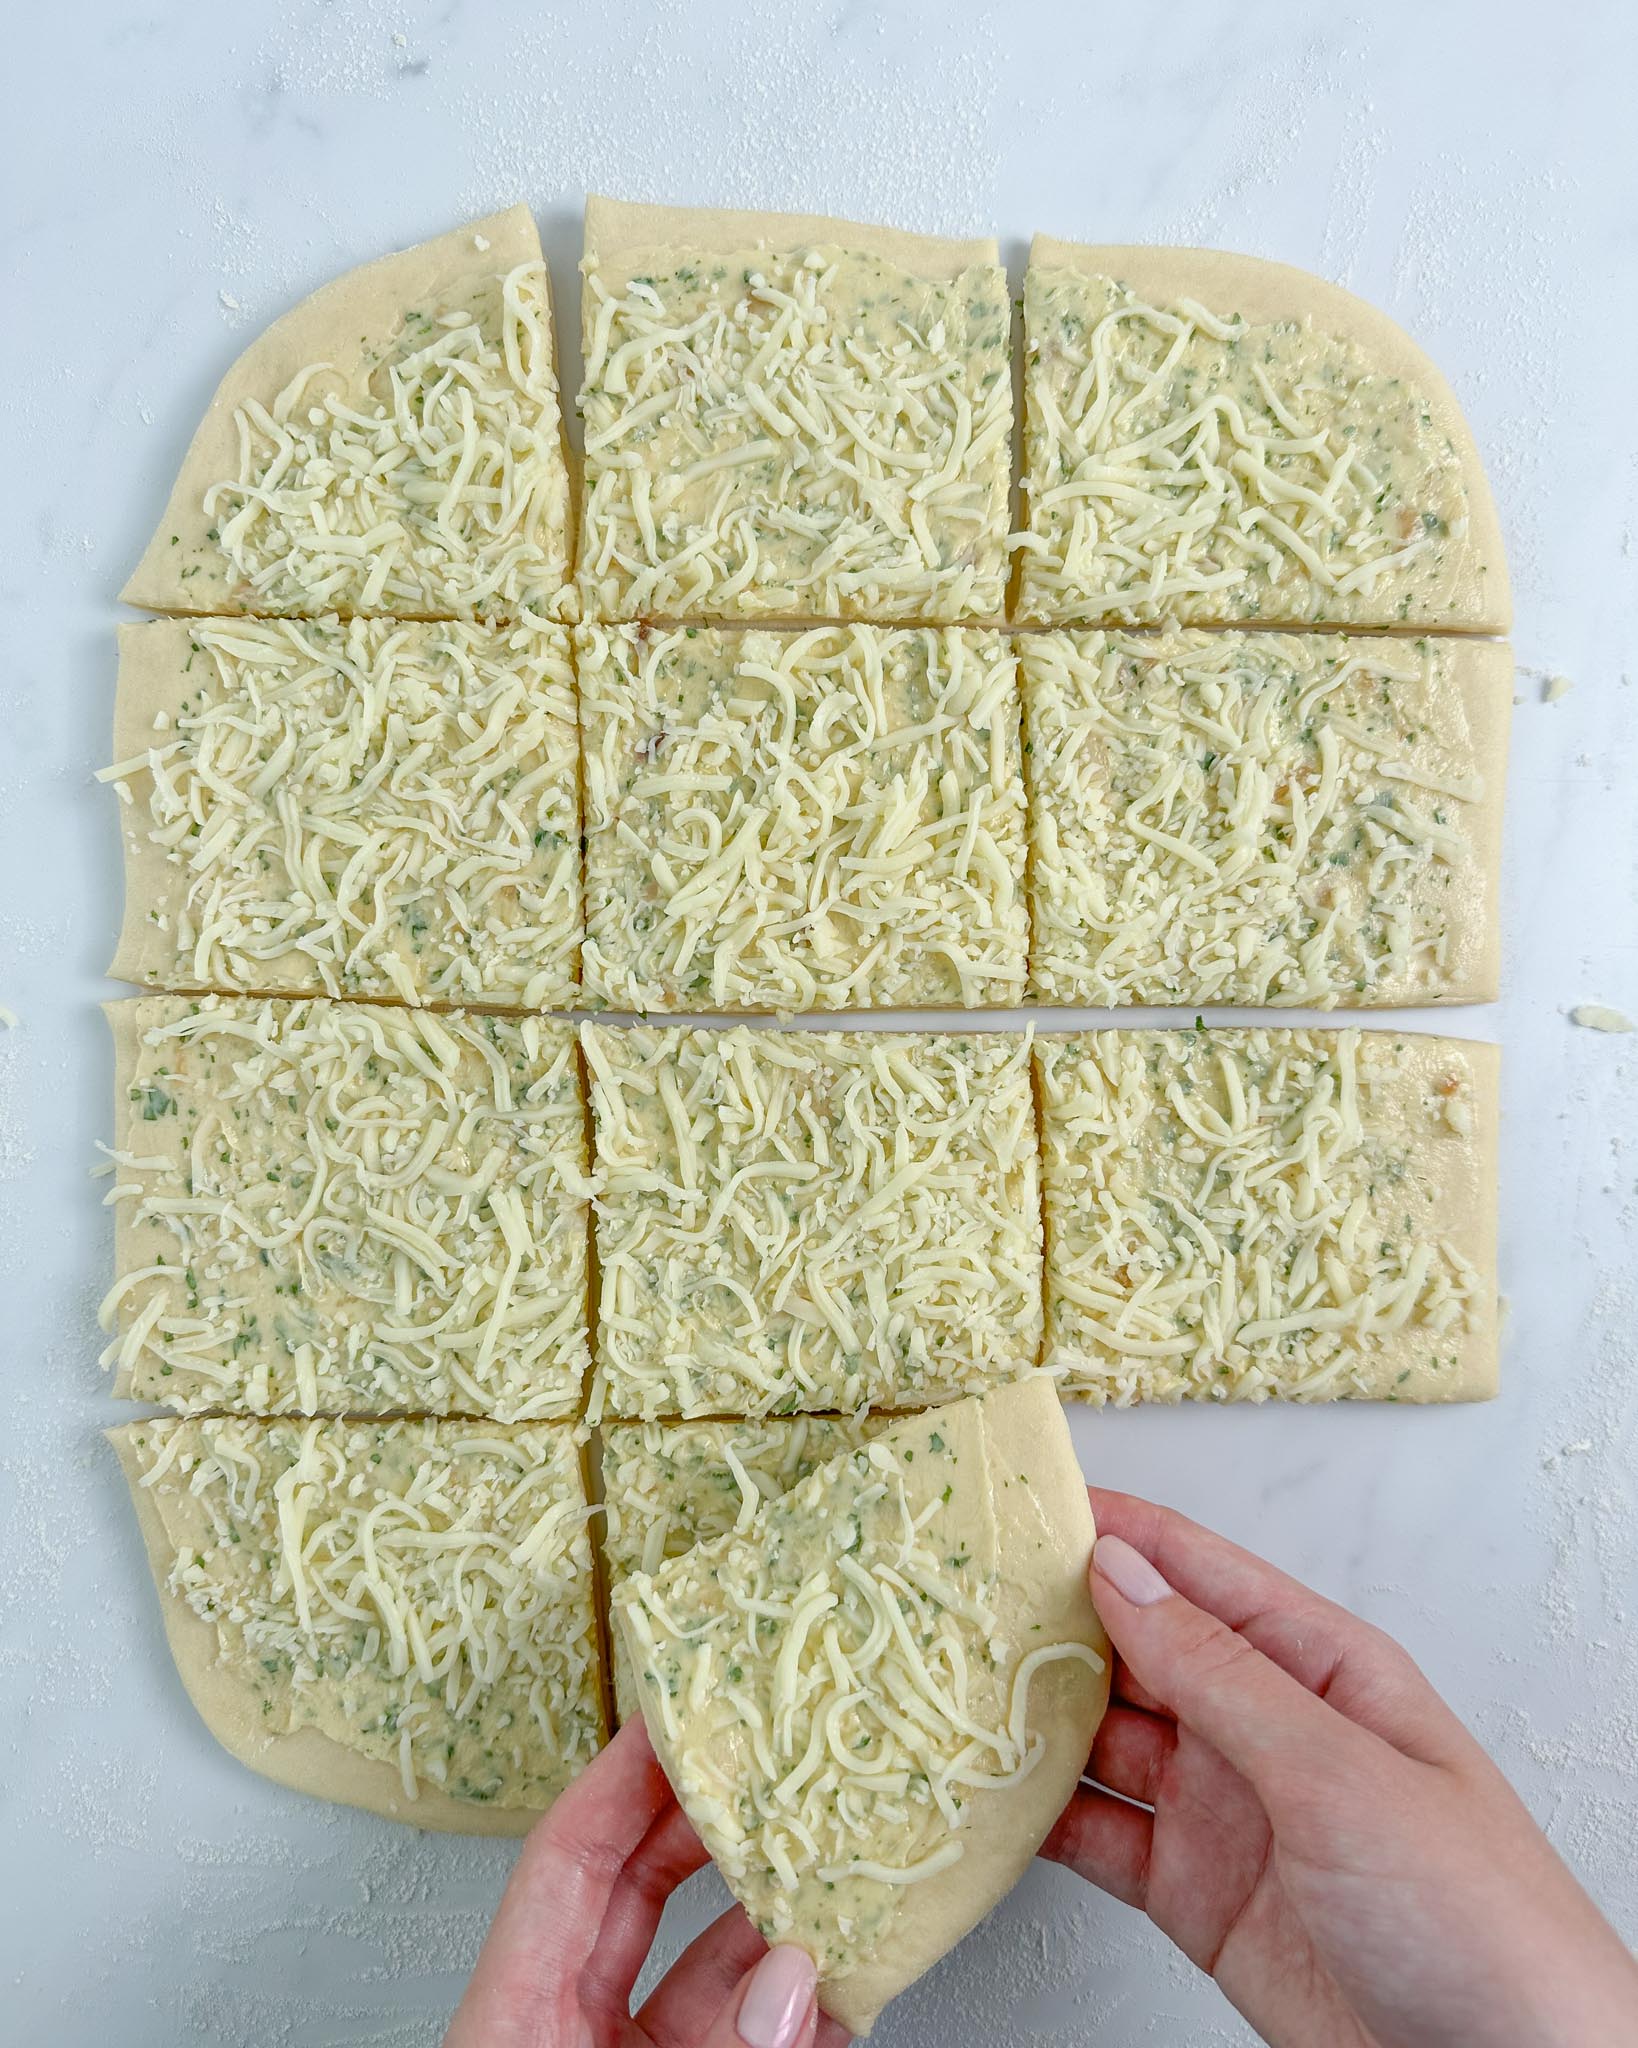
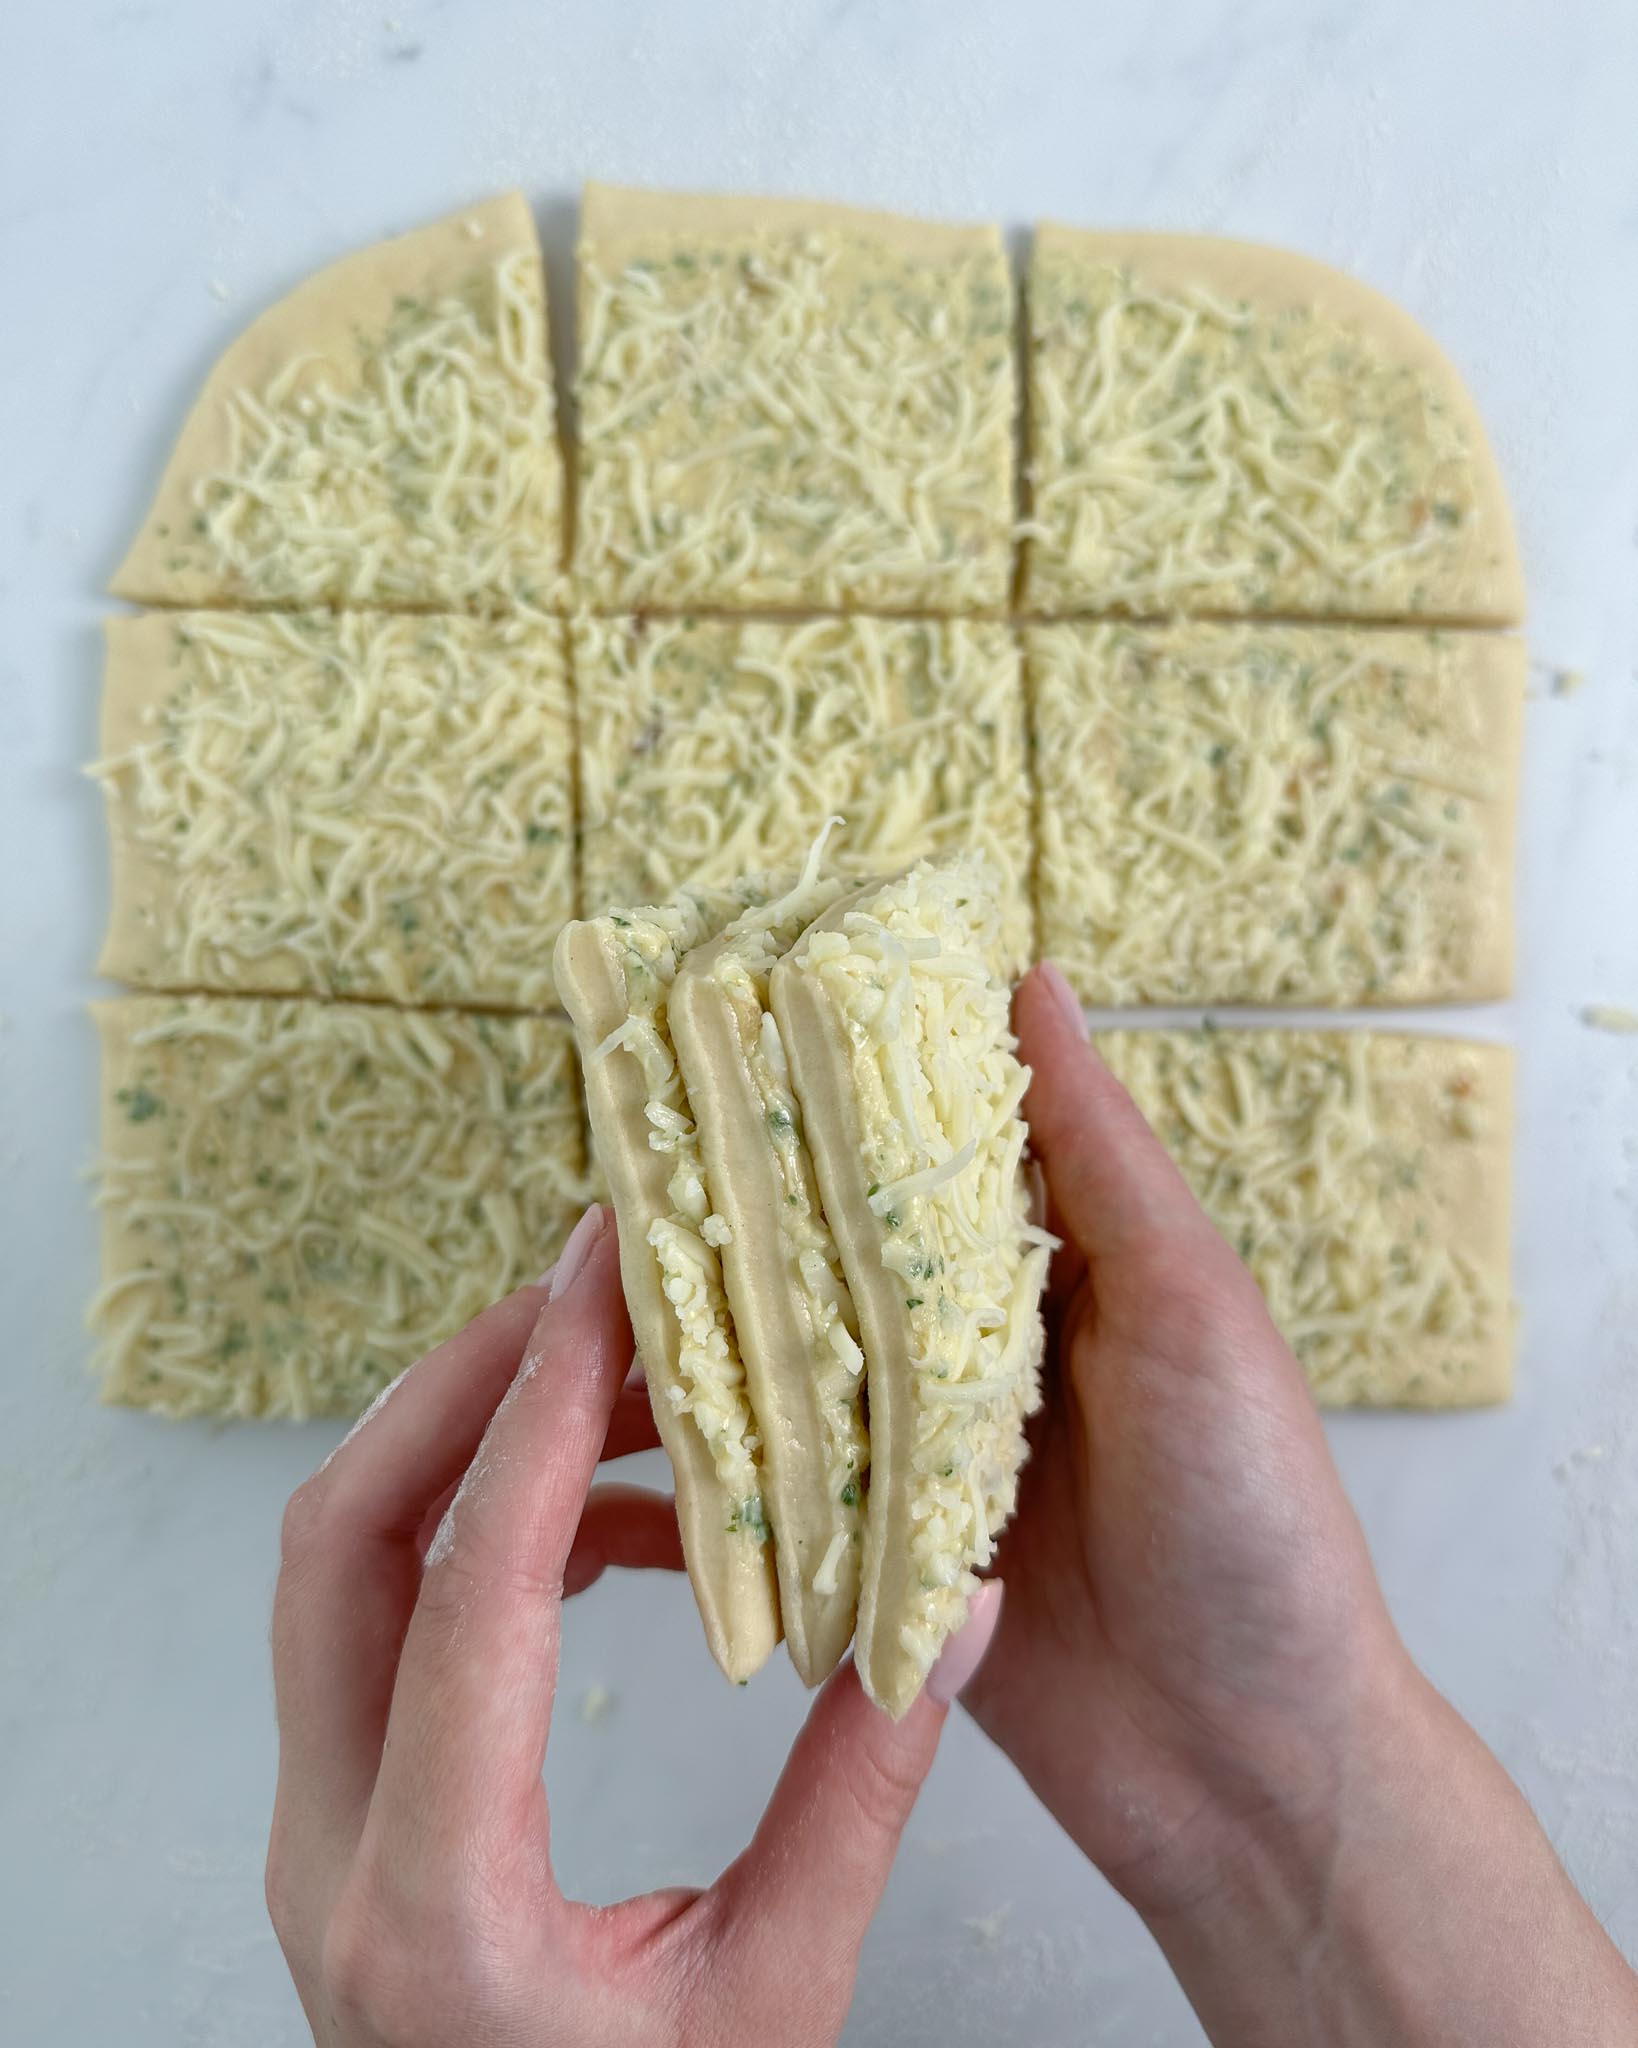
- Use a pizza cutter to cut the dough into 12 even pieces.
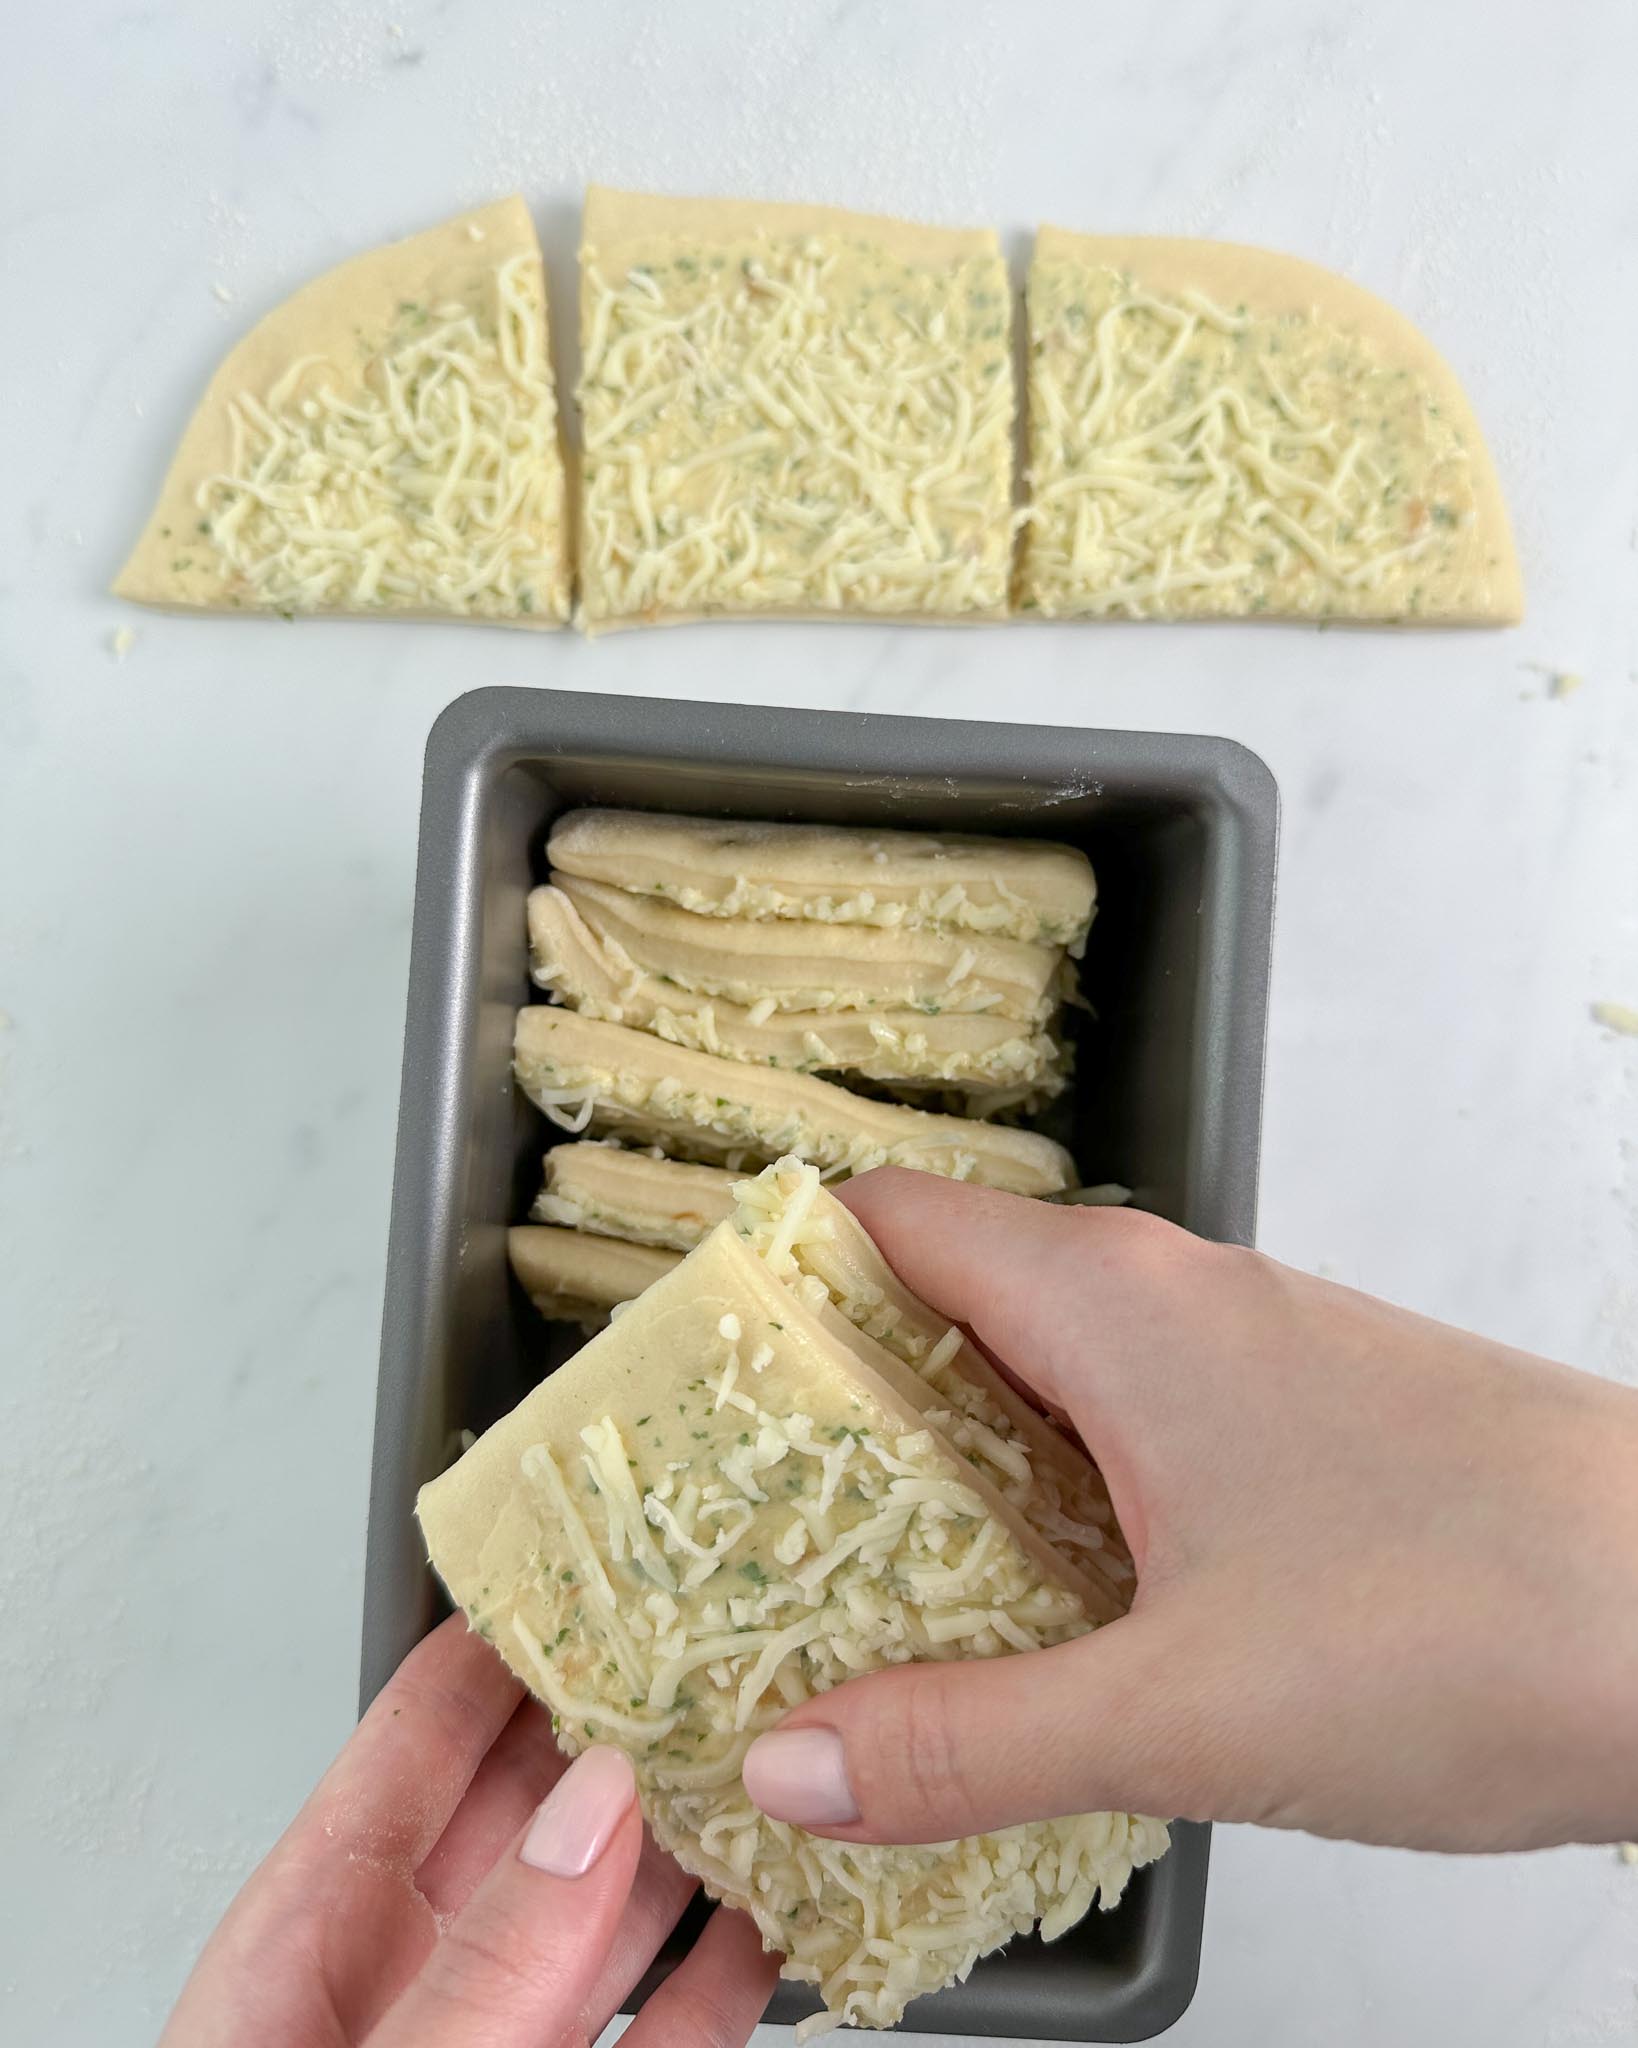
- Lastly, stack the dough pieces and arrange them in a 7×3.4-inch bread pan (or a loaf tin of similar size).
Shop the Tools


Cheesy Pull-Apart Garlic Bread
Ingredients
Tangzhong
- 20 g bread flour
- 80 g whole milk
Main Dough
- 300 g bread flour
- 15 g granulated sugar
- 6 g sea salt
- 6 g instant dry yeast
- all the tangzhong
- 90 g whole milk room temperature 77°F/25°C
- 40 g cream cheese full fat
- 50 g egg (1 medium egg)
- 20 g unsalted butter softened at room temperature
Roasted Garlic Butter
- 1 head of garlic
- ½ tbsp olive oil
- 1 pinch flaky sea salt
- 1 pinch black pepper
- 70 g unsalted butter
- 1 ½ tbsp chopped parsley
- 1 pinch flaky sea salt
Toppings
- 100 g grated mozzarella or other meltable cheese
- + a little extra mozzarella
Egg Wash
- 1 egg
- 1 tbsp water
Instructions
Tangzhong
- Mix flour and milk in a small pot. Heat up over medium heat. Stir until the mixture thickens and reaches a temperature of 150°F/65°C.20 g bread flour, 80 g whole milk
- Transfer to a clean bowl. Cover with plastic wrap that touches the entire surface of the tangzhong. Cool to room temperature before continuing with the main dough.
Main Dough
- Add all ingredients, except butter, to the bowl of your stand mixer fitted with a dough hook.300 g bread flour, 15 g granulated sugar, 6 g sea salt, 6 g instant dry yeast, all the tangzhong, 90 g whole milk, 40 g cream cheese, 50 g egg
- Knead for 10 minutes until the dough starts to come together.
- Add the softened butter.20 g unsalted butter
- Continue kneading at medium speed for 10-20 minutes until the dough has a smooth surface and pulls away from the sides of the bowl.
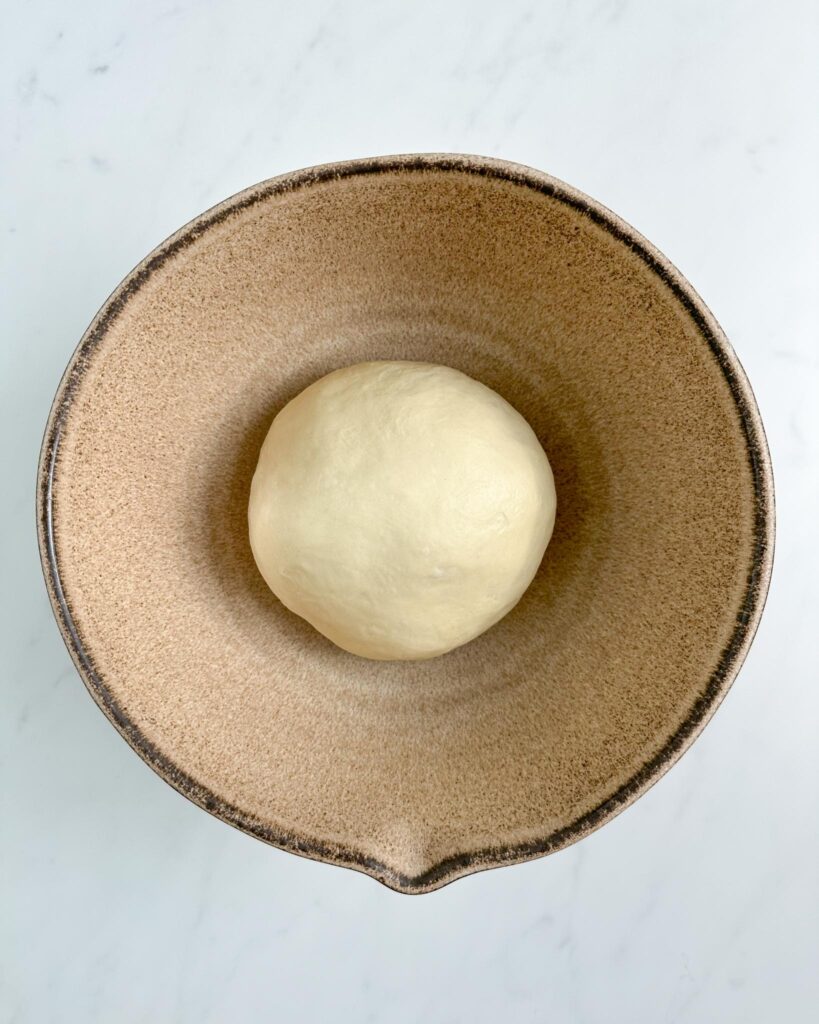
- Place the dough on your work surface and roughly pre-shape the dough into a round using your hands and a bench knife.
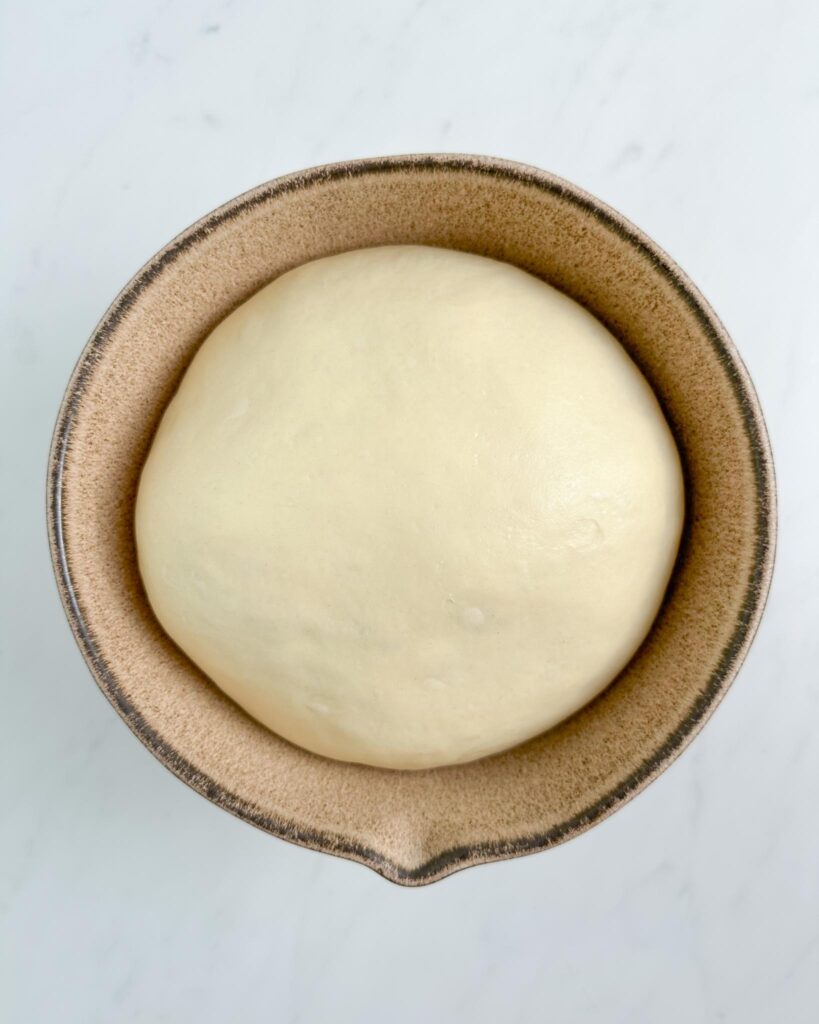
- Transfer the dough to a clean, lightly oiled bowl, cover, and place in a warm spot, ideally at 78°F/26°C.
- Proof the dough for 1 ½-2 hours or until doubled in size.
- Meanwhile, make the garlic butter:
Roasted Garlic Butter
- Preheat the oven to 350°F/180°C.
- Chop off the top of a garlic head, leaving the cloves exposed.1 head of garlic
- Drizzle with oil, flaky salt, and pepper.½ tbsp olive oil, 1 pinch flaky sea salt, 1 pinch black pepper
- Wrap the garlic head in aluminum foil or place it in a small, oven-safe casserole with a lid.
- Bake for 45-60 minutes, until the garlic cloves are soft as butter.
- Allow the garlic to cool to room temperature before continuing with the next step.
- Squeeze the garlic cloves into a bowl and add softened butter, chopped parsley, and a sprinkle of salt. Mix with a fork until smooth.70 g unsalted butter, 1 ½ tbsp chopped parsley, 1 pinch flaky sea salt
- Set aside at room temperature.
Shape
- Once the dough has doubled in size: lightly flour your work surface and the top of the dough. Next, roll out the dough to a 12×12-inch square.
- Spread garlic butter on top and add grated mozzarella.100 g grated mozzarella
- Use a pizza cutter to cut the dough into 12 pieces. Please see the images above for reference.
- Arrange the dough pieces in a 7×3.4-inch bread pan (or a loaf tin of similar size).
- Cover the bread pan and proof for 30-45 minutes until the dough is nice and puffy.
Bake
- Preheat the oven to 350°F/180°C.
- Whisk together an egg and water to make the egg wash.1 egg, 1 tbsp water
- Lightly brush the top of the bread with egg wash.
- Sprinkle a little extra mozzarella on top of the bread.+ a little extra mozzarella
- Bake for 35-40 minutes or until the internal temperature is at 200°F/95°C.
- Serve warm!


Very soft and yummy!
Can I use this to make garlic knots or just rolls or loaf of bread?
Hi! Sure, you can 🙂
Hi Elise! I want to make this bread tomorrow for some friends. Can I use your sourdough Japanese bread recipe and do the garlic filling? I couldn’t find a sourdough version of this 🙂
Made this and used it as a pizza dough, had to use a wee bit more flour but it came out perfectly! Delicious!
I really needed this and thank you .
Wow. It’s crazy good. The garlic flavor is very mellow, since the garlic is roasted first. It’s fluffy on the inside, cheesy, it gets a little crusty on the outside and the mozzarella caramelizes a little. Do yourself a favor and make this bread.
So simple and yet so amazing. I love your recipes. Thanks so much
Hi Elise. I saw this from Youtuber who tried viral recipes. It looks really good. Was wondering if I could keep this in the refrigerator after second proofing. I got really late in preparing all and want to bake this for breakfast now